Originally I planned to make a display case identical to the one that Miles Dyson admires in the vault Terminator 2. It looked as though it had been made from metal and glass, but I was unable to machine a large enough piece of metal to match it for the base, so I decided to go with wood and plexiglass.

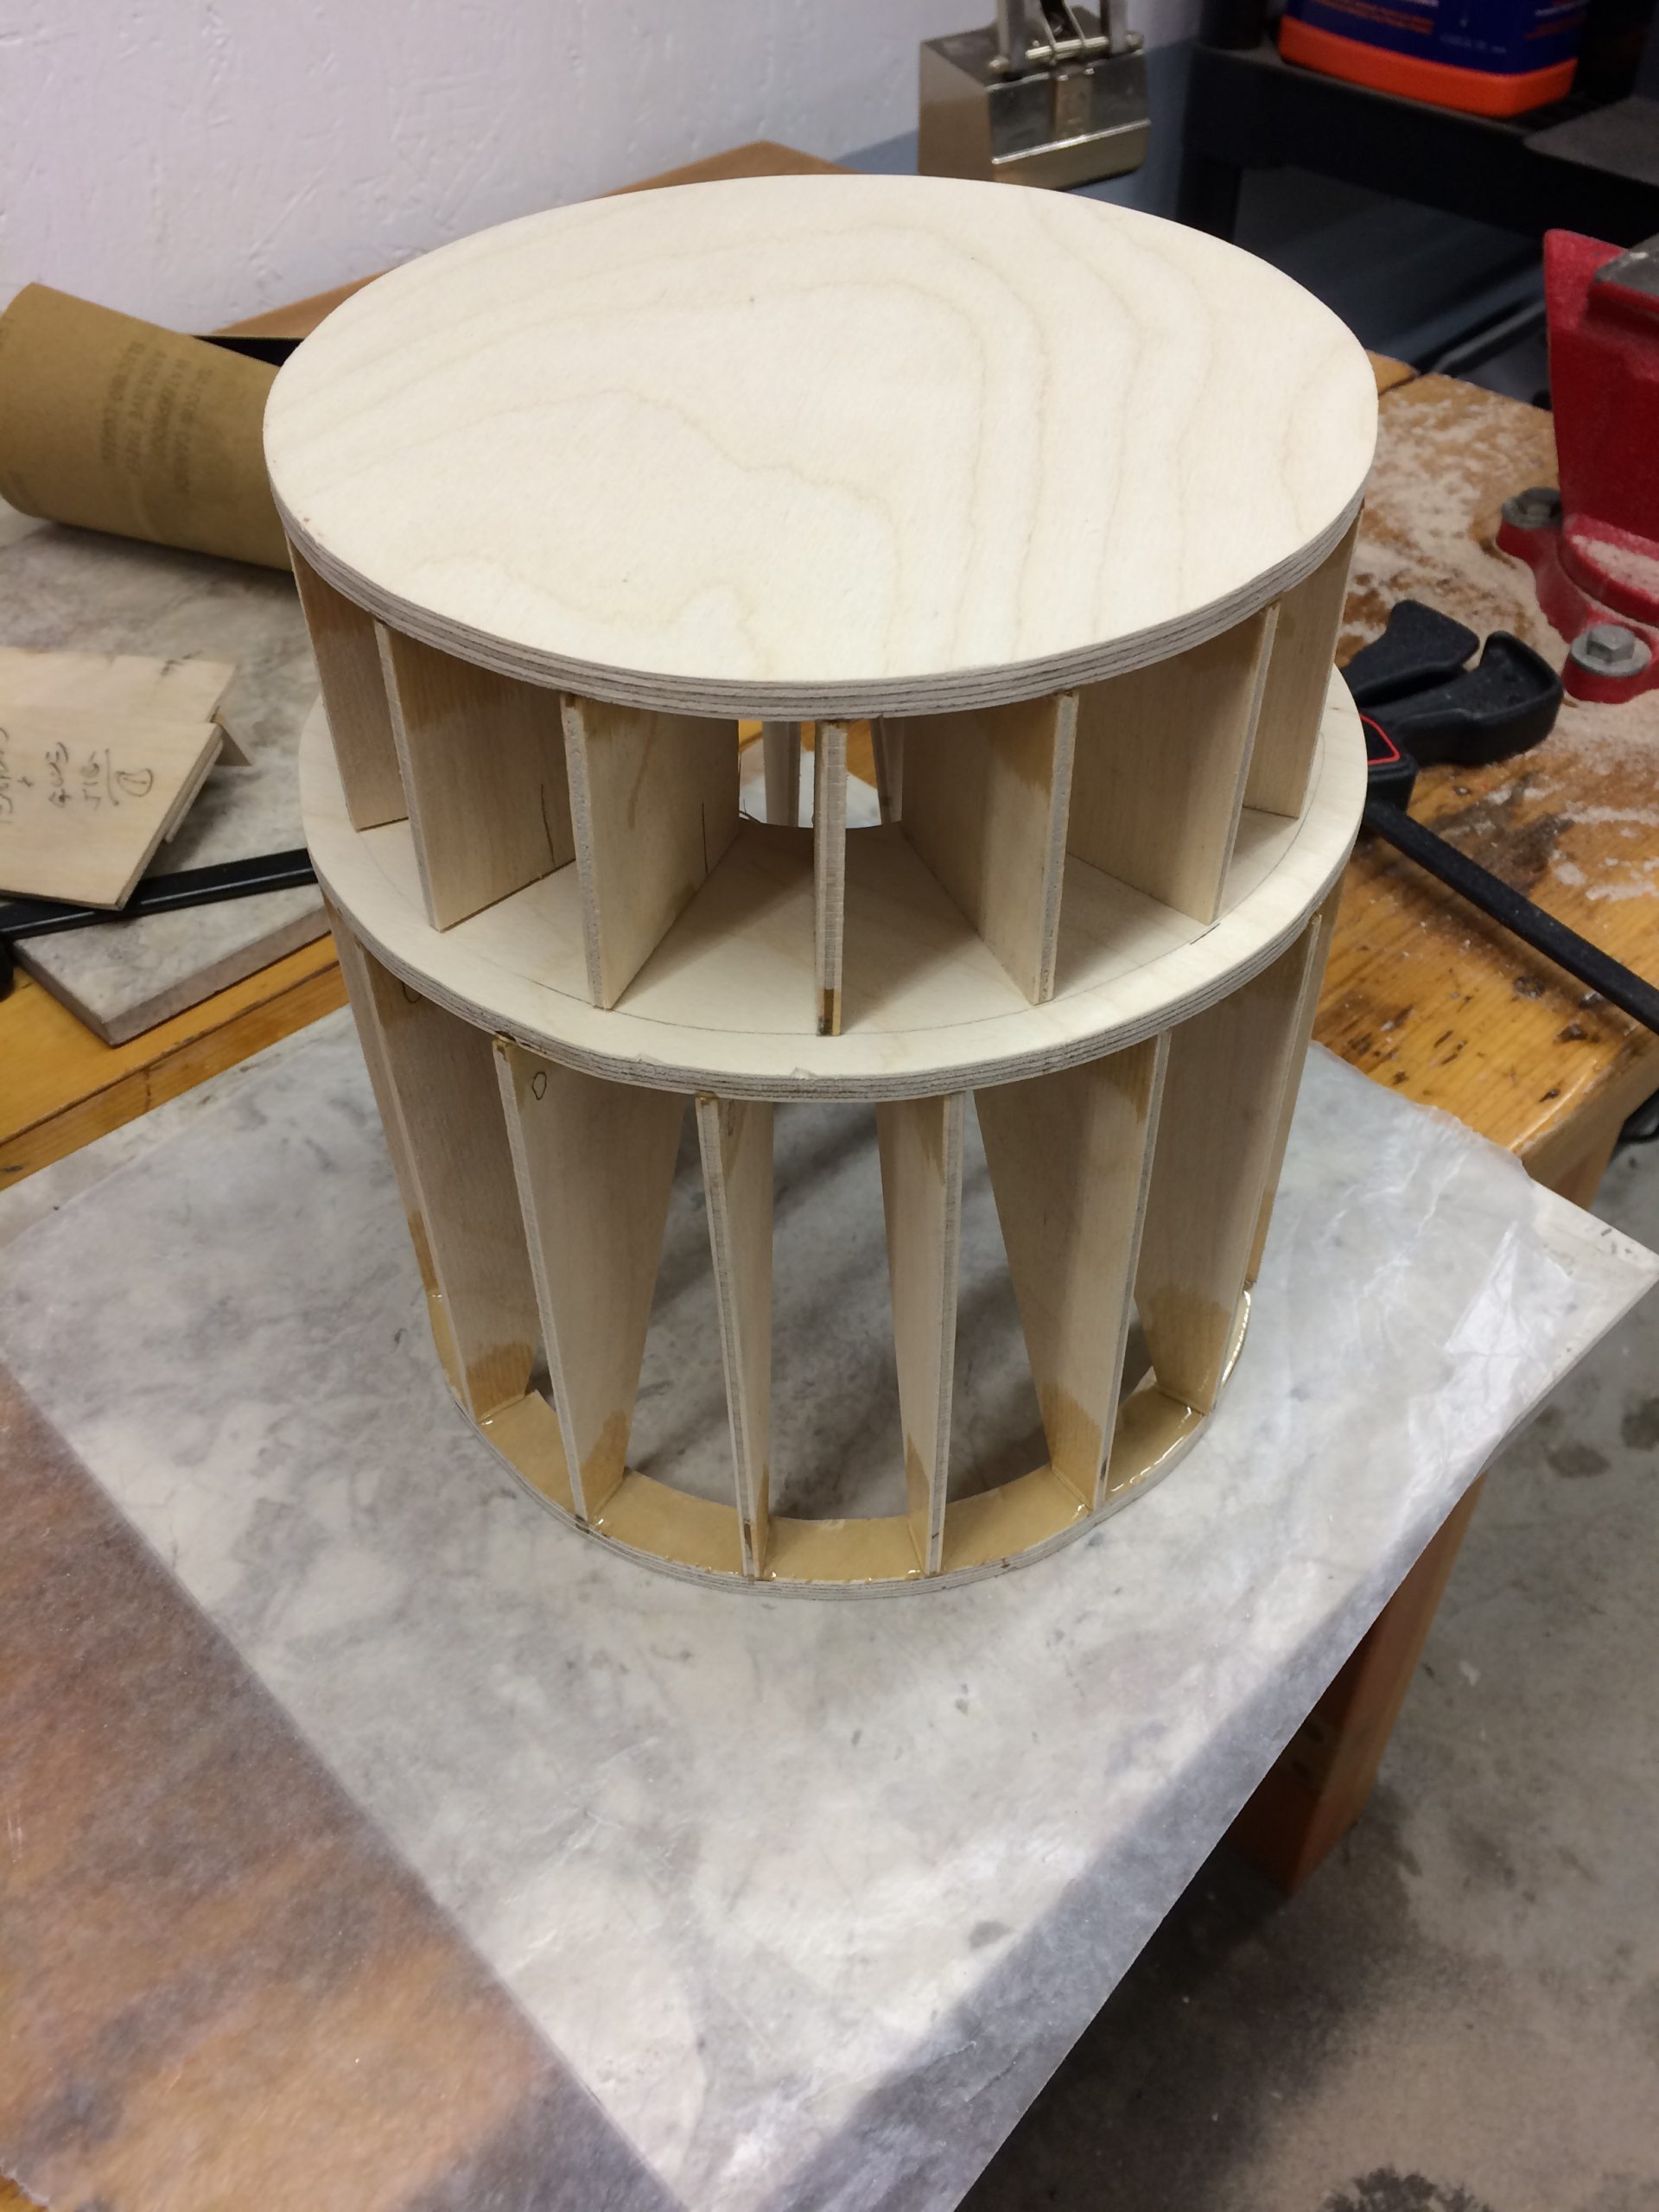
Some 1/8″ and 1/4′ plywood would serve as the foundations for the base and lid. Plywood ribs added some structural stability to the cylinder-like top and bottom.
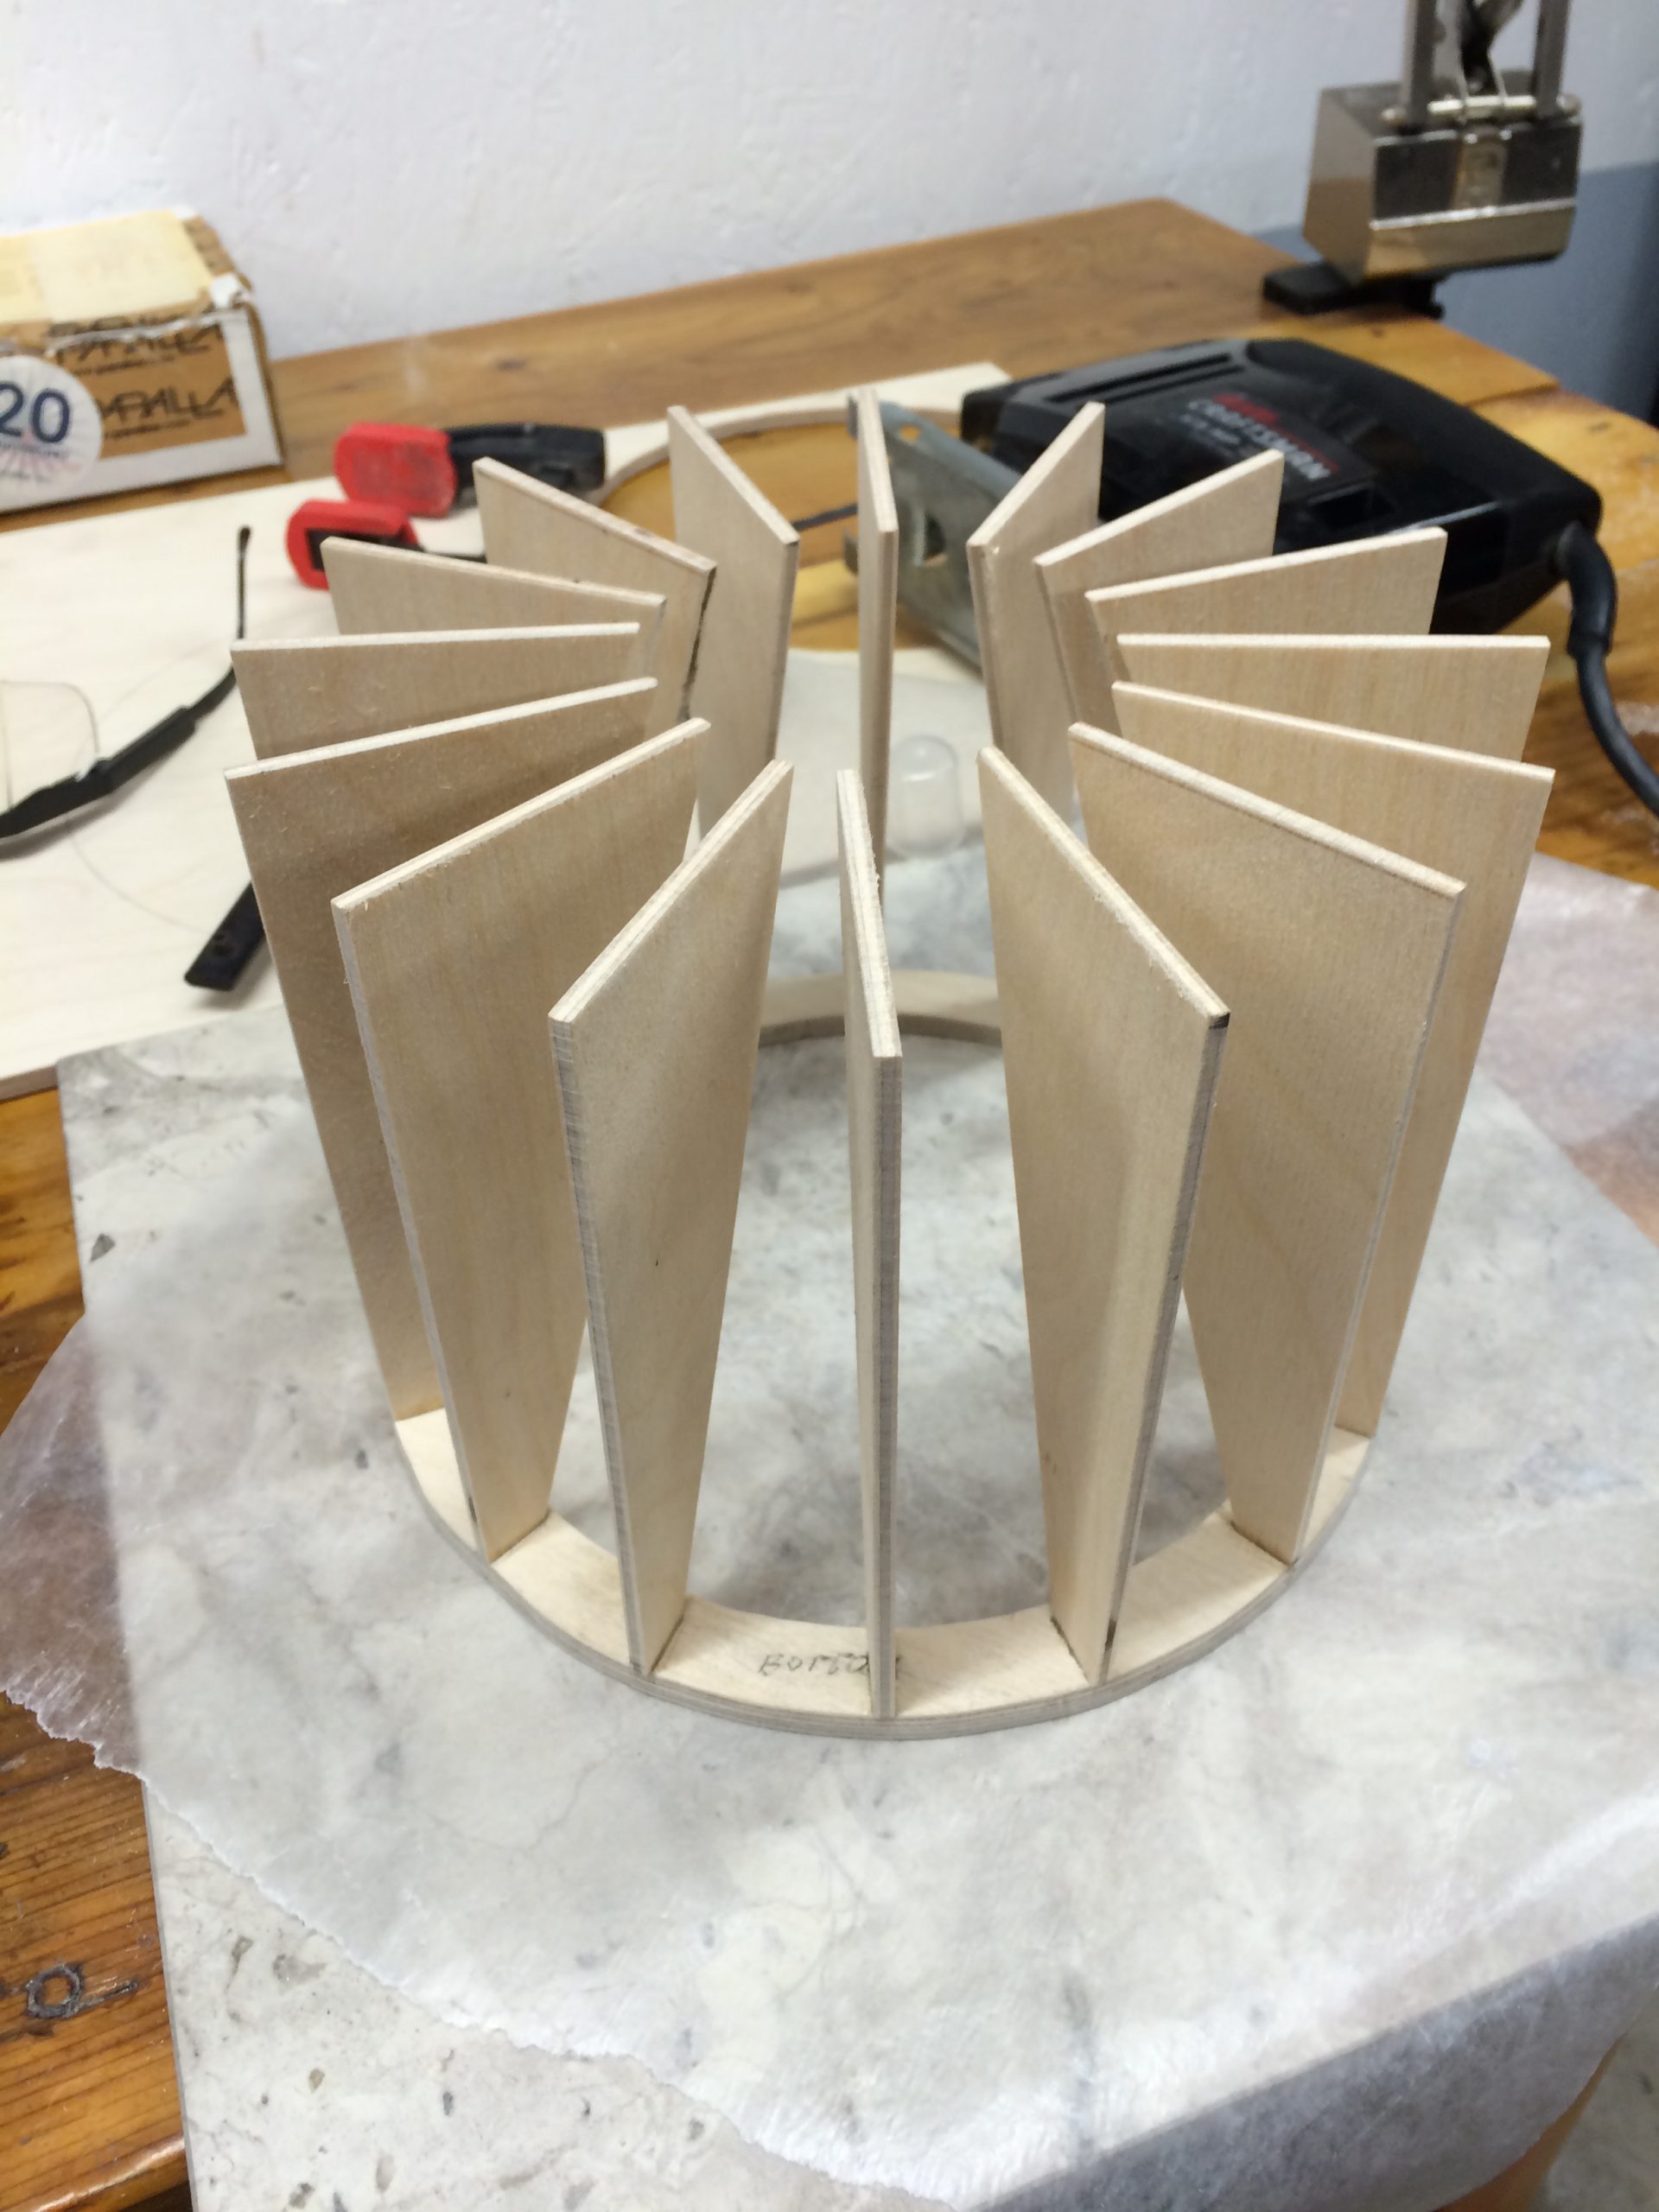
Epoxy was used to glue all the wooded ribs and rings into the rough shape.

Once the top and bottom cores had dried, I wrapped both pieces with 1/64″ plywood bent to the cylindrical shape. Again, epoxy was used to hold this skin onto the ribs.
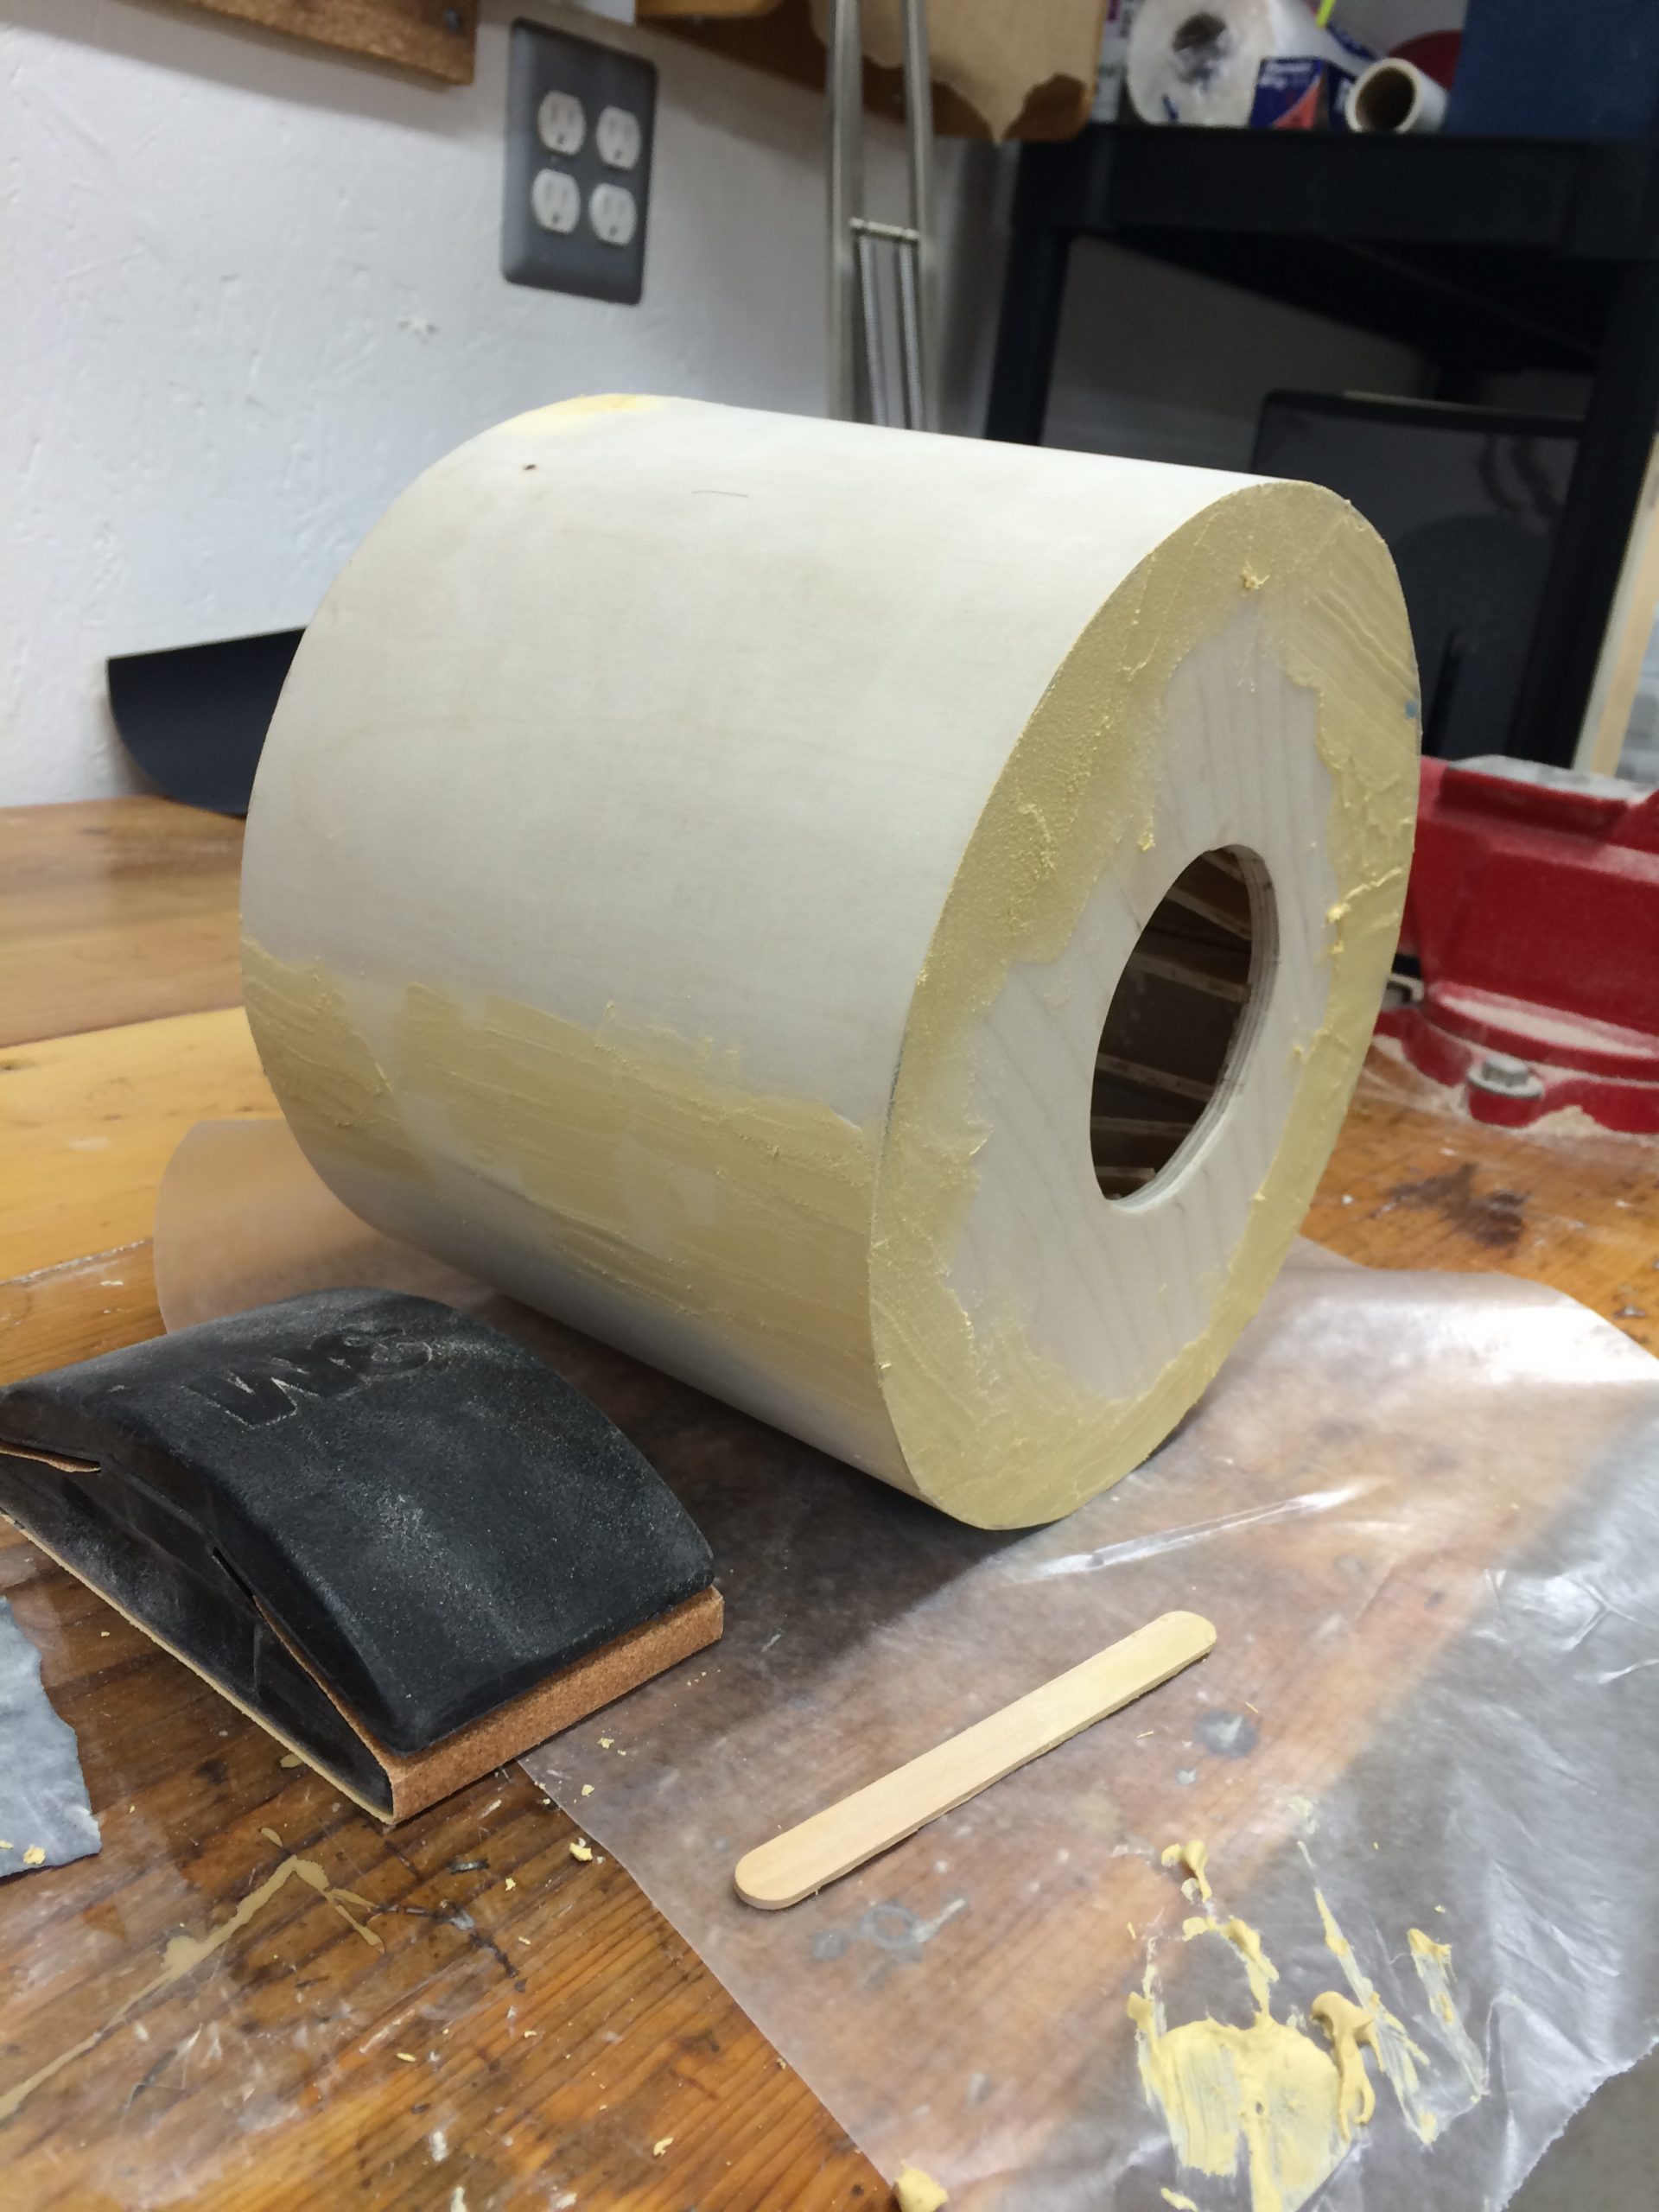
After some sanding, I used wood filler to fill in any large gaps and seams.
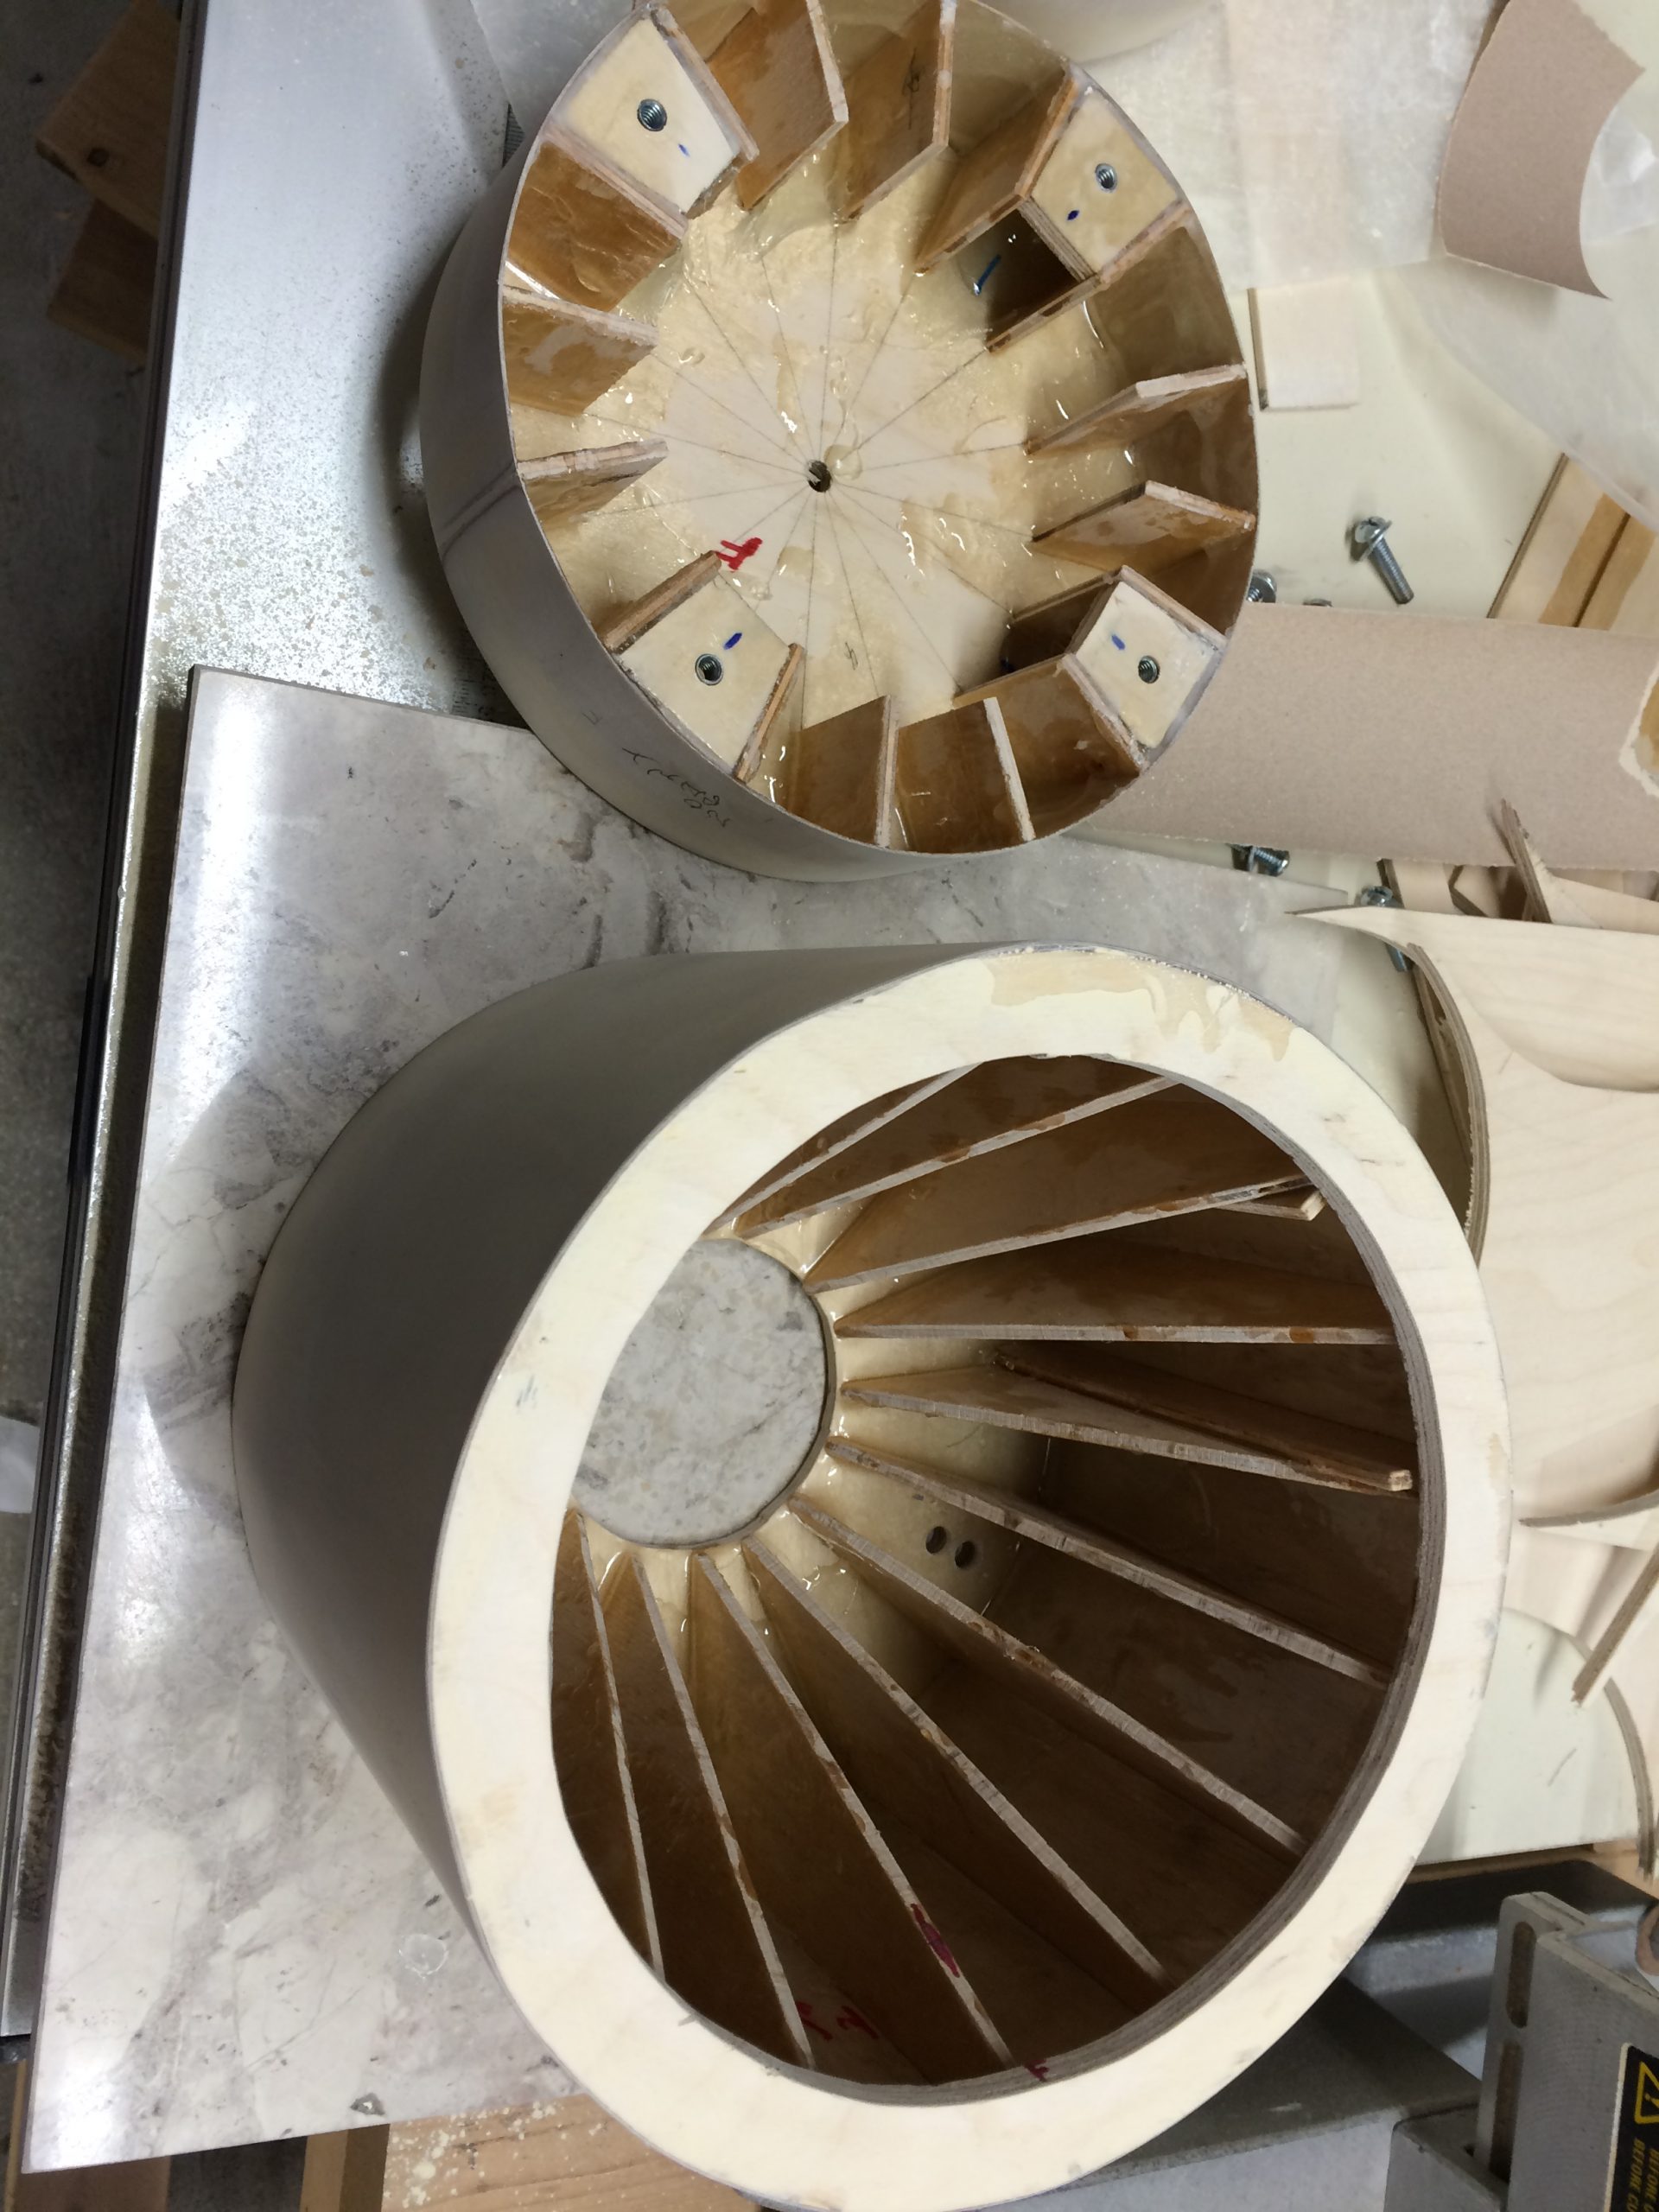
Hardware of blind nuts was epoxied into place and then reinforced with plywood. Then the entire interior was reinforced with fiberglass cloth and epoxy for strength. This gave the once-flimsy 1/64″ outer plywood skin a metal-like solidity.
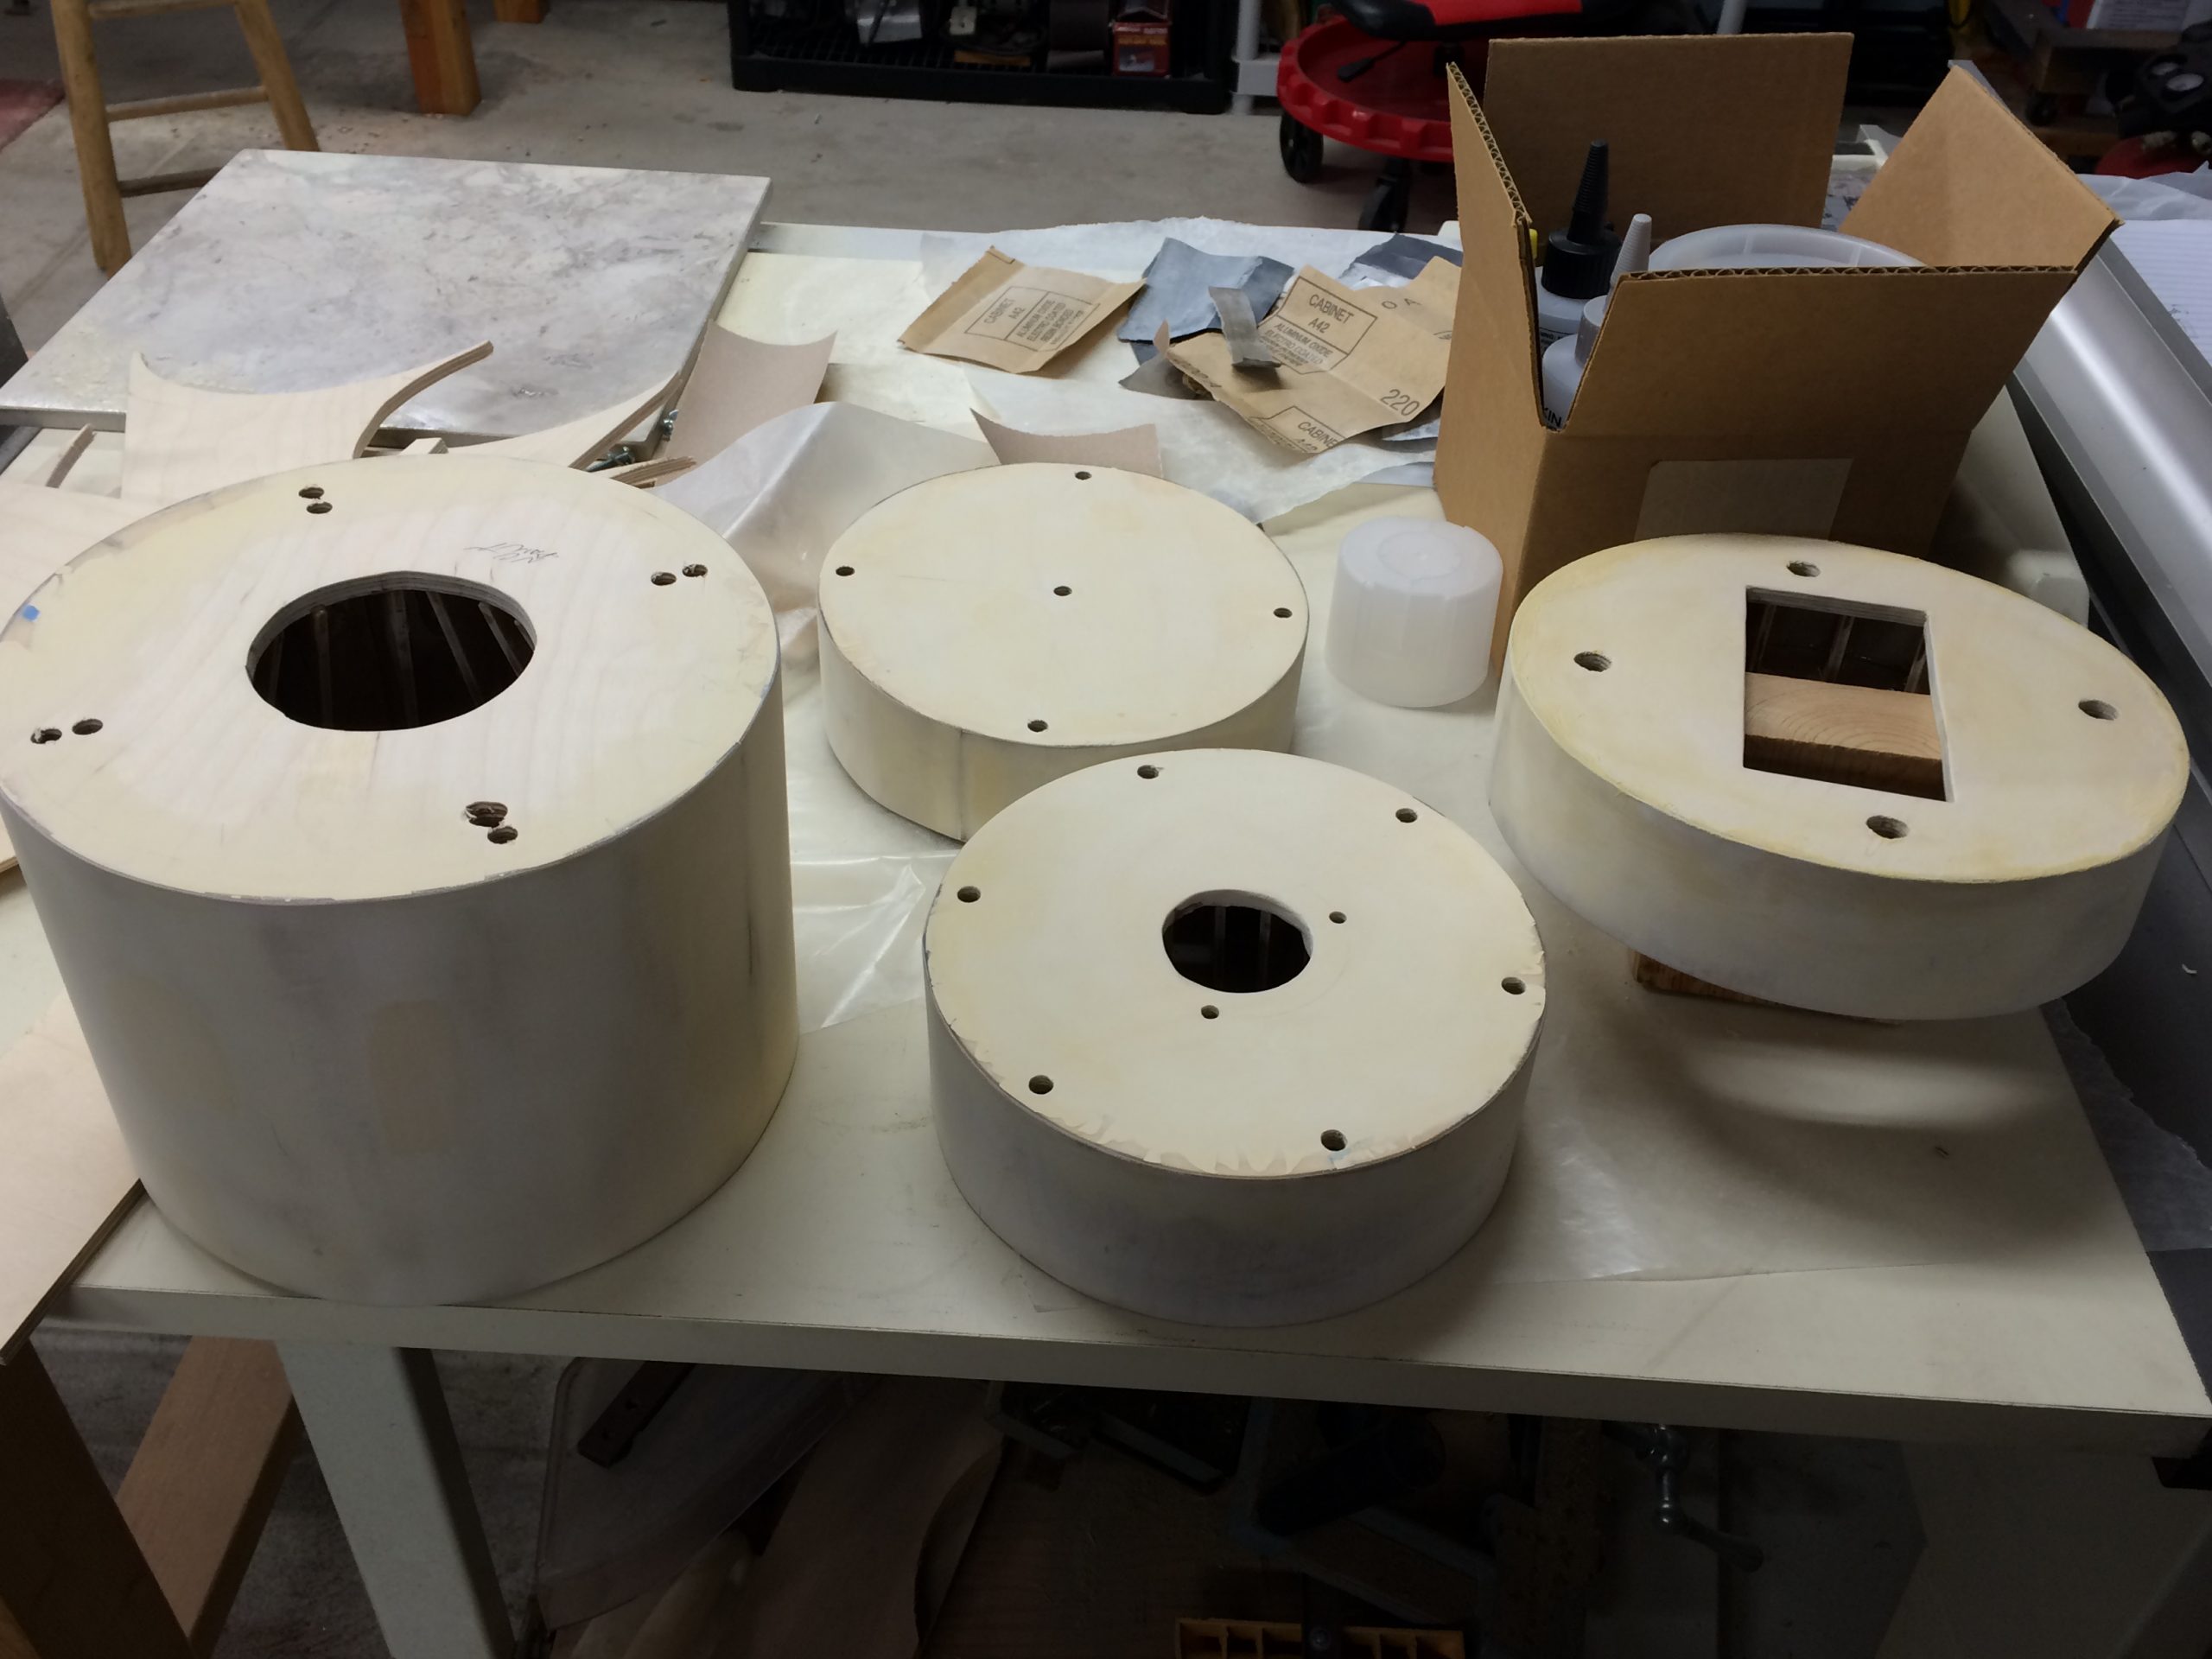
There were actually four wooden pieces to the case: From left to right the base, the shoulder for the top, the shoulder for the bottom with holes for the arm cabling and the top. The smaller holes in the shoulders are for 10 small LED spotlights that would iluminate the arm from within the case.

I decided to engrave a nameplate for the arm using my mill and some engraving bits. Once again, my MillDroid software provided the layout and CNC control.
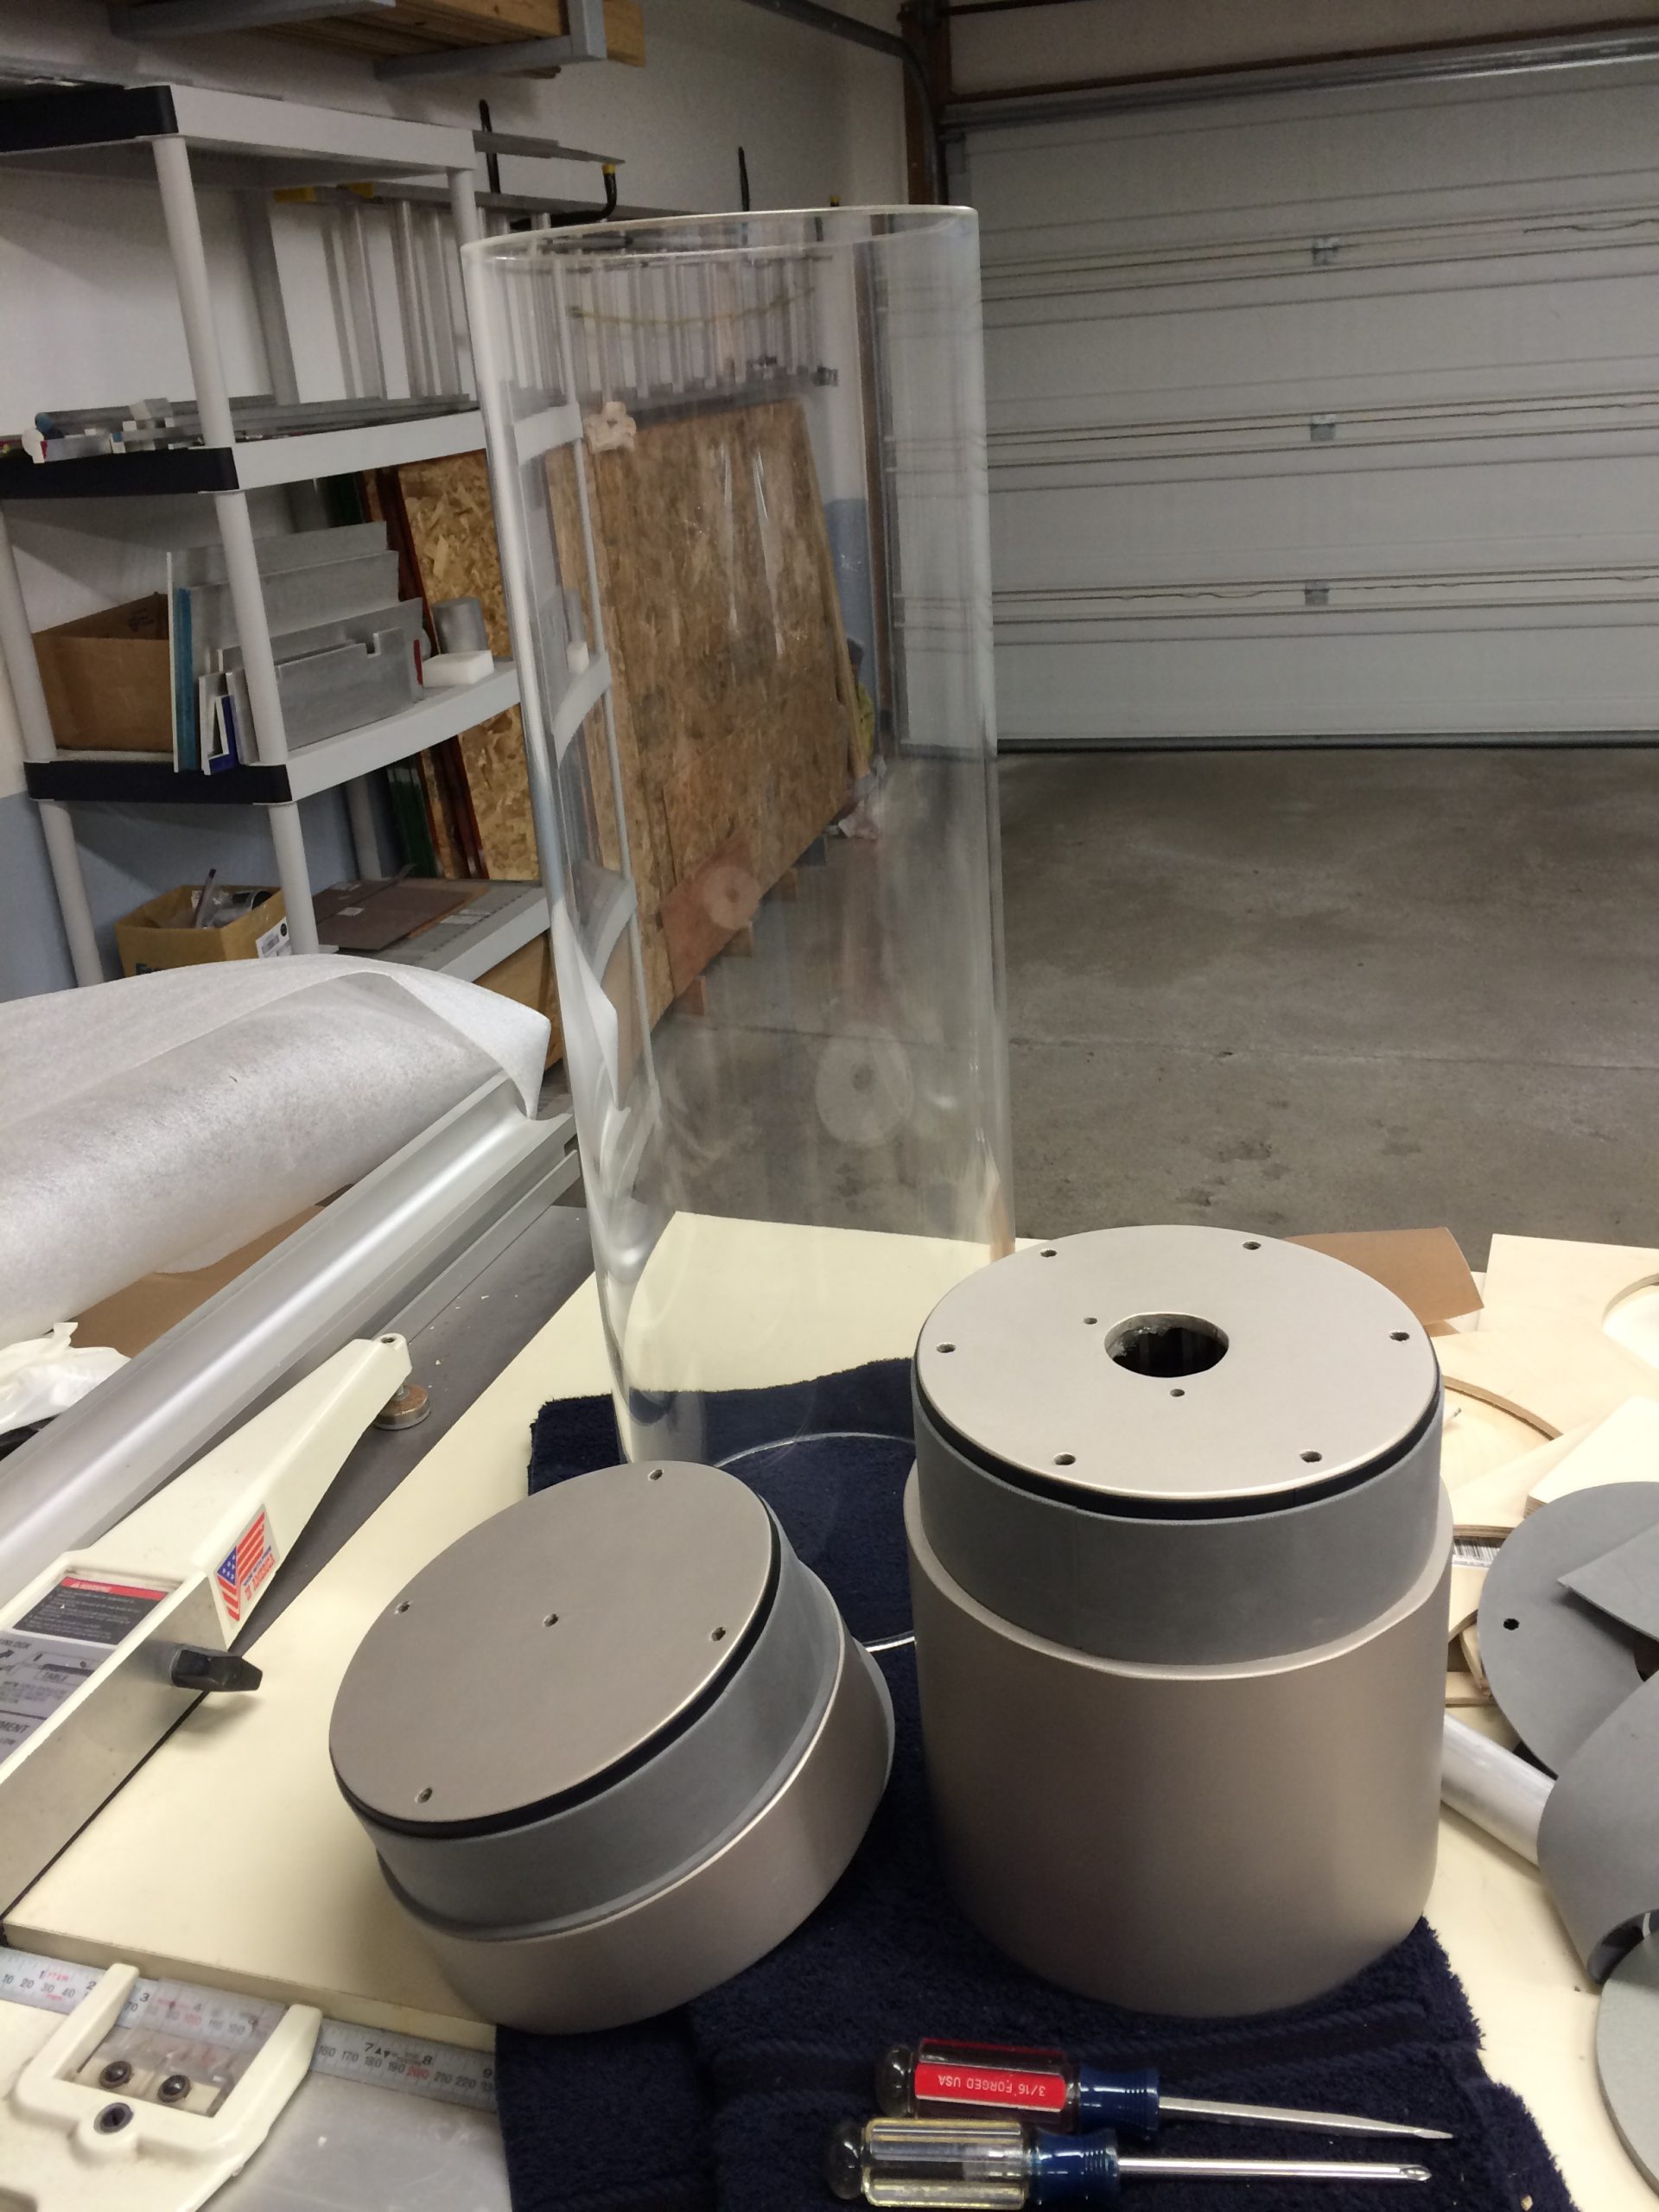
I purchased a 10-inch diameter, 36″ length of 1/4″ plexiglass tubing. After a few practice cuts I fire-glazed the edges to get a clean edge. This is when I goofed–I overheated the edge, and caused one end of the tube to shrink by about a 1/4″ in the overall diameter. It affects the outer three inches of the tube, ruining the piece and forcing me to purchase a second tube and start over. I was much more cautious and the second tube came out perfect. It was a $60 mistake that bought me how quickly the heat of a torch can melt expensive plastics.
The two shoulder pieces are now painted and mounted to the top and bottom of the case. The finished wood pieces were finished with several coats of thinned wood filler, sanding sealer, then shellac with lots of fine sanding between each. A couple coats of enamel primer and three coats of nickel satin paint then three coats of satin clear coat. The shoulders where then wrapped with a 1/16″ inch layer of gray hard foam. This brought the shoulder diameter up to just slightly larger than the inner diameter of the plexiglass tube for a snug slip fit.

The case awaiting interior detailing and wiring. On the right you can see the $60 mistake I made on the first tube attempt. Ugh. Hope to find a use for is someday.
I didn’t take any pictures of the interior wiring. It consisted of a couple of 1/8″ power jacks (one for the top and once for the bottom) and some small LED “Projectors” that I machined from styrene and metal to emulate the look of the arm’s mechanics. I alternated blue and white LEDs to get a nice lighting arrangement on the metal of the arm.