Assembly was hardly a start-to-finish process. I would test fit a group of pieces, say of a single finger, then pull it all apart and make adjustments. Something this was a bit of filing to make an axle a bit smoother. Sometimes it would involve polishing a piece a bit more or removing some burrs that were missing during finishing or tumbling. On average I would guess that everything was assembled at least 3-5 times each before dismantling it all before final assembly. I then literally ‘dunked’ all the pieces into an aluminum protective coating to prevent oxidation. Stainless steel parts were similarly protected by oiling or teflon lubricants. After a couple days hanging and drying final assembly could begin.
I used my Panavise to hold the palm plate and began attaching the skeletally completed fingers to the metacarpals. A bit of finessing for a good fit was necessary for each joint along with proper lubrication and remembering to add all the teflon washers I has made to reduce friction. If I had not been so concerned with matching the original arm construction, I would have probably made a change regarding the joints of all the moving parts. As they were originally made, the tightness of the cap screws of each joint determines how tight the joint actually is for movement–this is fundamentally a bad design and why I had to make certain I didn’t over-tighten the joints and bend the metal pieces and cause too much friction. A better design would have been to make some bronze or brass bearing sleeves for the interior of each joint that would prevent over tightening. As it was, I relied on red loc-tite for hold all the cap screws in their permanent positions and thus remained true to matching the original look.

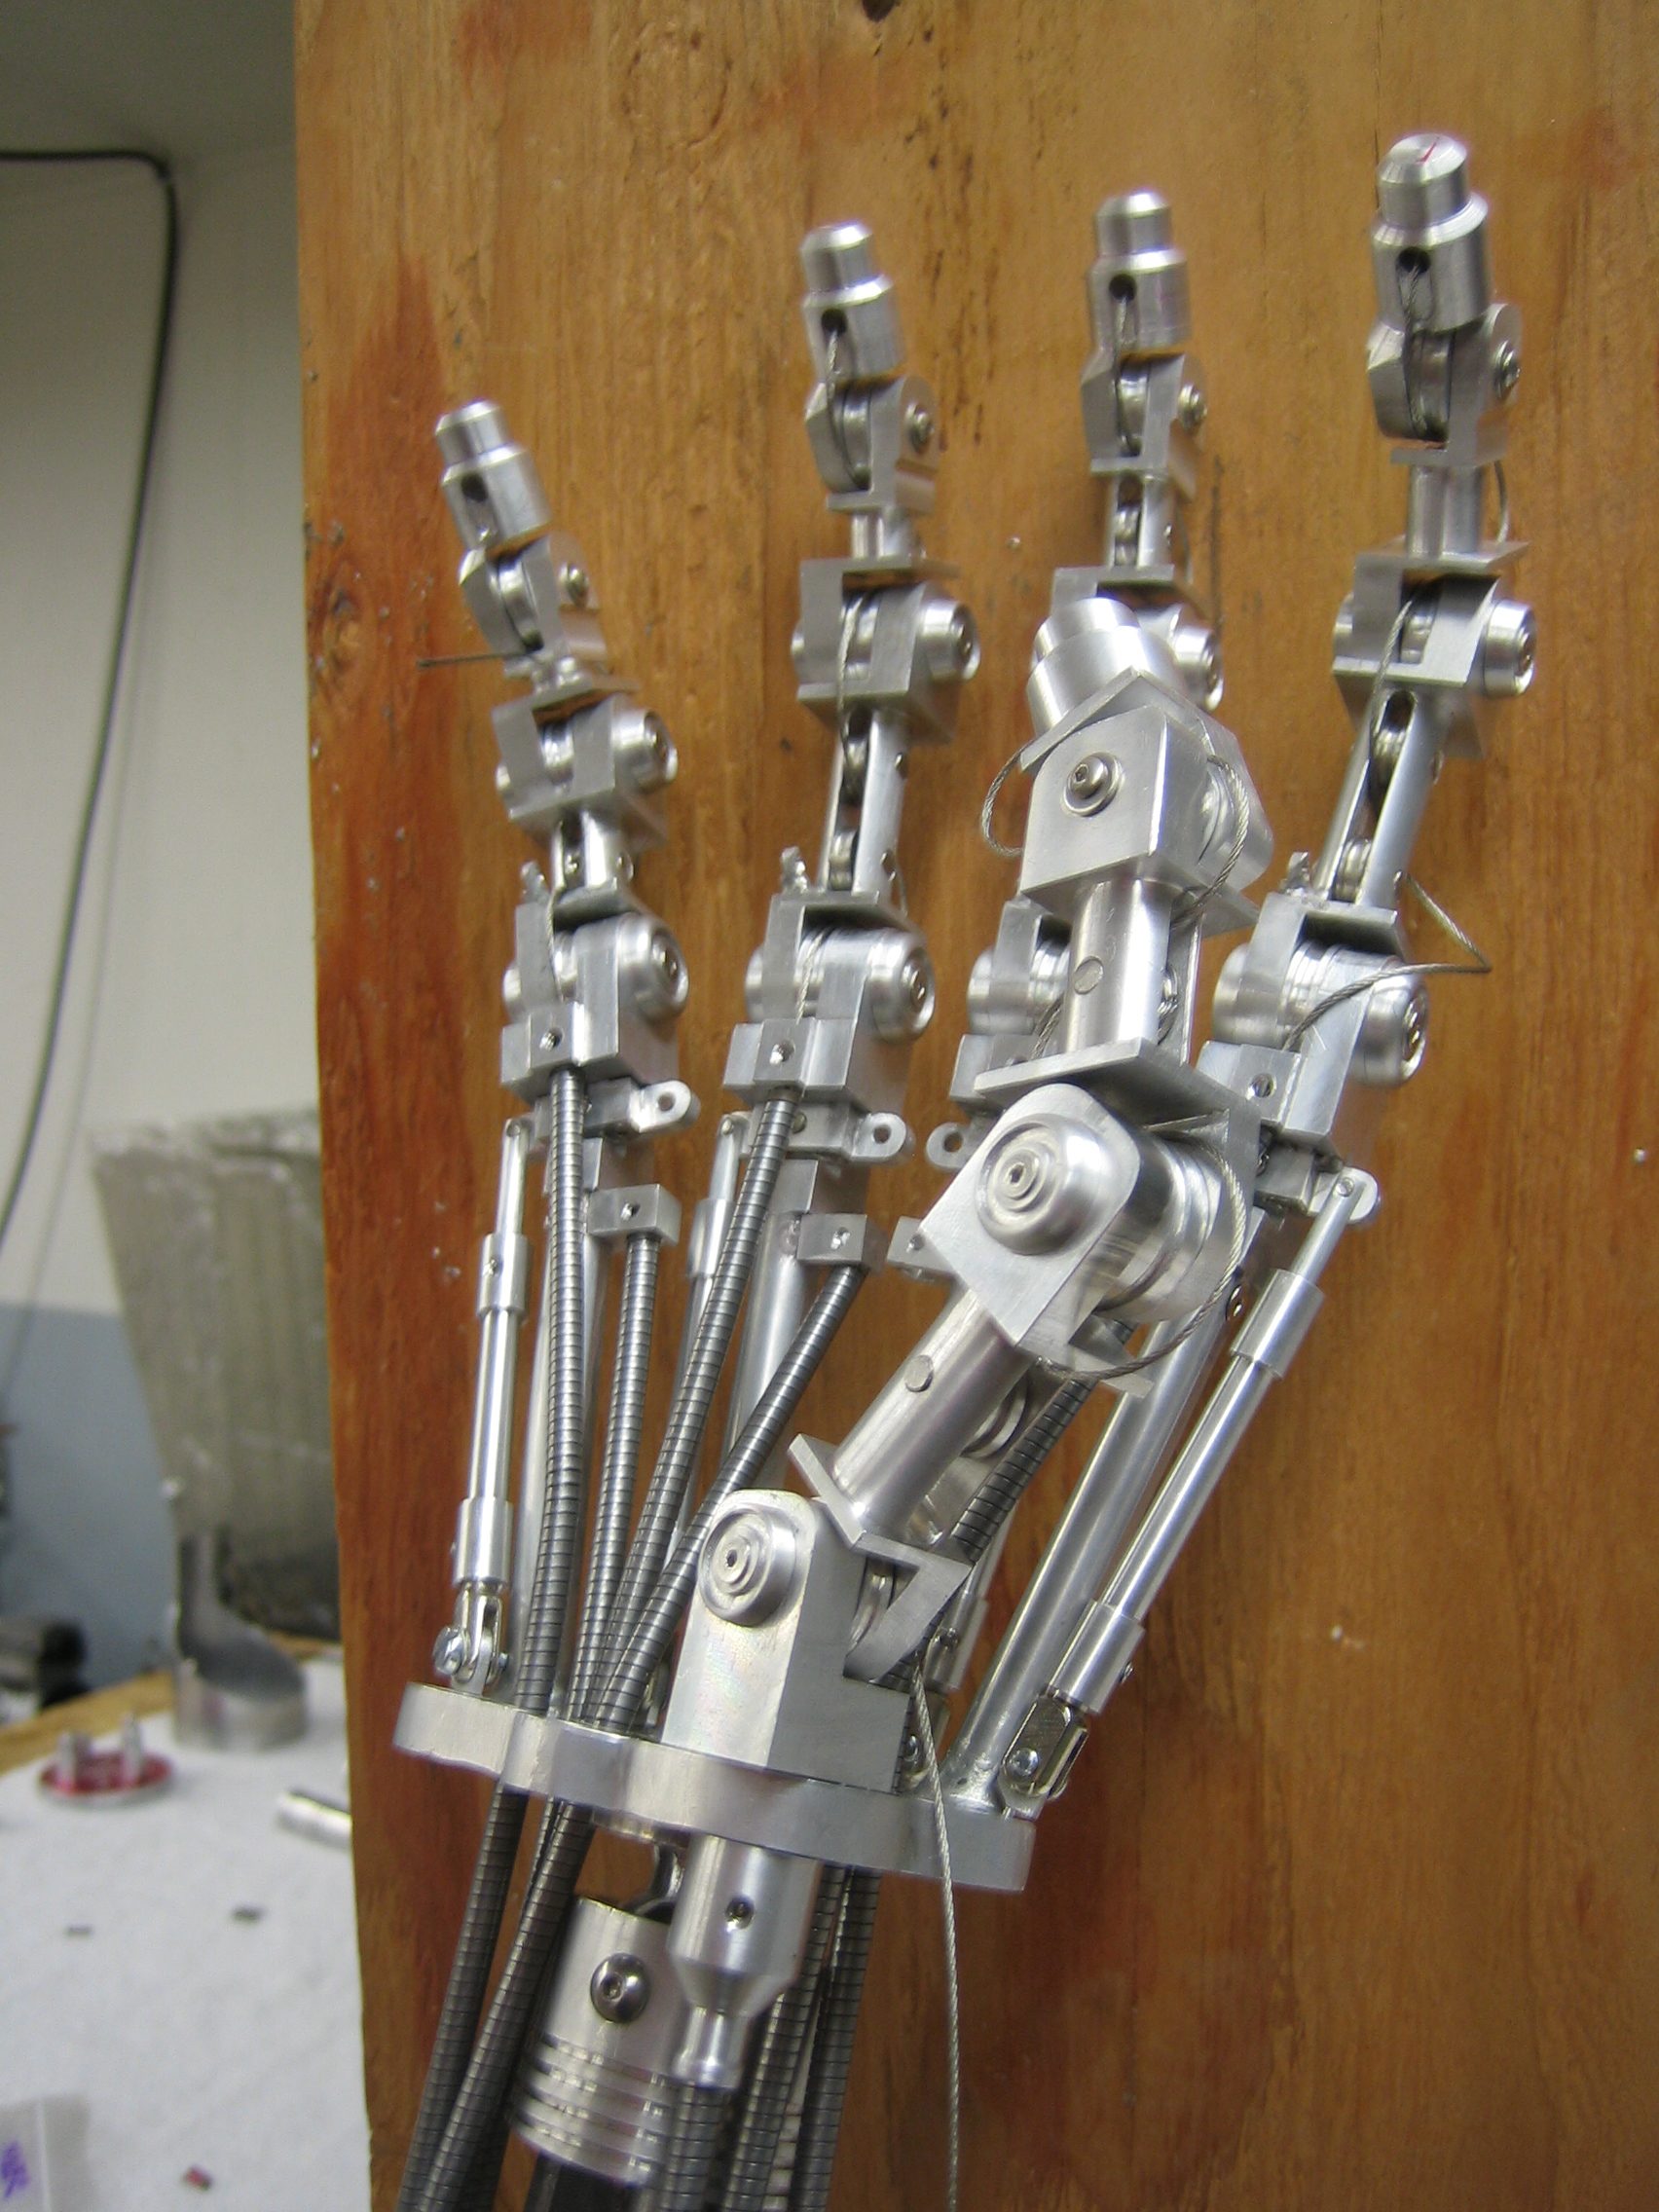
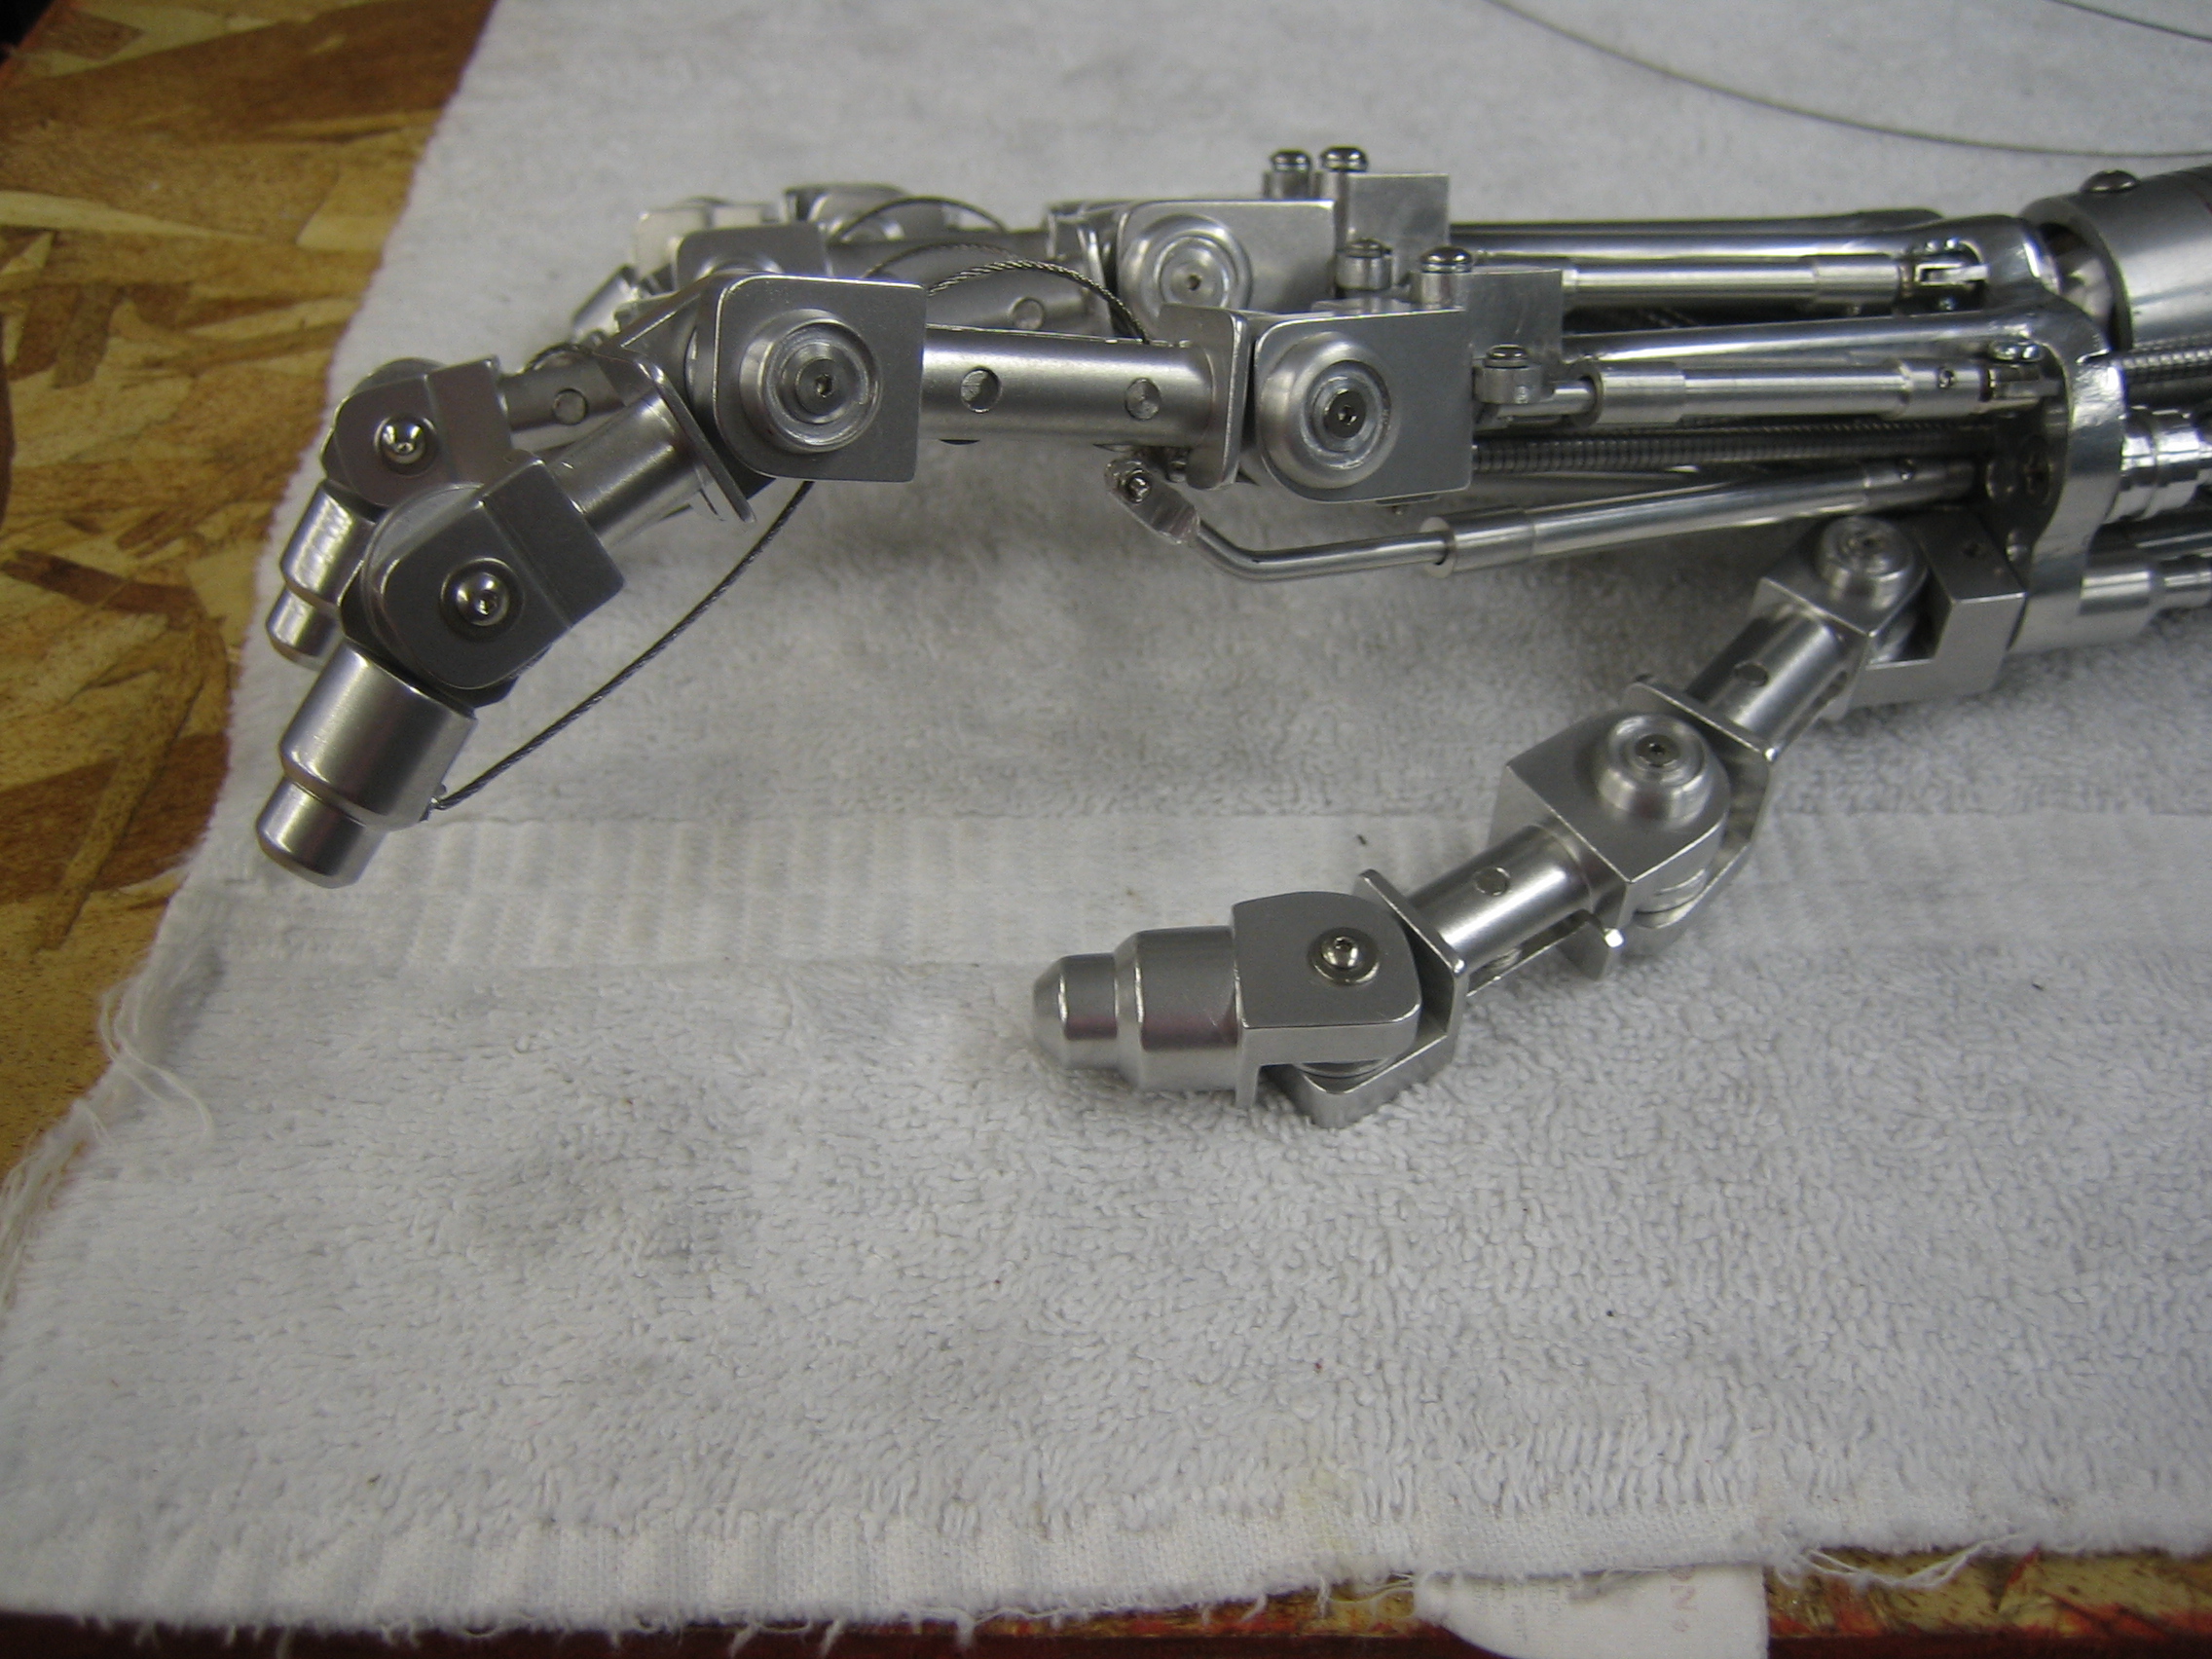
More fingers being mounted, the thumb and all the interior pulleys awaiting cabling. The thumb pivots around the base of the wrist plate, consisting of a cable (for tightening the thumb joints) and a rotating sleeve around the cable (for rotation of the thumb). The orinal props thumb has some design limitations over a real thumb, but accuracy was everything for this project.
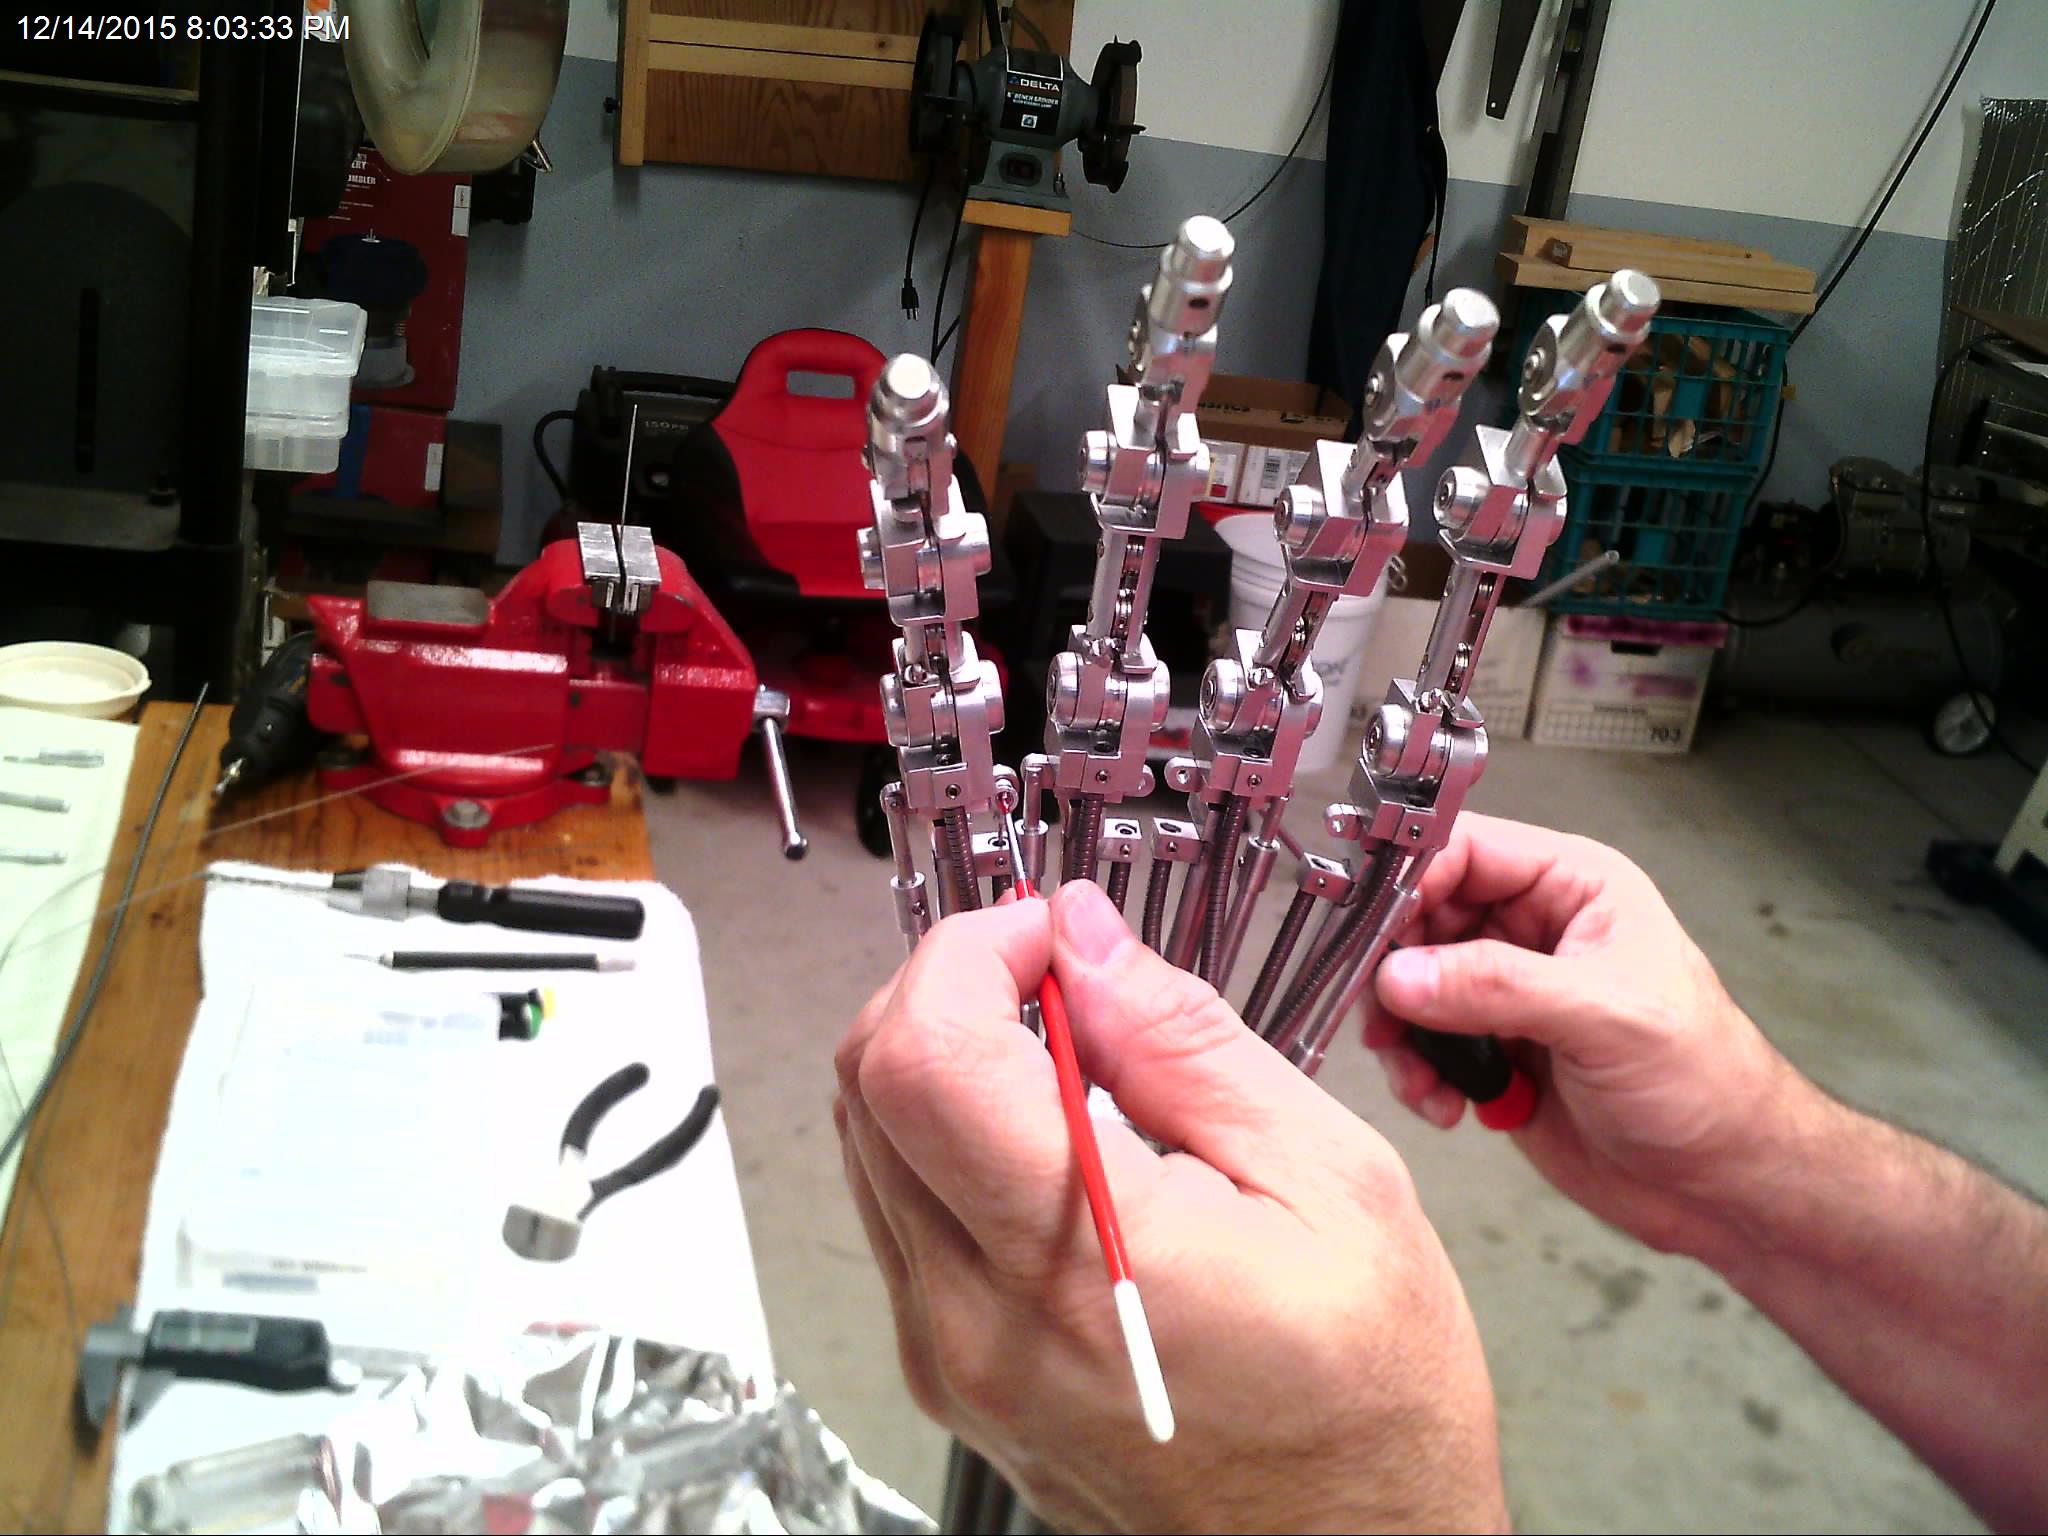
I used some tiny paint brushes to apply teflon lubricant and loc-tite where necessary. The areas for application were too small to get into with the bottles and applicators. I avoided silicone lubrication so I would not have any contamination issues with the aluminum protective finishes. Once you get silicone onto a project, it is almost impossible to clean it off short of scrubbing and soaking the part in acetone. Better to keep it out of the shop entirely unless absolutely necessary.
Muscle cables and sheaths being installed. I spent a good amount of time looking for stainless steel cabling stranded cabling that was strong enough and flexible enough to bend around the joints and pulleys yet look the proper diameter of that in the film. It turned out to be an impossible task for a couple of reasons. Cable that looked thick enough in the closeups of the arm could not have been flexible enough to use in the ‘moving arm’ that flexes at the end of Arnold’s arm in some scenes. The conclusion was that the two different scenes had two different props. Since I wanted visual accuracy over movability, I chose the thicker of the cabling choices. The joints could still be pulled and released somewhat, but it would never be as ‘animatable’ as the motion prop that was used in that scene. The sheathes for the cable tool nearly as long to locate. I found a company that made the sheaths for mountain bike brake cables that were encased in rubber. Underneath, they were a nice stainless steel (to help avoid rust) and looked perfect. Some interior lube and threading of the cables and I had my “muscles” ready to be threaded in and around all the pulleys’.
Ajusting the tension on the cables against the springs that were in all the pistons to achieve a nice ‘balanced’ look and feel took some tweaking, but it was really satisfying to be able to pull a cable from in the base of the forearm and finally see a finger flex and pivot. At this point it was starting to feel like a completed project.

Here you can see the dual sheaths for controlling each finger at their bases. In this photo the cables are not yet threaded through the sheaths and pulleys, nor are the ‘palmer pistons’ installed on the empty lugs that would pull each finger down.
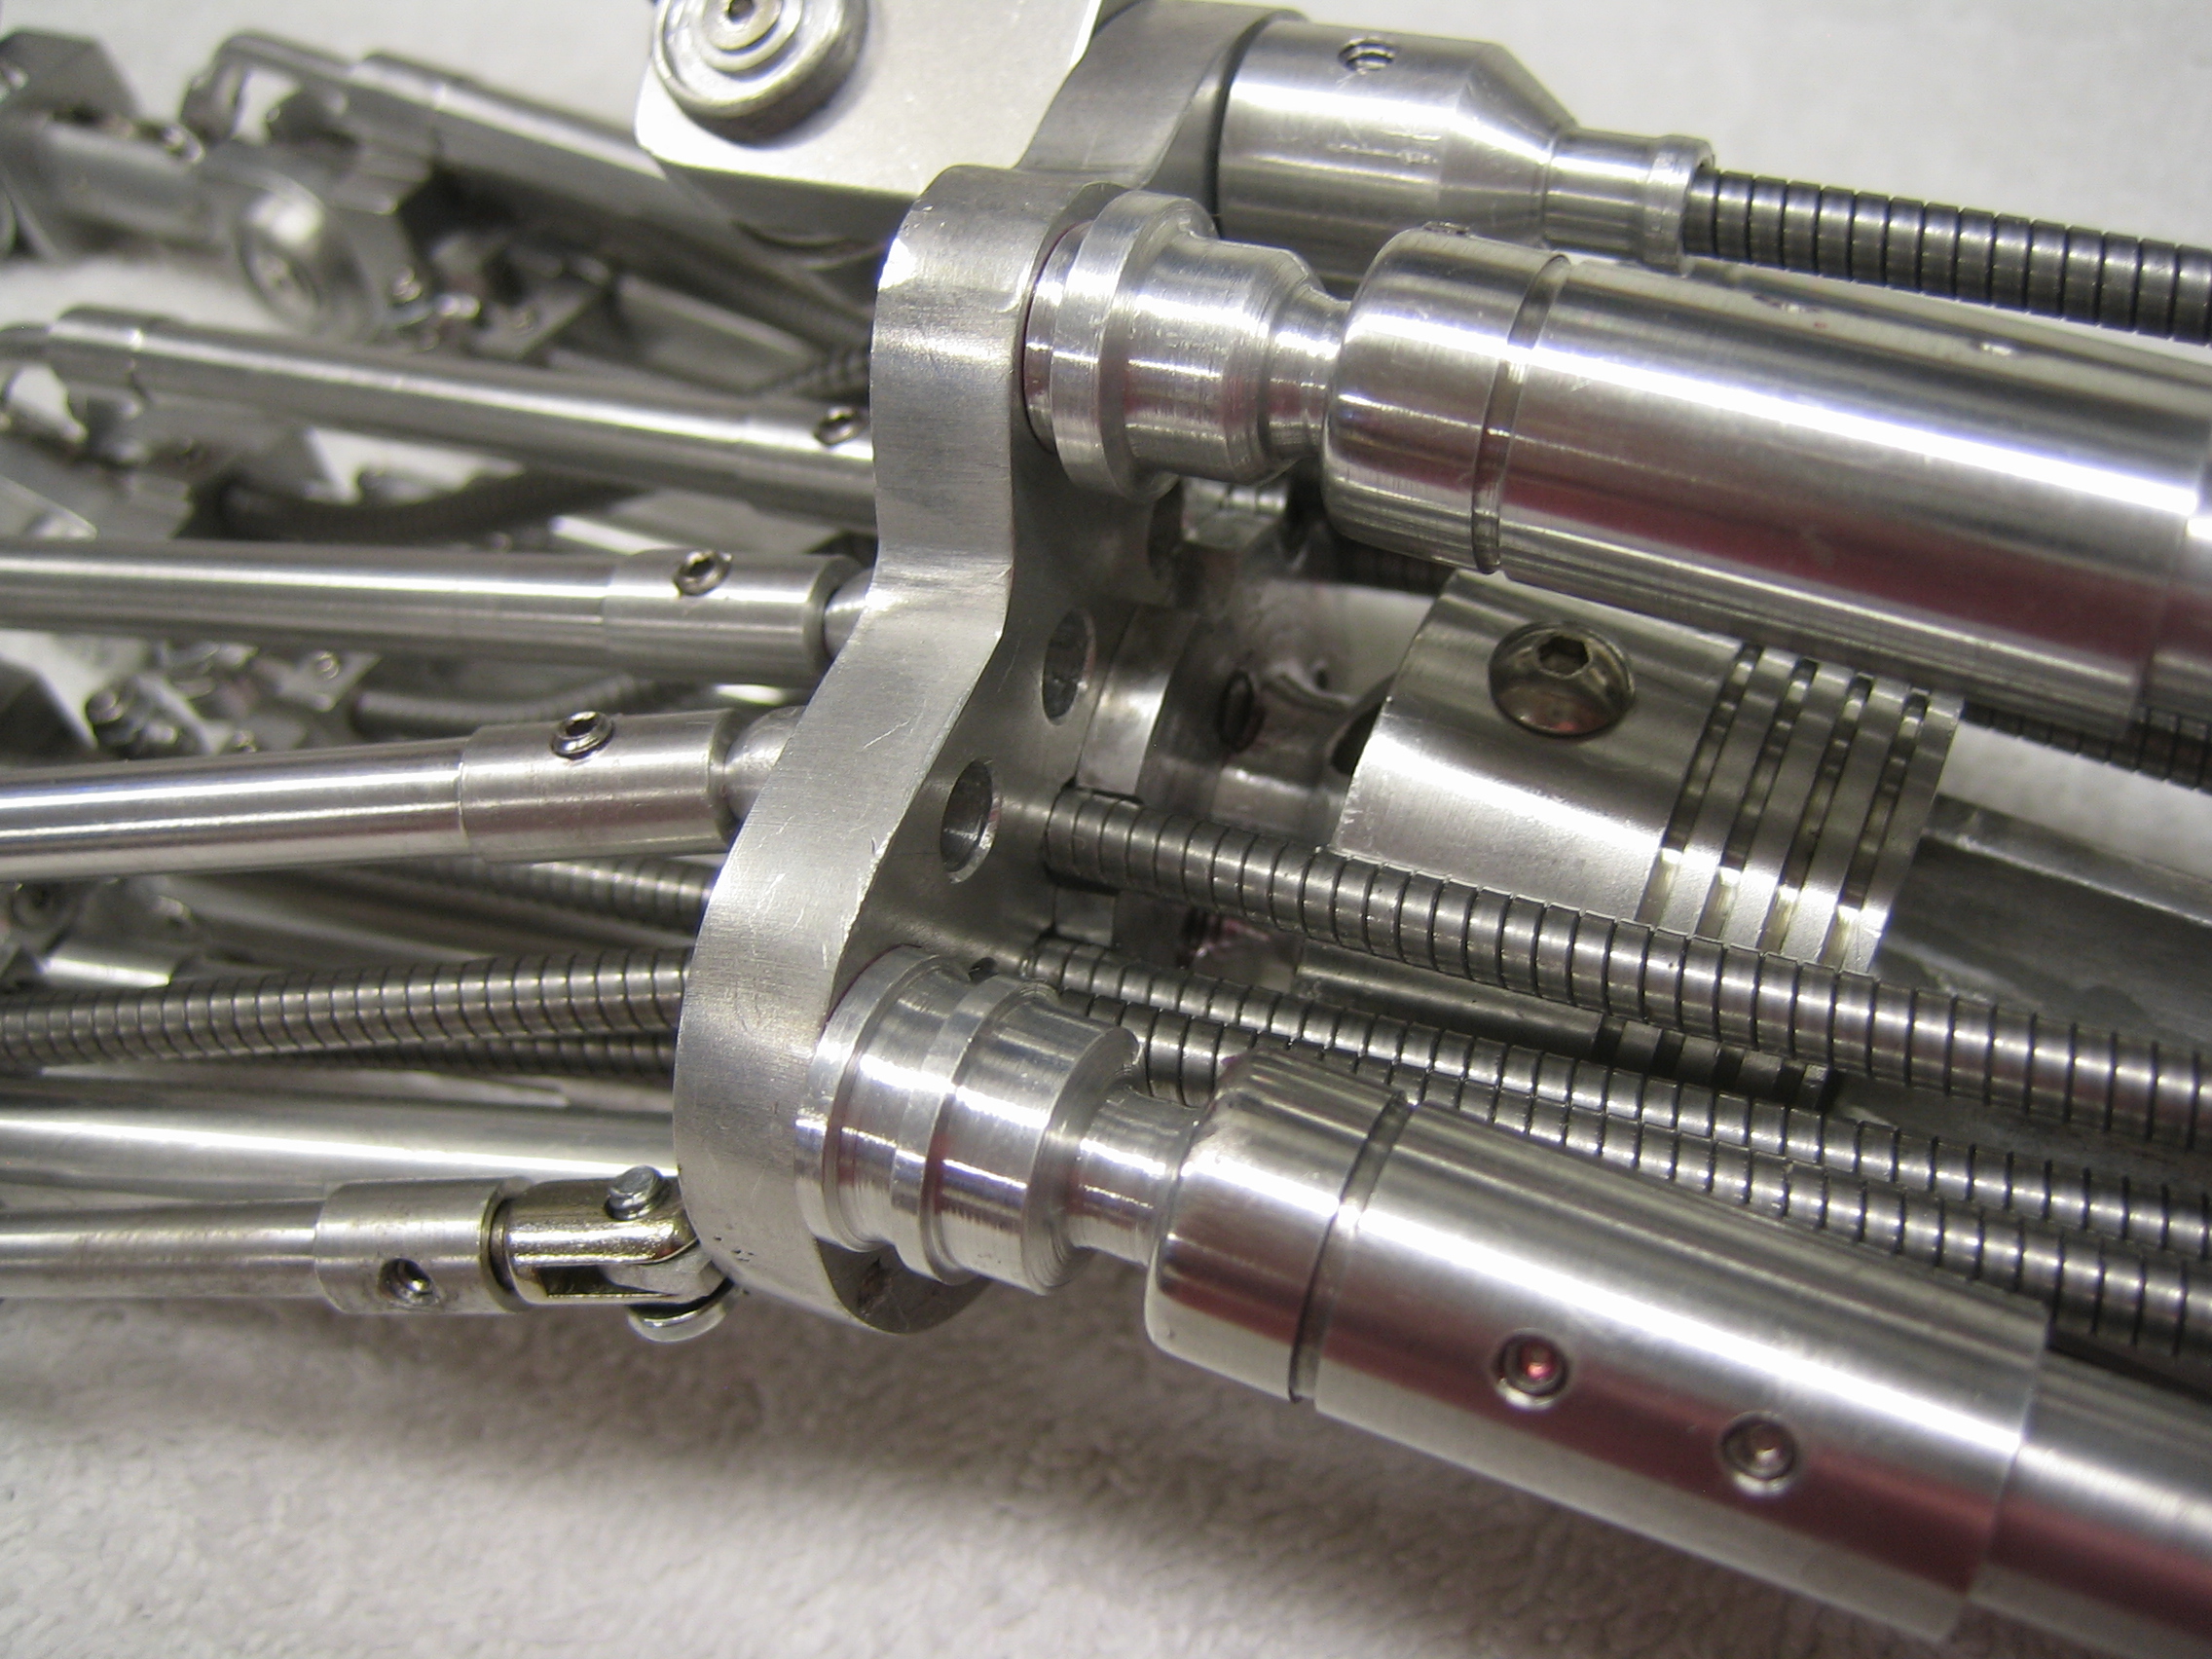
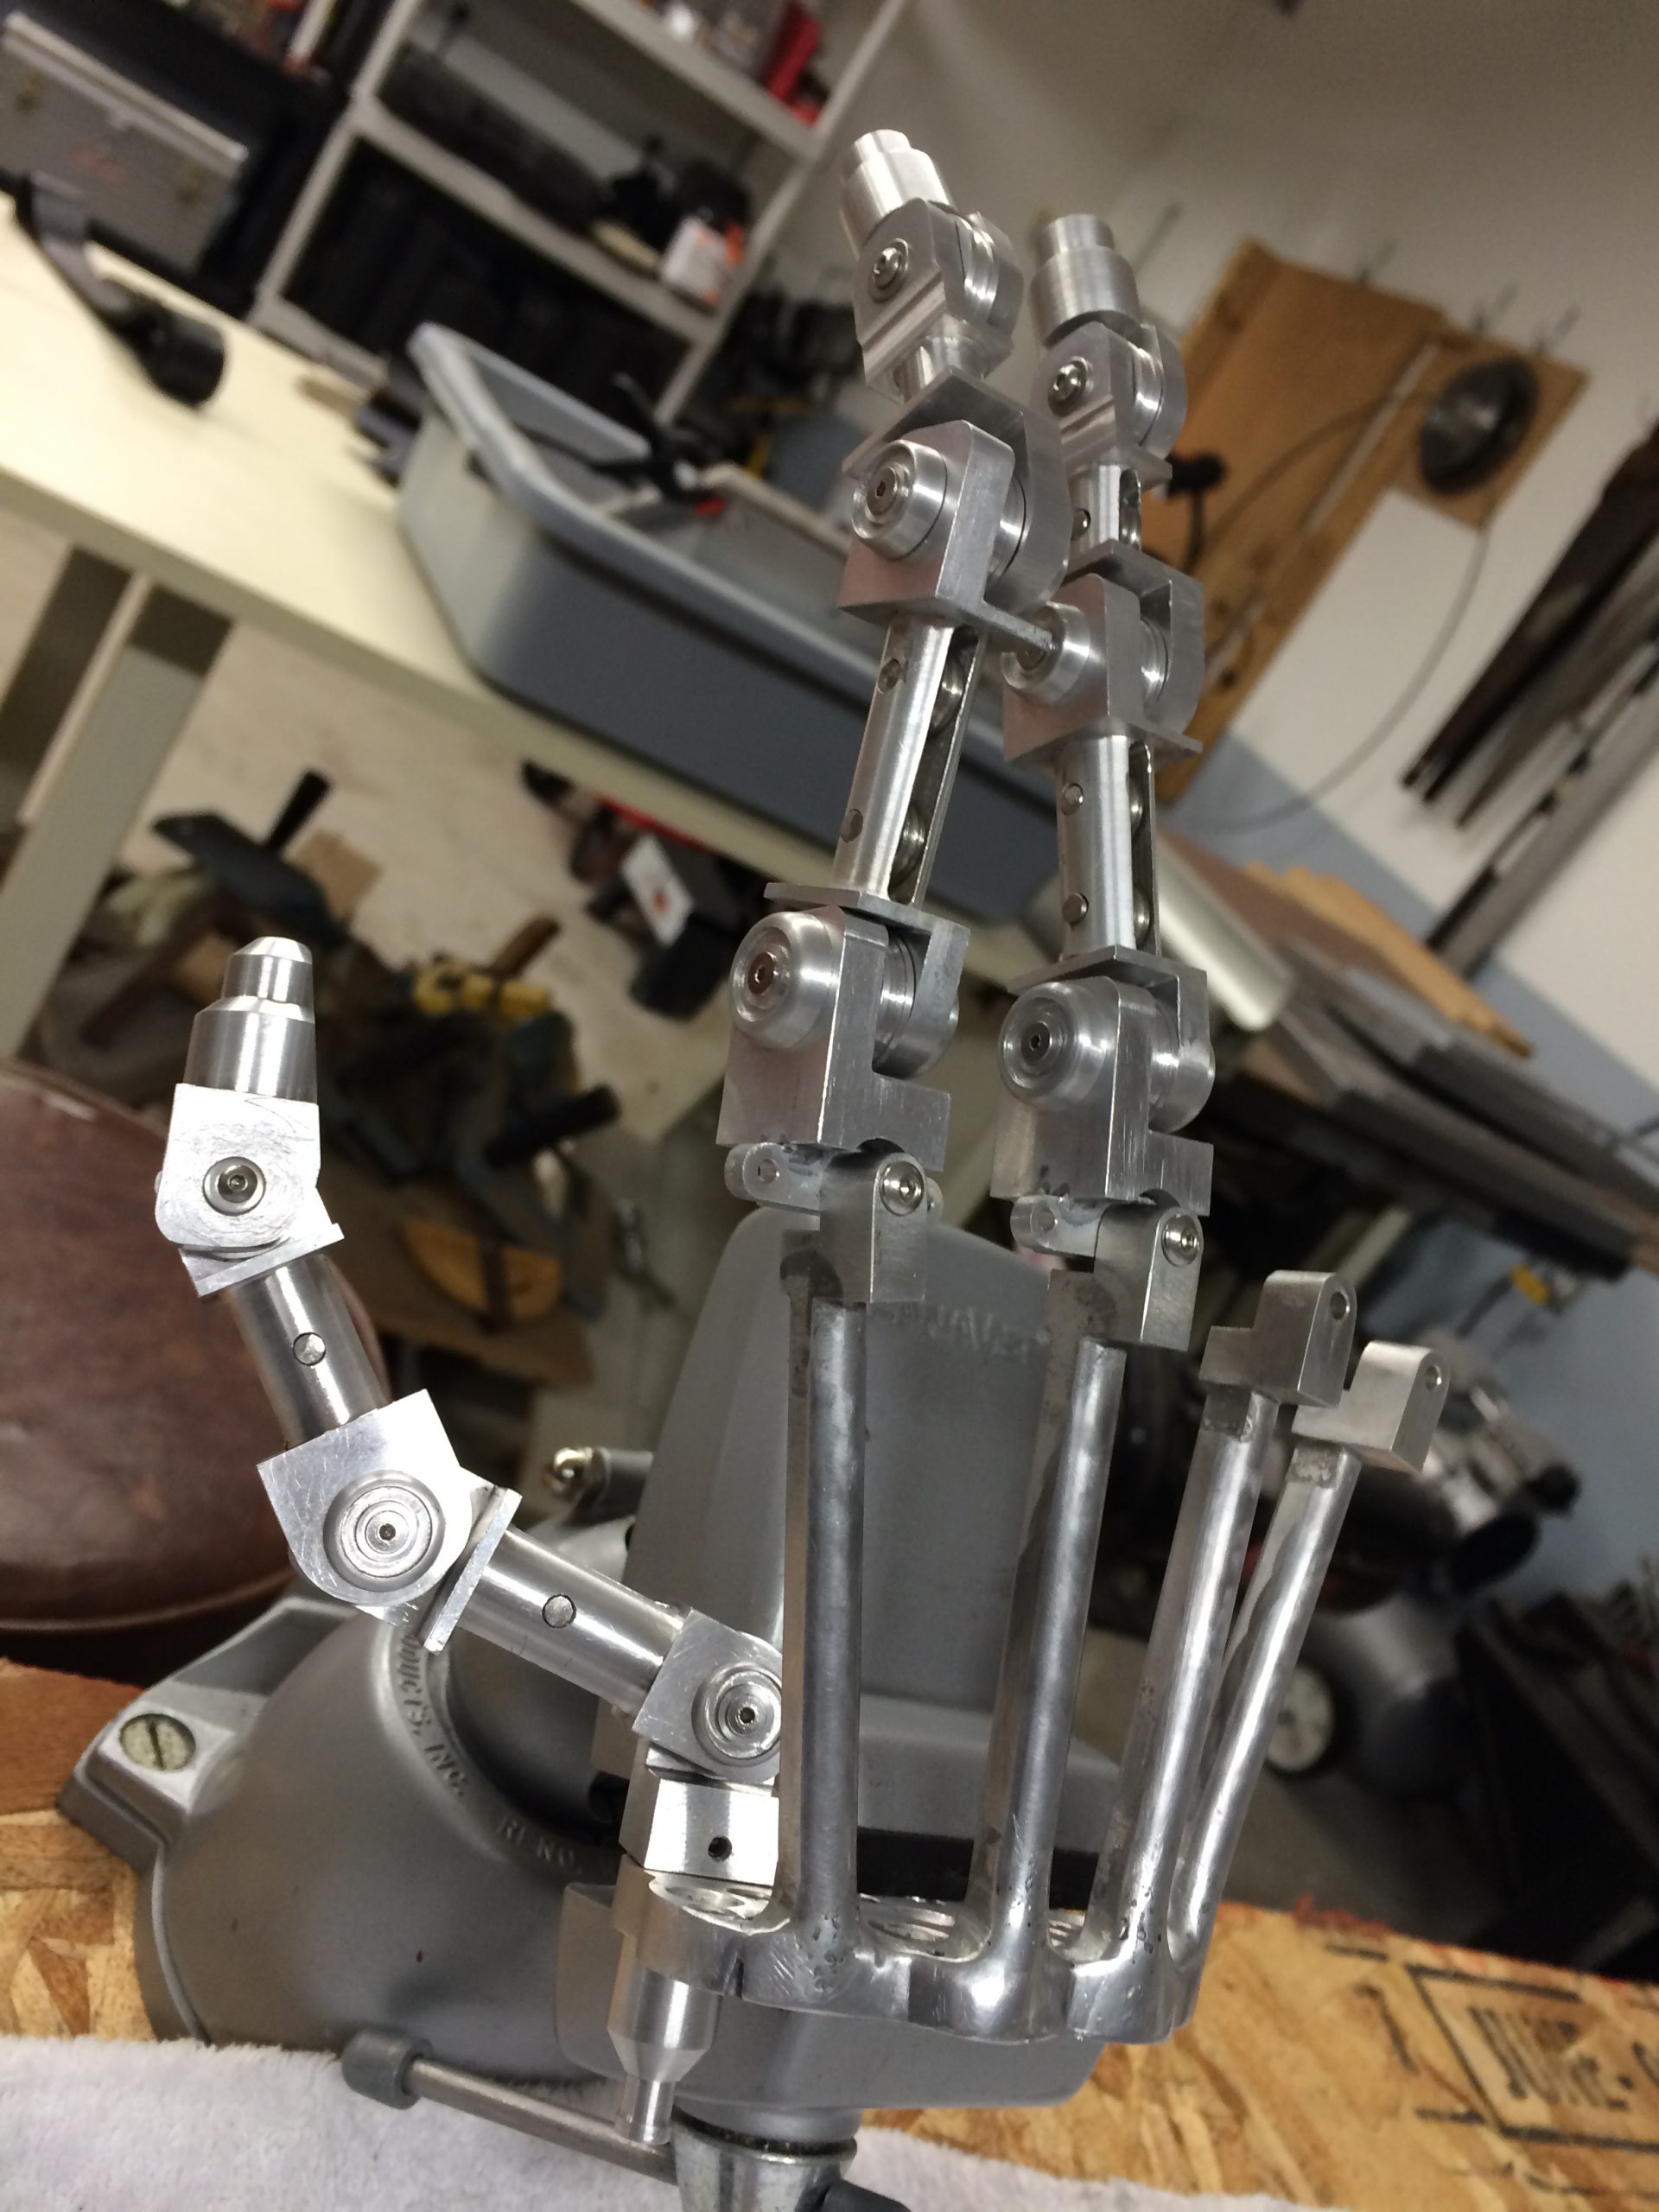
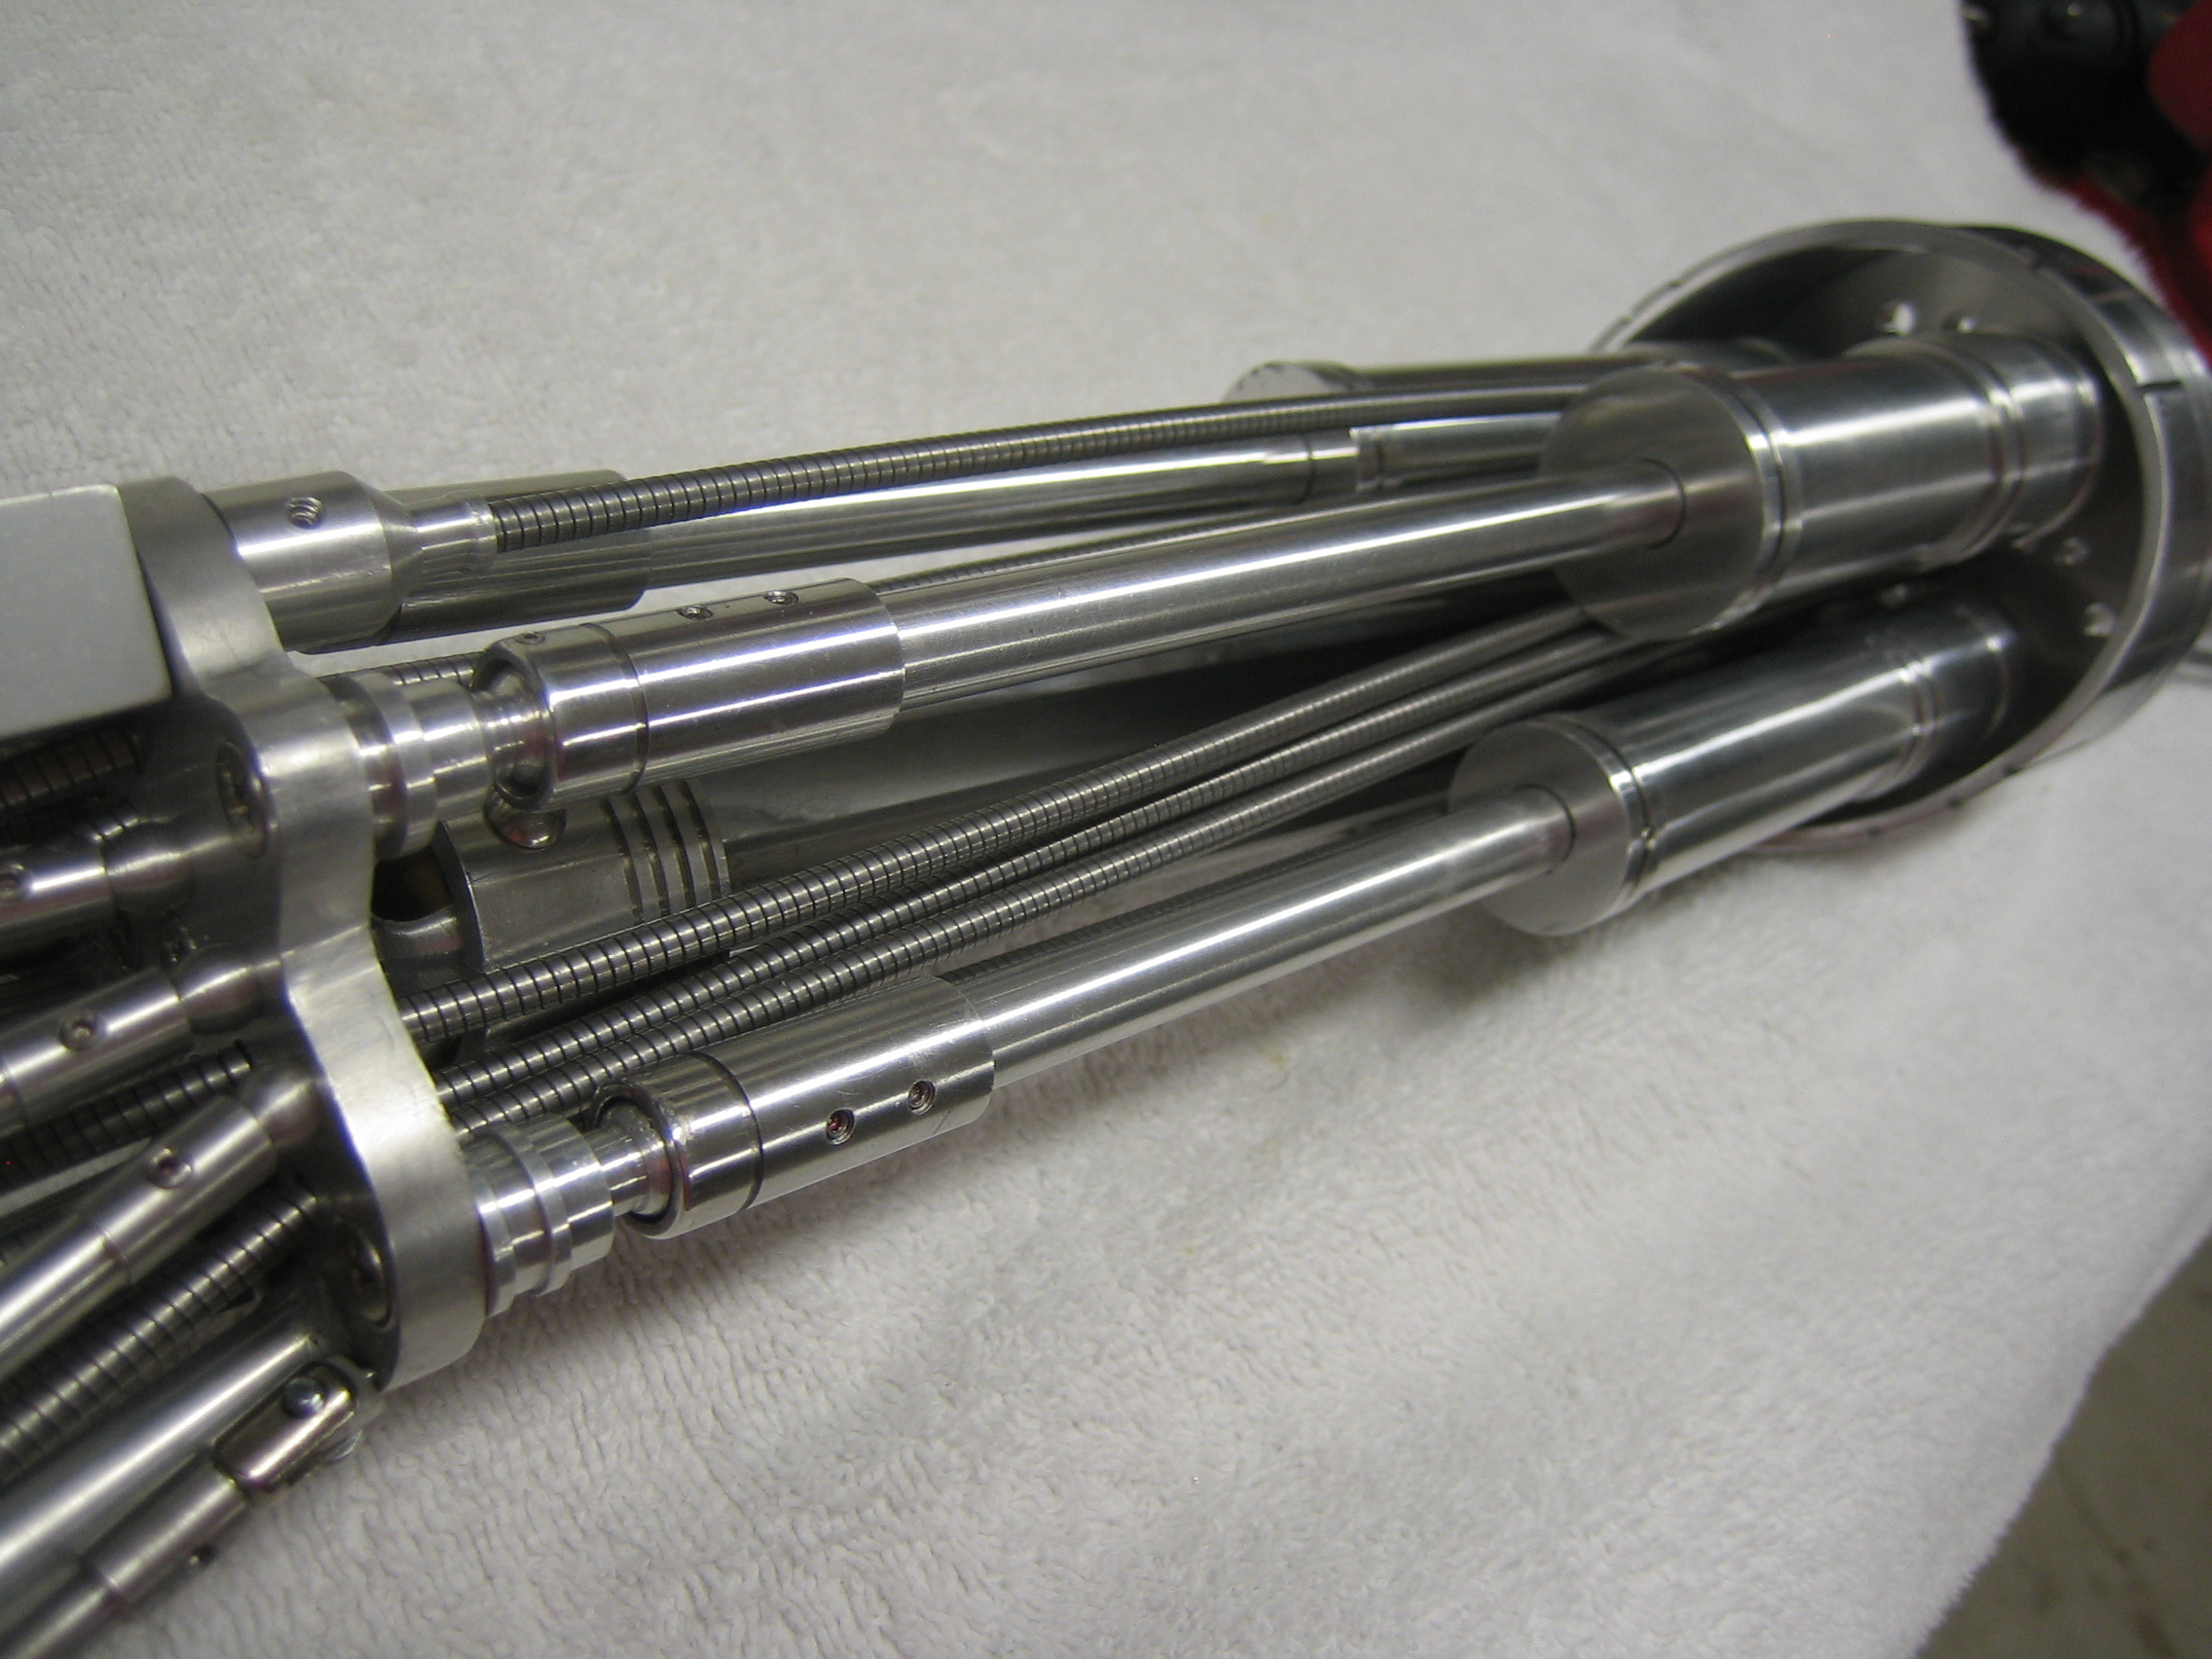
A closeup of the wrist plate, showing the three smaller ball joints at the end of the forearm pistons. The palmer piston are in place here, pushing against the palm to straighten each finger. All the finger cable sheaths continue down through the wrist plate and through the forearm to the elbow region. As the cable sheaths began to multiple I worried that the amount of parts in the forearm would be too dense to be contained in the allotted space and still allow movement and ‘good looks’. In the end it all fit. Barely.
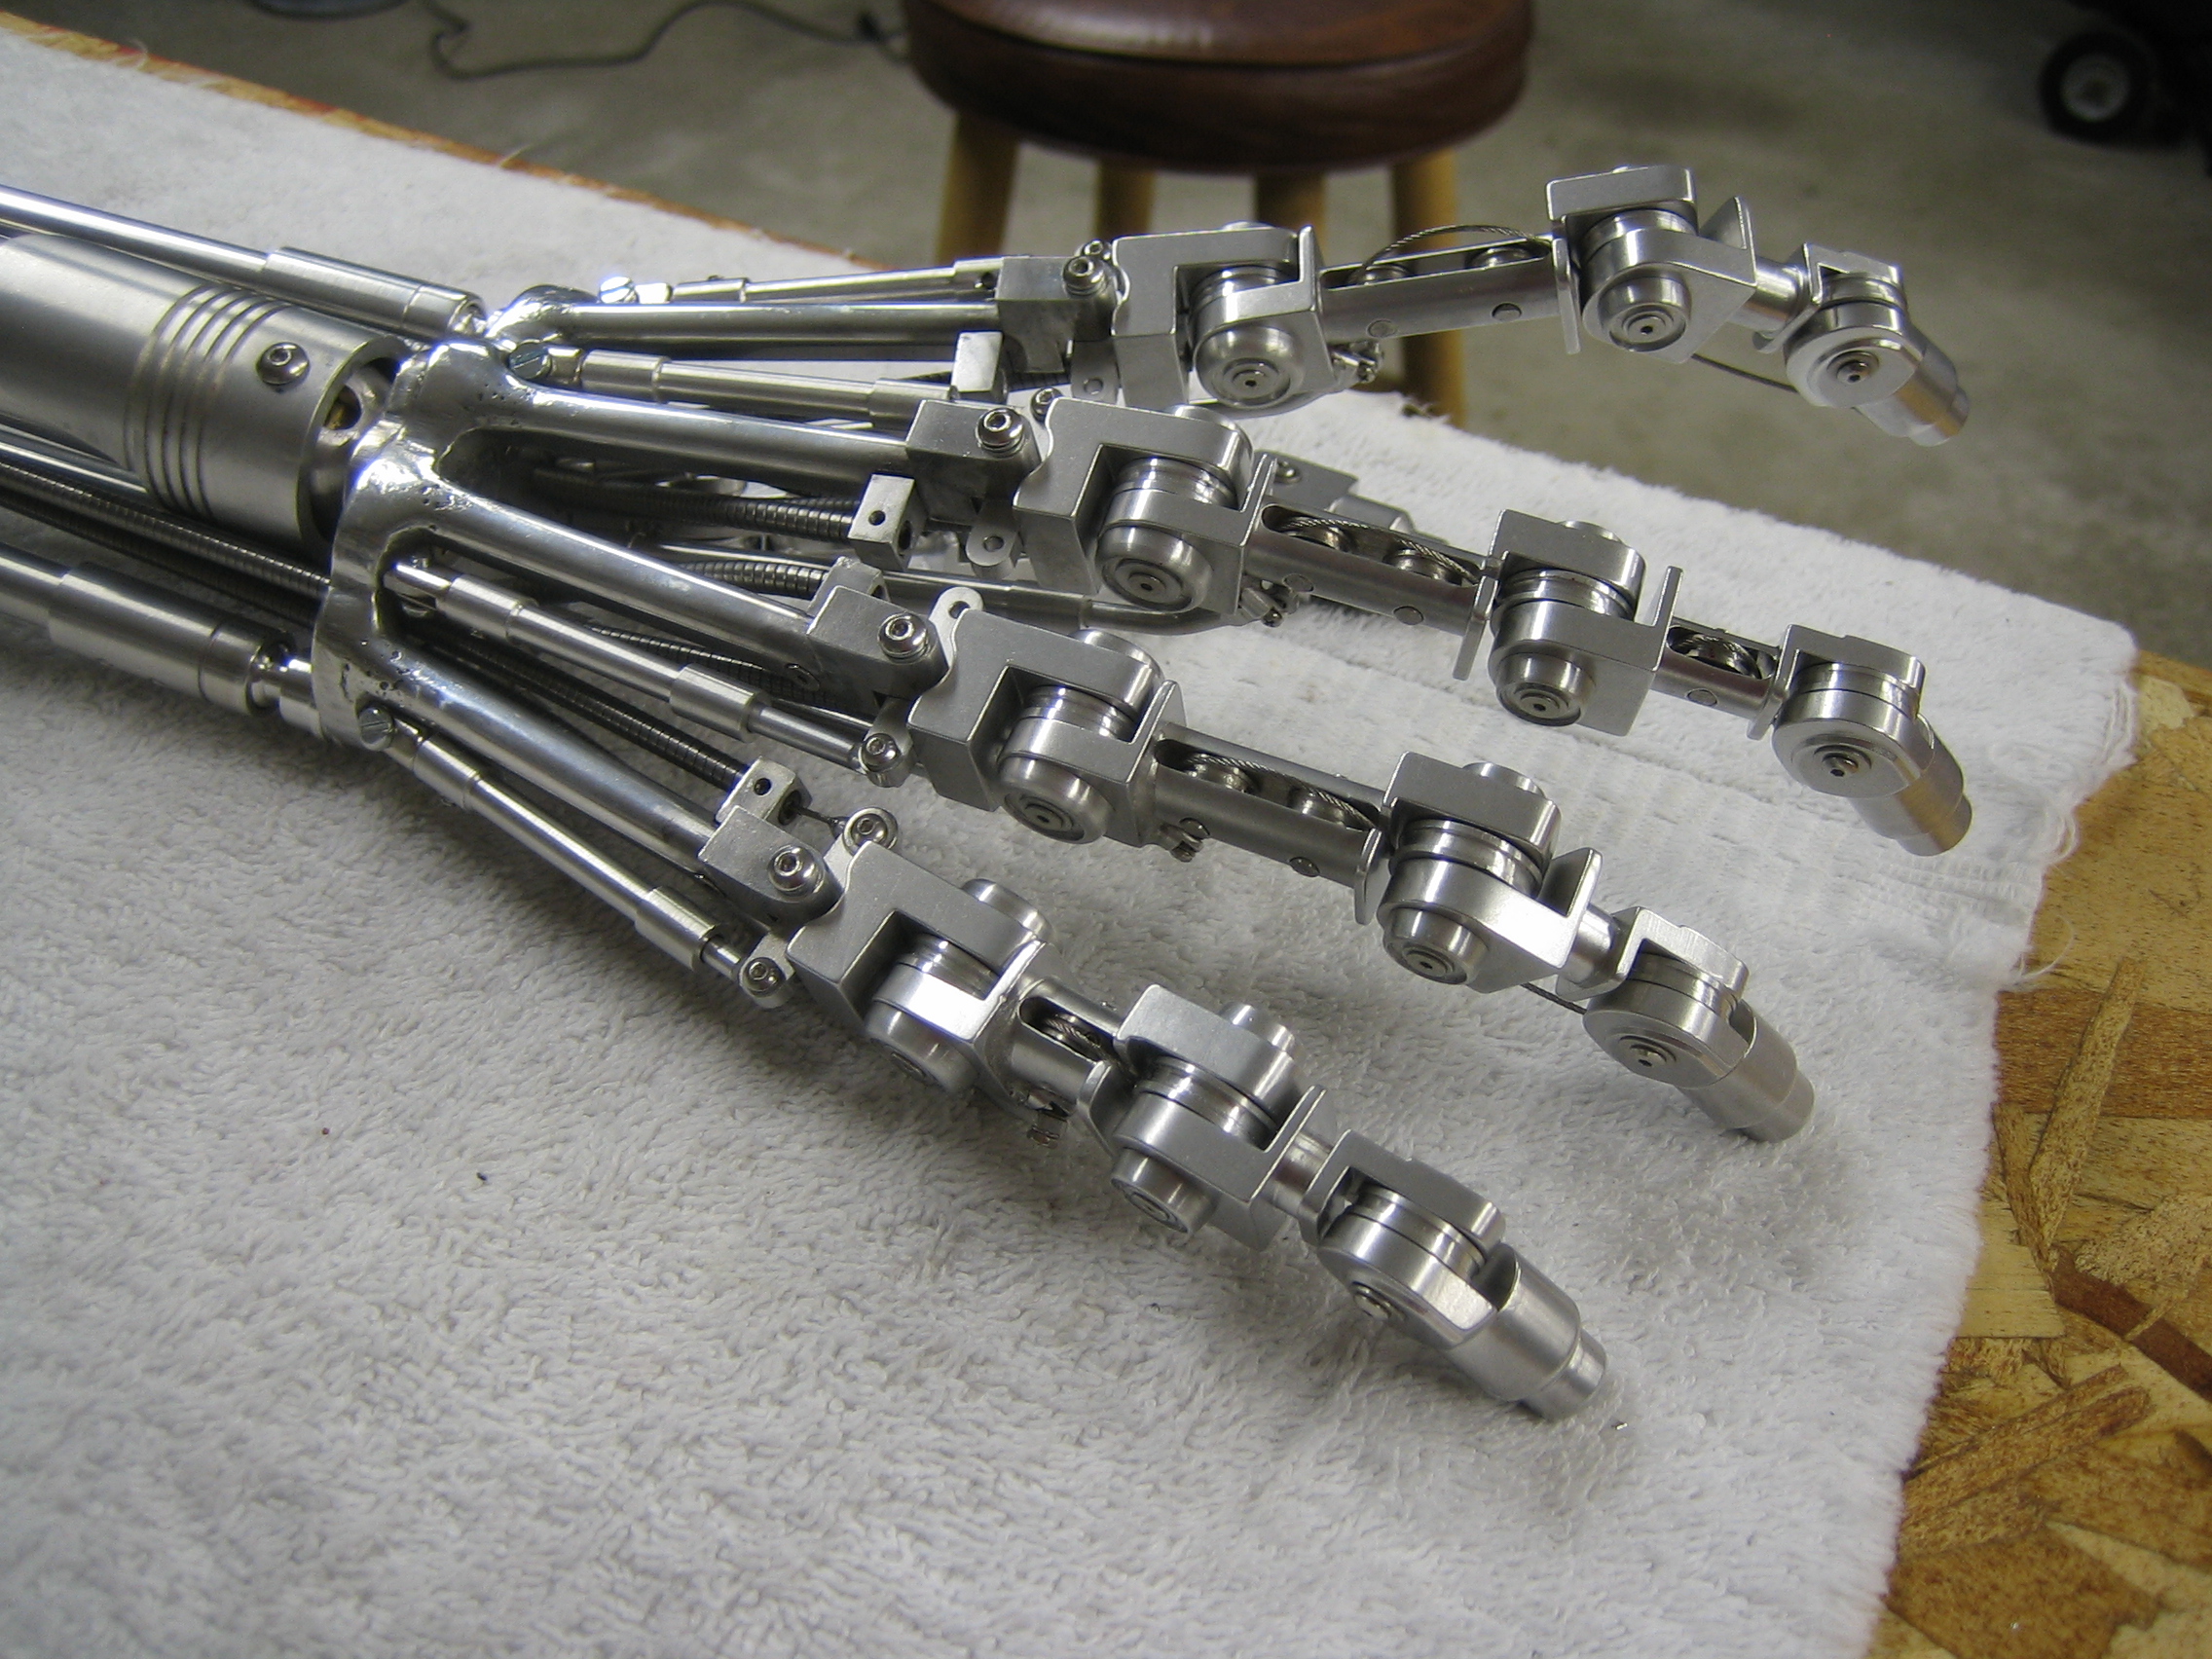
Here you can see some of the detail on the back of the hand and the side pistons for each finger. These spring-loaded pistons, along with a counter cable/sheath on the opposite side, cause the lateral side-to-side movement of each finger, similar to you you cam spread your singers apart.
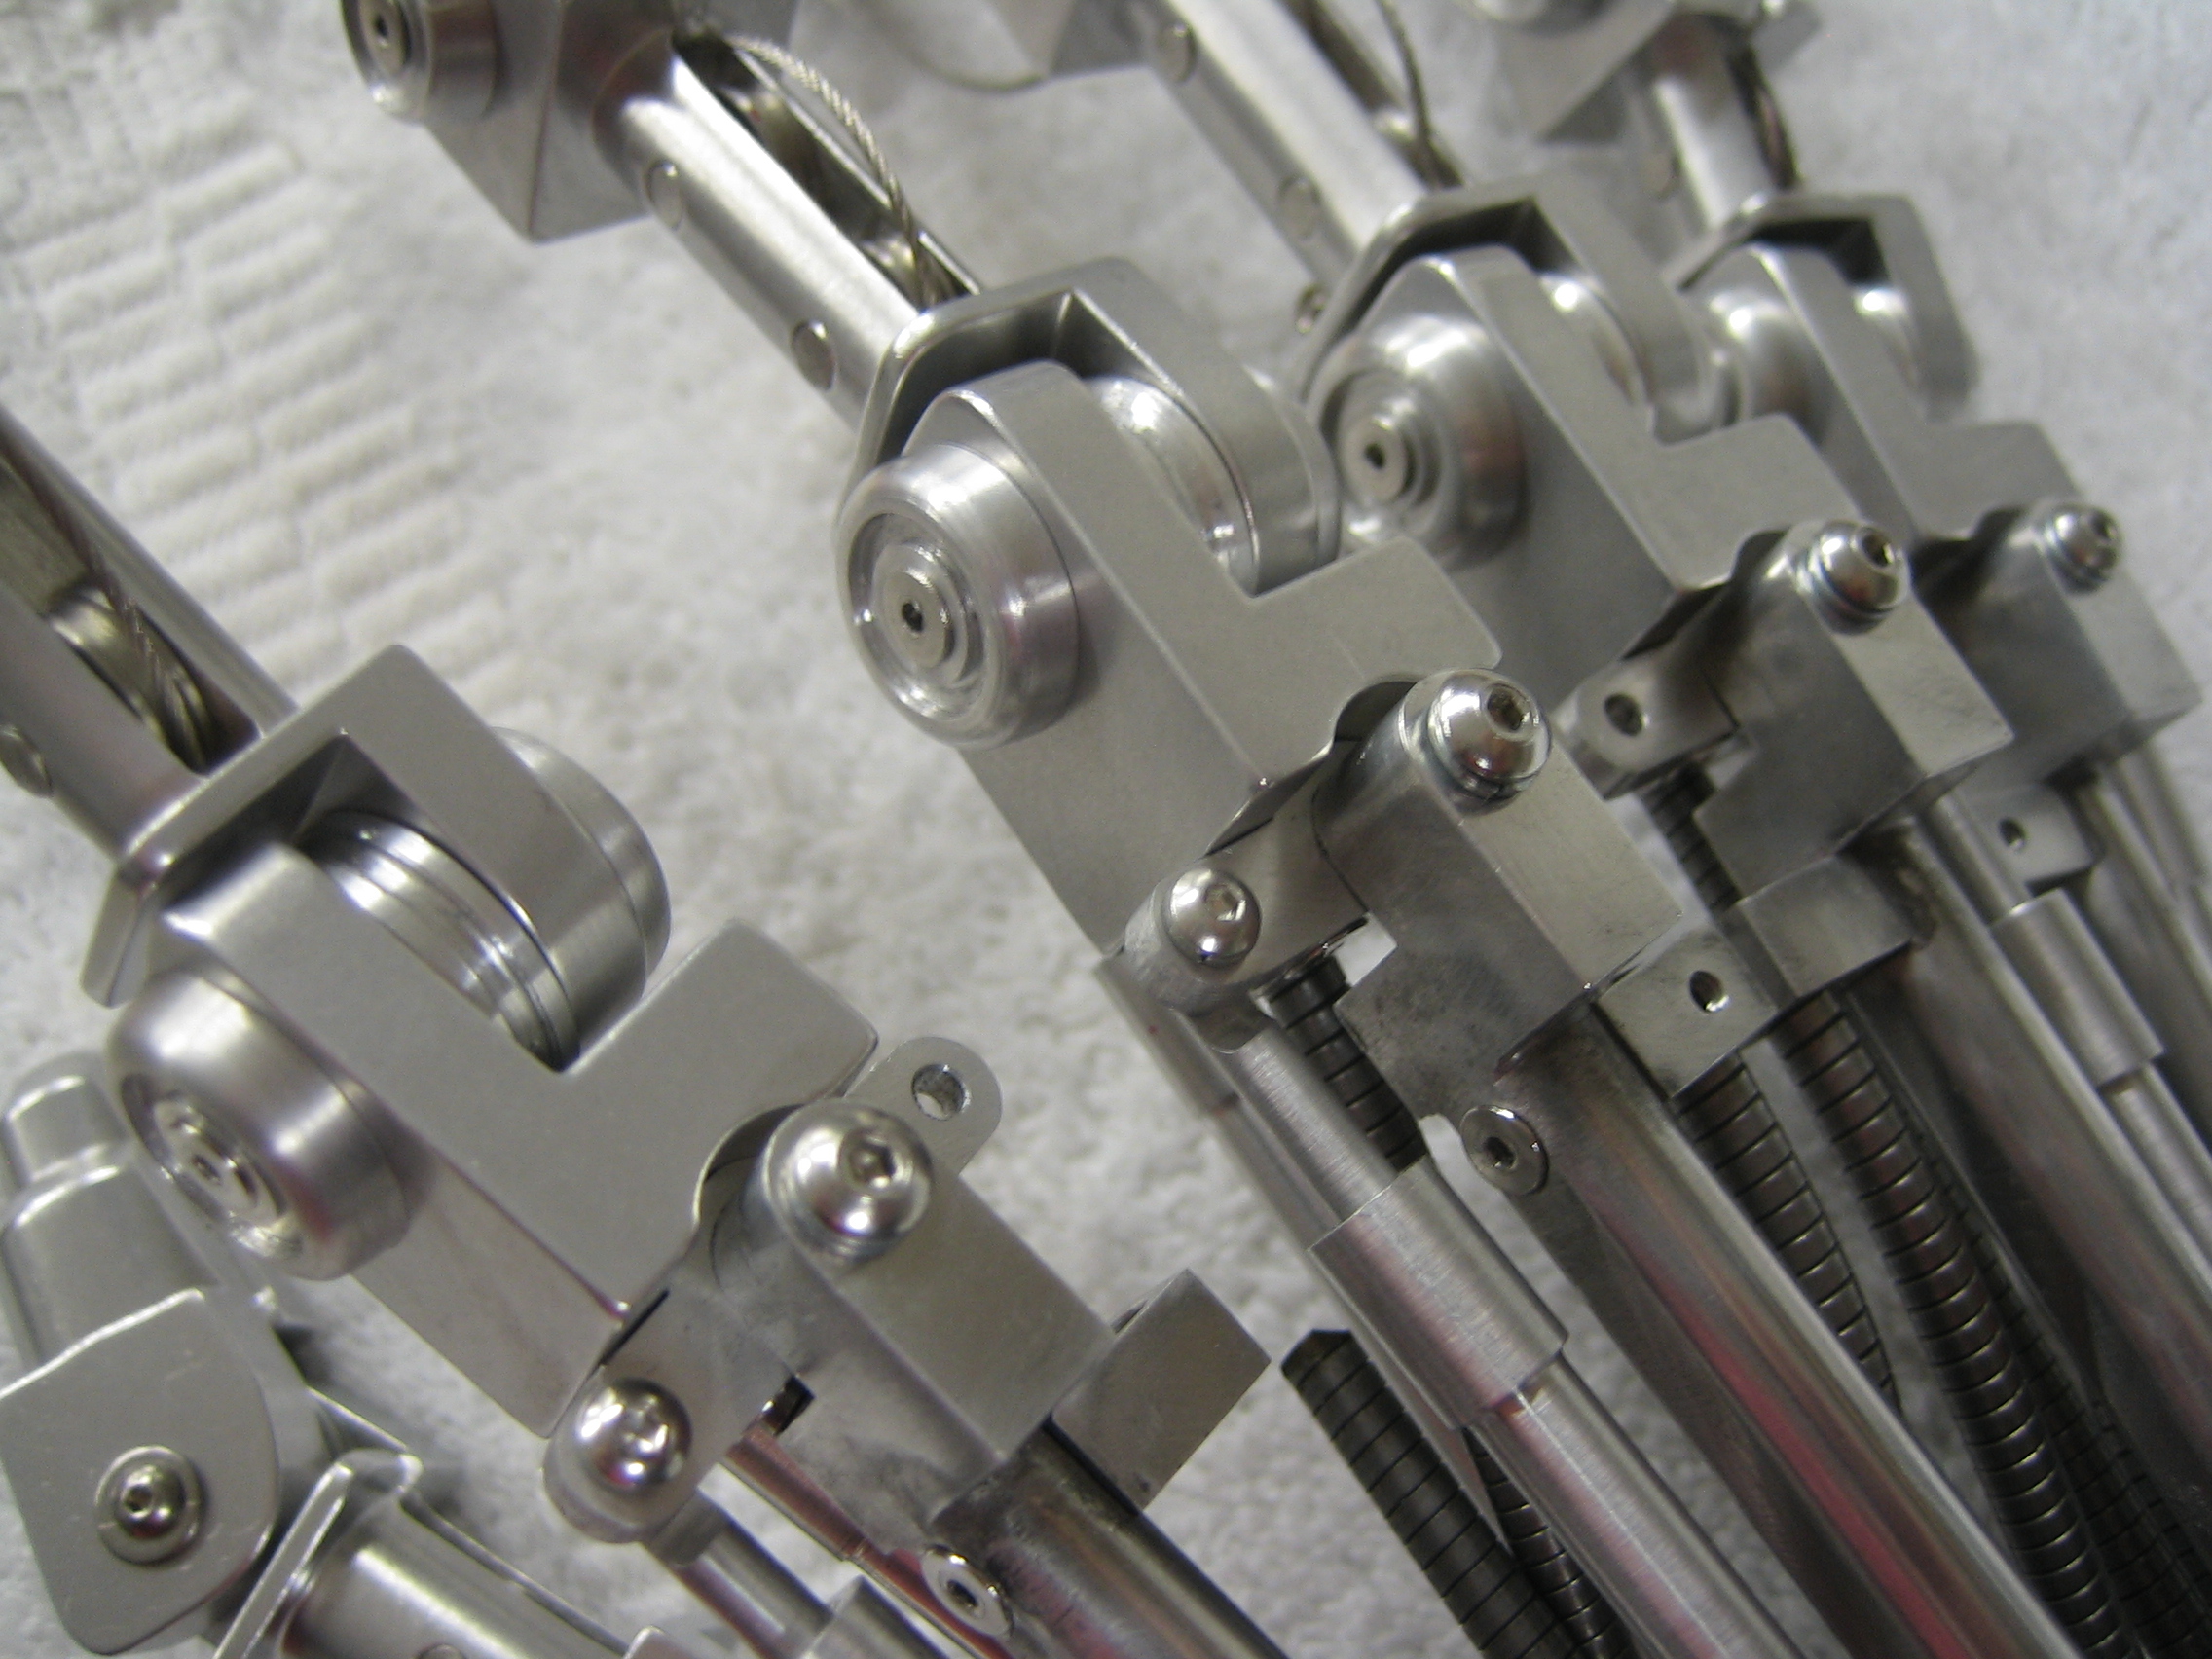
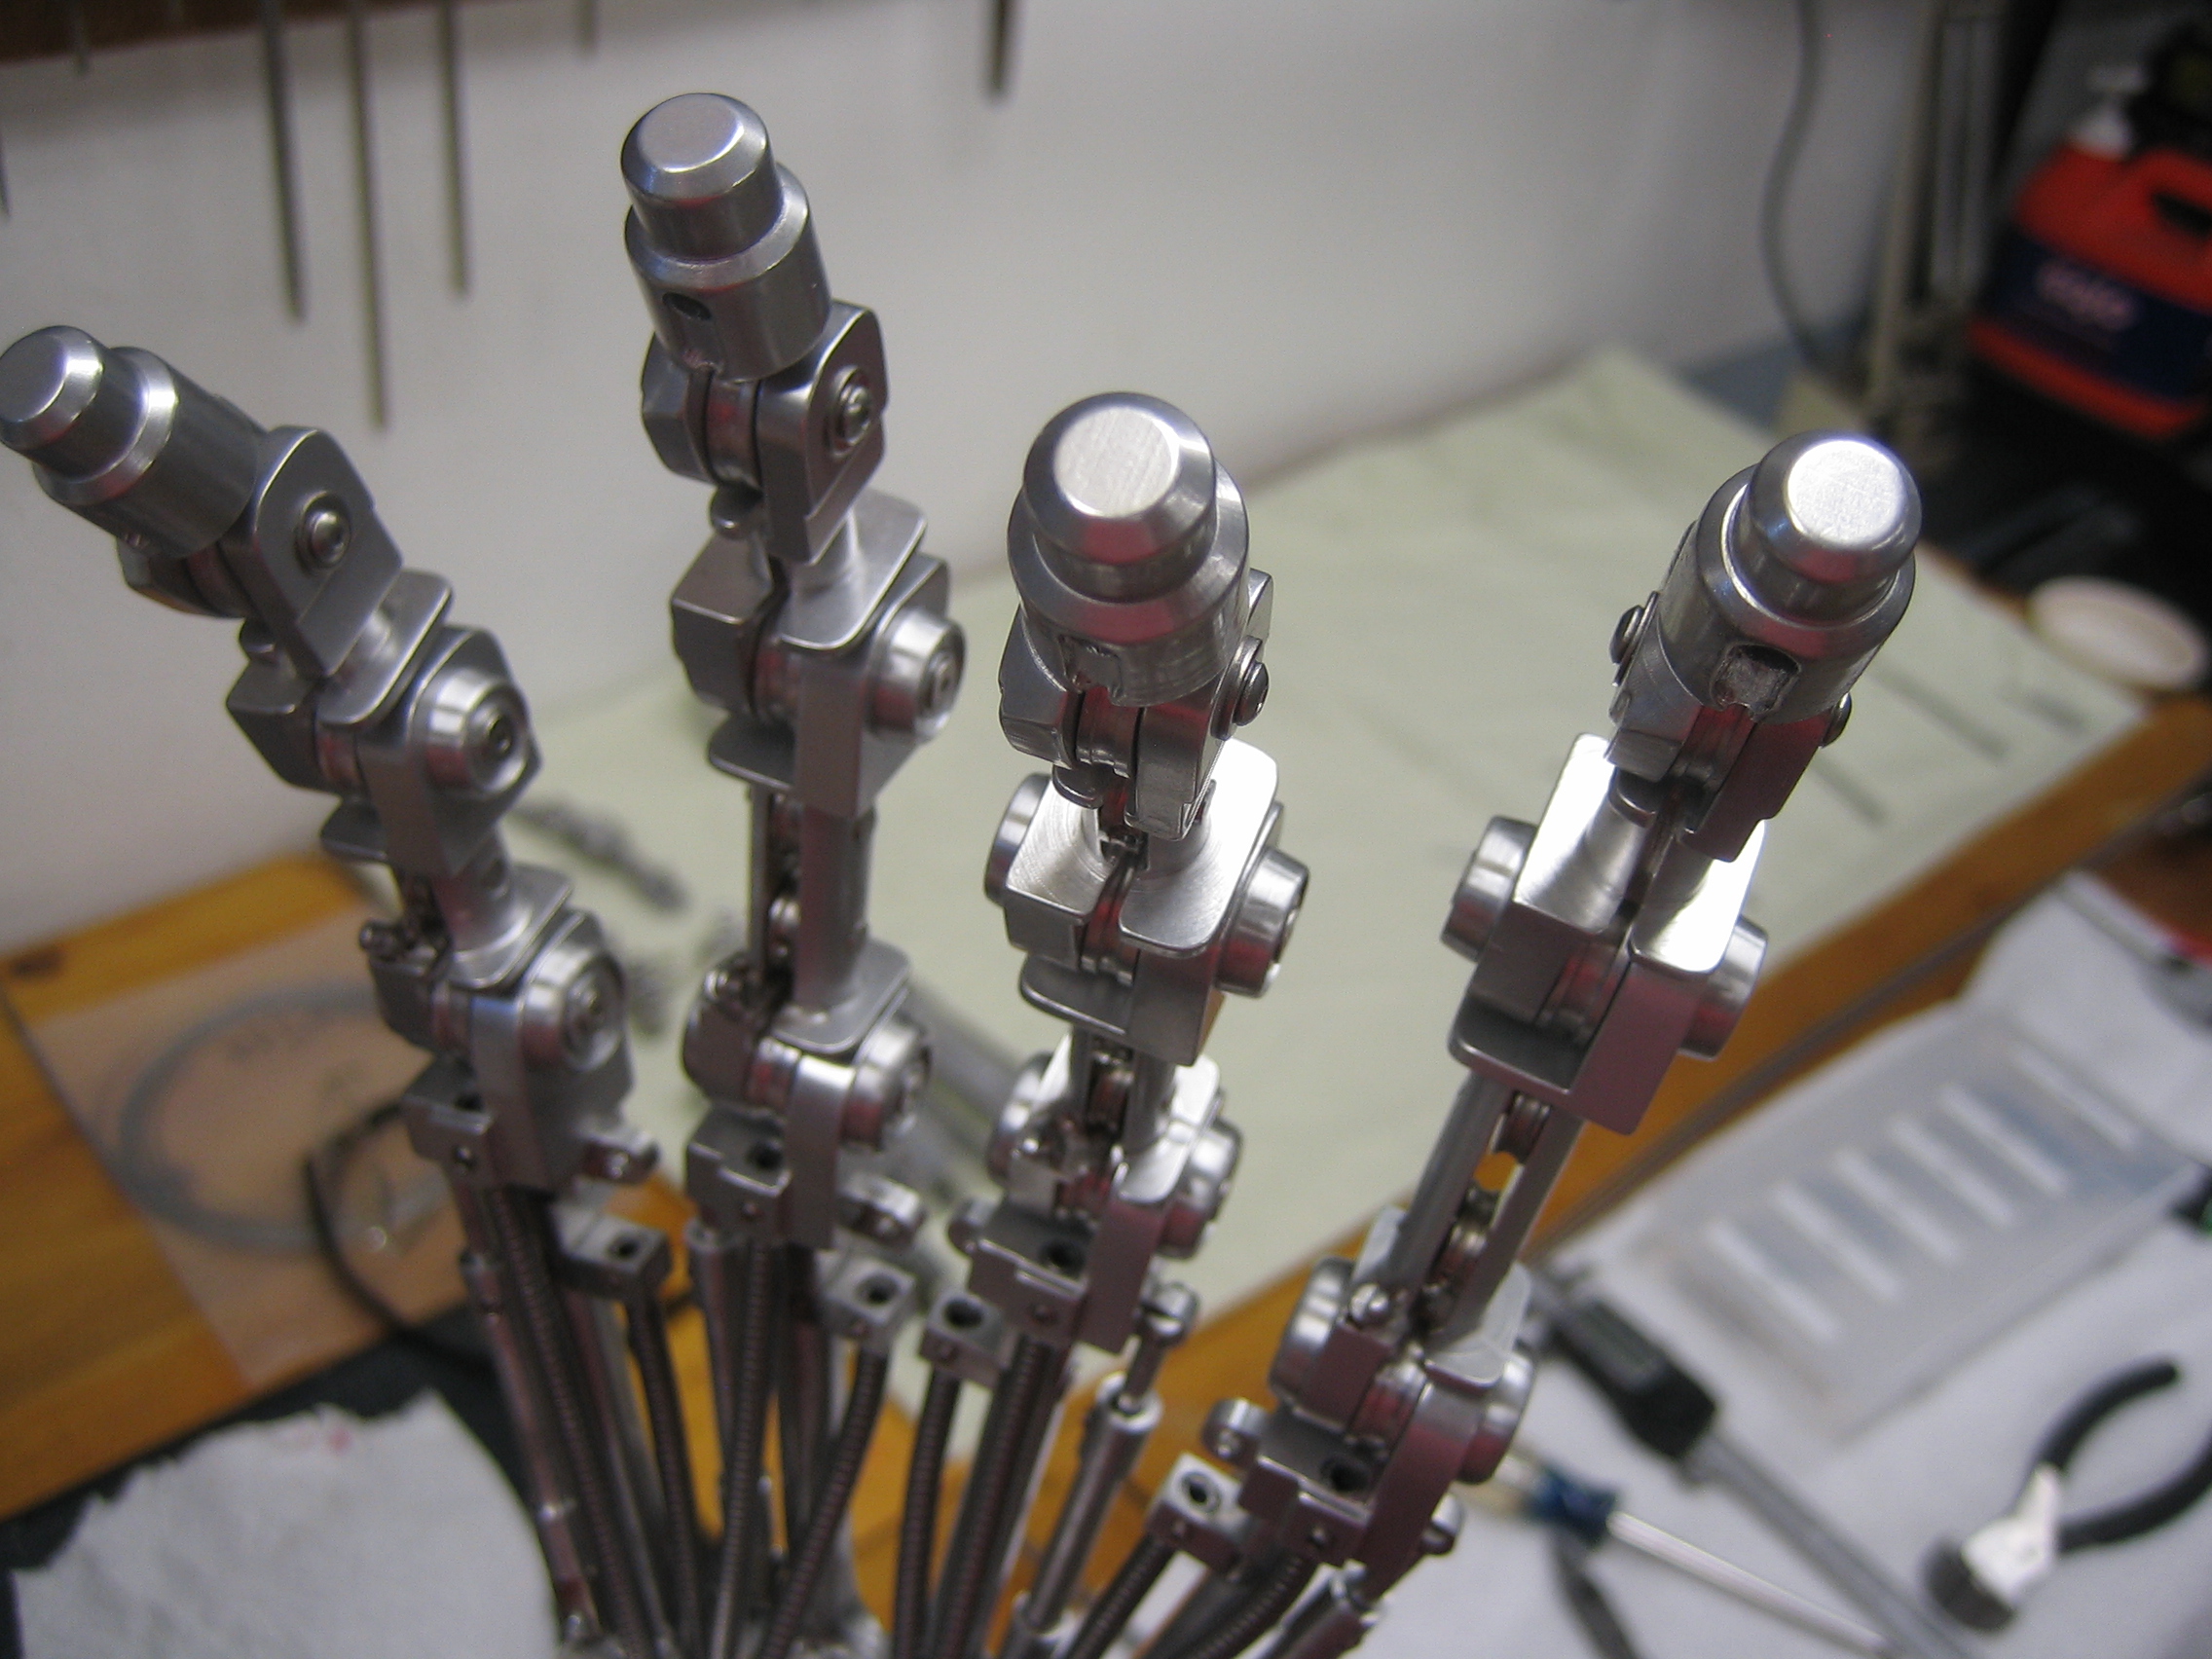
Details of the base of each finger. The lateral cabling is not attached in this shot and one of the sheaths is not attached.

Details of the palmer pistons mounted to the lugs on each finger to push them into their straight positions. Cabling is present in this image.

Closeup of all the cable sheaths in place. You can see where, along with all the pistons, the area at the base of the wrist plate becomes quite congested with moving parts.

Forearm showing the three large pistons and ball joints for pivoting wrist movement. Lots of tiny set screws visible for adjusting and locking the springs and ball joint pieces in place.