Category: <span>Rocketry</span>

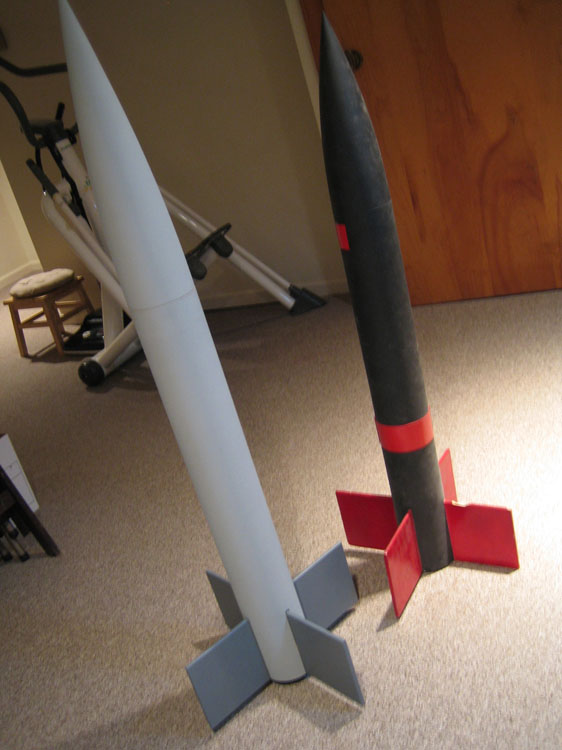
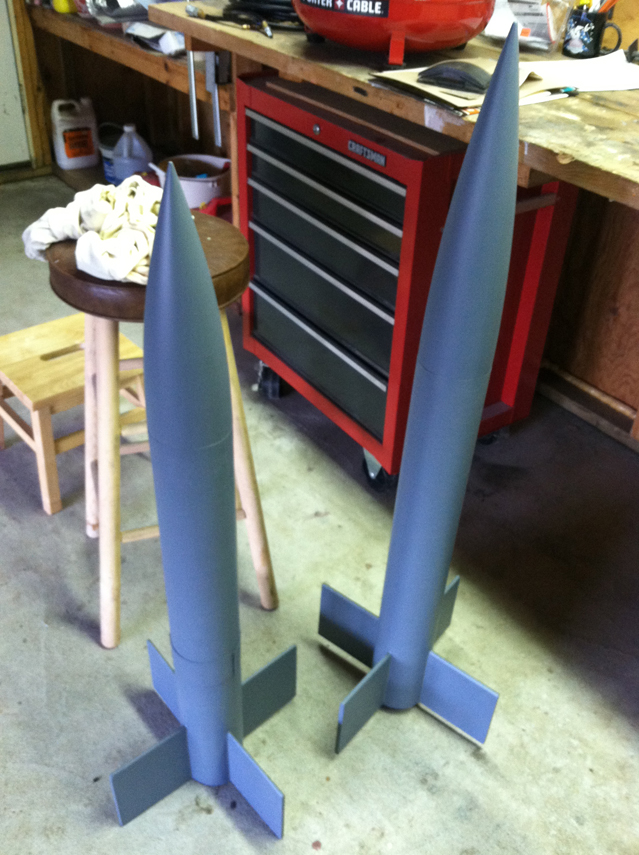
Since I was already finishing the new rocket I decided to clean up and refinish the old one at the same time. Besides, I hated the black/red color scheme (it seemed like a good idea at the time).

I polished and patched up the original Cobra’s old balsa fins lightly with epoxy and refinished the tubes and nose. It wasn’t worth filling the seems on this old girl. Several coats of primer for both with lighter and lighter wet sanding between coats. It was after taking hours to paint with my airbrush that I decided that I needed a faster method of painting….these babies were too large to paint with a small airbrush. I picked up a more “automotive-scale” airbrush and things went a lot smoother.

The newer version gets several light coats of thinned enamel with more wet sanding between coats. Then a few final coats to get a mirror finish. I was very please with the surface quality on this bird–it was my primary goal to get a mirror like surface and I pulled it off.

Some details that were painted separately, some masking/painting of the fins and the girls are ready to fly!

Rocketry

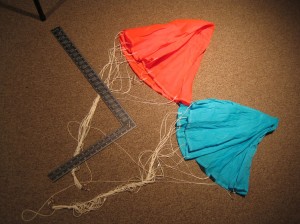
My original plan was to pilfer the two 36″ nylon parachutes from my never flown Sparrow rocket for recovery. However after feeling the weight of the new bird I’m starting to think I might need some beefier chutes. Also need to track down some heavy-duty shock cord to absorb the ejection charge.

One of the things that the original rocket had a problem with was that the nose would “bang” against the body during descent and do some surface damage to the fins and body tube. I could have the nose and body recover separately but I think some adjustments to the position of the chutes along the shock cord can cure this problem.

Have to work on recovery stuff a bit….also need to decide on launch guidance. This one is a little large for a standard rod/lug system so I’m looking into a rail-guide. Need to do a little more research on this.

Rocketry

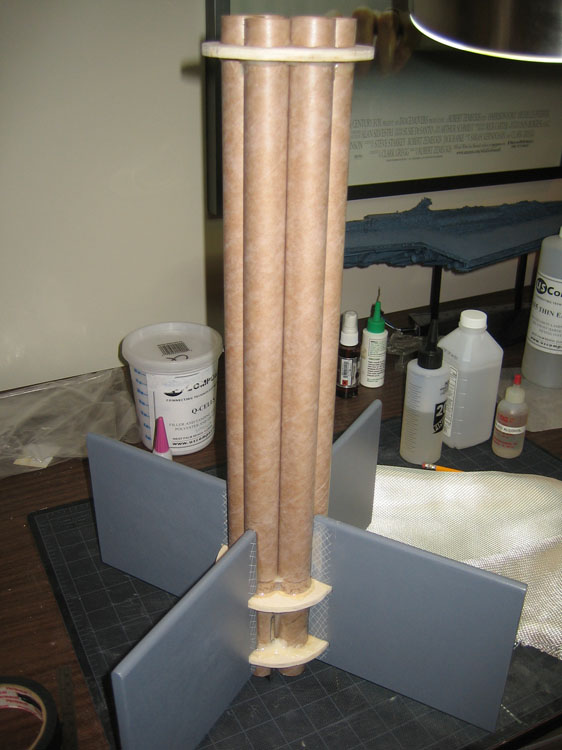
Now that the four fins have had their bases epoxied to the engine core using the outer body as a guide I can remove the core and begin reinforcing the fins and interior.

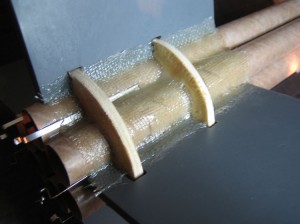
I purchased some heavy duty fiberglass cloth for the reinforcing of the engine mount tubes, fins and centering rings where they all will bond together. For this I used pure epoxy (no thixatives or micro-balloons) so it could saturate the thick cloth and seep into the wood surfaces for a secure bond.

Thanks to my old friend gravity, I could only do one side per day. This prevented the epoxy from dripping down fins or running down the body. The US Composites Epoxy I use is extremely thin in it’s purest form giving it a good soaking bond but runs are quick to appear. Even though the pot life was 15 minutes I wanted to make sure there was no chance of runs. The pure epoxy is very hard to remove or sand.

Three layers of heavy 6 oz. fiberglass cloth/pure epoxy across each fin root/centering ring/engine tube. Then a wrap of one layer of 6 oz. cloth around the entire remaining length of the engine core tubes for some added strength. This should help distribute the engine thrust across more of the length of the main body tube.

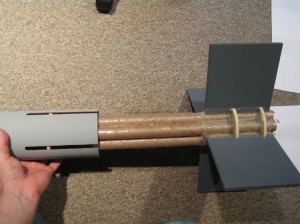
A test fit of the finished engine core/fin unit into the slotted body tube showed that it all fit together. Whew!

Side-by-side of the last version with the current version ready for final assembly and final primer & sanding. The new baby is a little taller because of the difference between the old Estes-BT101 nose cone and the PML 3.9 Nose cone but this couldn’t be helped without turning my own nose cone. Since I don’t like lathes this’ll have to do. I did shorten the body a couple inches to help compensate but the added length will help compensate for the heavier tail due to added engine weight. Looks like the center of gravity will be darn close to the location of the original helping to maintain stability. A trip through the RockSim software helped confirm this theory.

Rocketry

It took another coat of primer, sanding with 220 grit then wet-sand/polishing with 600 grit paper to get the fins to a silky smooth surface. Now that I’ve completed the whole fiberglassing process for the fins I’m 95% satisfied with the results. I think the fiberglassing process gave me fantastic strength but the amount of labor to finish the outside of the fins and get a glassy-smooth surface just wasn’t worth it. Given another take, I’d triple up the heavy fiberglass on the interior of the fin between the perpendicular basswood layers but I’d skip the fiberglassing of the outside of the fins and go with multiple coats of sanding sealer. The pinholes and slight waves in the fiberglass surface just involved too much work to get a glassy finish.

First I scraped the root of the fin down to the wood and soaked the edge with pure epoxy to allow it to sink into the wood for a few minutes. After dry-fitting the engine core into the main body, I added cabosil thixative to the epoxy to keep it from running and applied it to the engine core fin location through the body slots. Now the fin could be inserted into the body slot without worrying about the engine core or fin being glued to the body. By not gluing the core or fins to the body I’ll be able to remove them and reinforce the fins and core later.

Second fin epoxied on (1 every eight hours, allowing time for the last fin to cure and not “drift”. Gravity is my enemy when gluing up. Pulled the engine core our to check that everything was still removable–didn’t want to find out it was too later after the fourth fin….then put it back in for the third and fourth fins.

Rocketry

Before slotting the main tube for the fins (which are mounted through the wall and onto the engine motor mounts) I though I’d try a test. I wanted to be sure that my jib saw wouldn’t vibrate the tube too severly and shatter or crack the spiral seams I had to painstakingly filled. Glad I did. The jigsaw shook the test tube enough to rattle out some of the filler. Now that I know I tried using my Dremel with a cut-off wheel. Takes a bit longer because of the impregnated phenolic for it was worth it to avoid damaging all the labor I’d put into the seam filling. Cutting phenolic tubing is more like cutting oak than paper.

Now the tube has been slotted to the fins. After they’re completed I’ll do a dry bit of everything. A compressor comes in very handy for eliminating dust after sanding….just remember the goggles and respirator when blowing all that phenolic and fiberglass dust about.

Rocketry

Although I learned a lot about fiberglassing by using it on these fins I’m not sure I’d do it again. Although the added strength is wonderful the work that I went through finishing the outsides doesn’t seem worth it. Too many air bubbles or waves to fill. Not sure how to reduce that and still get a perfectly flat surface. I think next time I would increase the number of fiberglass/epoxy layers within the fin’s layers, then stick with sanding sealer on the outside of the plywood. Here’s a few more shots of spot filling the surface of the fins and primer, gradually getting the smooth surface I wanted.

After one last coat of primer I’ll hit them with some wet sanding at 600 grit to prep them for final paint.

Rocketry

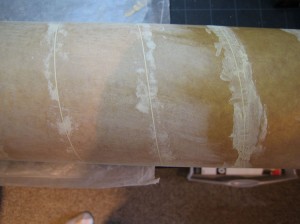
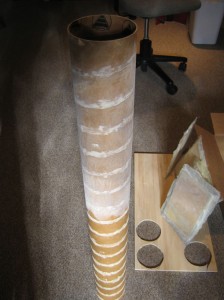
Filling in the PML phenolic body tube spirals is definitely the most tedious part of this project. Three successive passes each of filling, sanding, priming to get them nearly seamless. I say “nearly” because I can still see them if the light is at the right angle. I will definitely try Quantum tubing next project if for no other reason than to avoid this labor-intensive process.

Pics of each pass getting gradually smoother. Also more squadron putty for pass two on the seams and injection points on the nose cone….

Rocketry

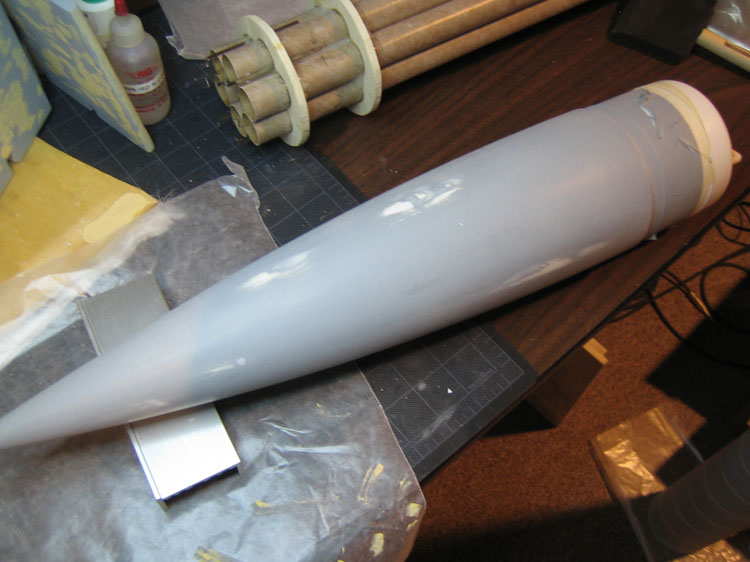
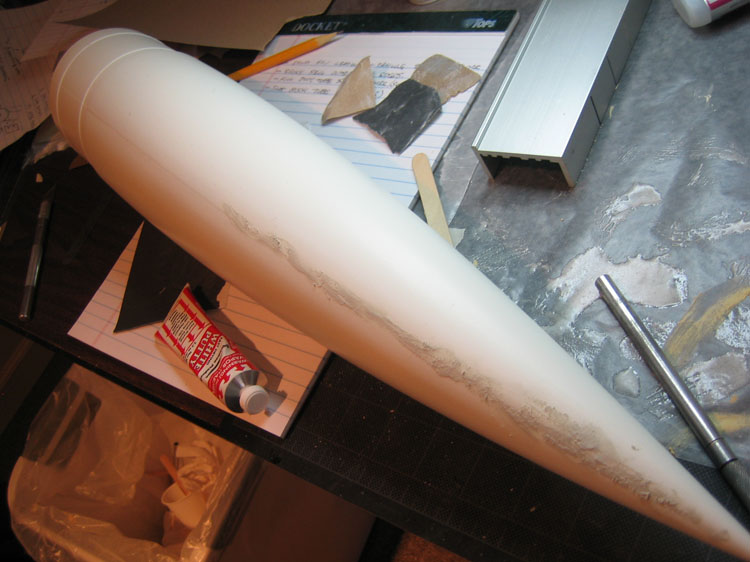
The PML 16″ nose cone arrived with quite a few flaws–seams, grooves, injection dimples…and a ding from a surprise driveway bounce.  Time to break out the squadron white putty and go to work. That stuff dries (too) fast so you need to work quick. It also dries harder than stone which makes sanding into a workout.

Rocketry

Now that the fins have fully cured I cut them down to size with a jigsaw and a fine plywood blade. Because of the fiberglassing I wore goggles and a respirator. It’s tough to work when your covered from head to toe but it beats getting fiberglass dust in your lungs and eyes. That stuff makes drywall dust look course by comparison. It gets into EVERYTHING. I keep my shopvac pointed at the saw blade while I cut to minimize floating material in my shop.

I half-rounded the leading edges and squared off the trailing, root and outer edges with a sanding block with progressively finer grains. I then brushed a thin pure epoxy coat onto the freshly cut leading, trailing and outer edges and allowed it to soak into the raw wood before sanding. This will seal the outer edges. I won’t do the root edge until the fins are mounted so that the raw epoxy will soak into the wood for a better bond.

The fiberglass and resin made the fins very tough and difficult to sand. I’d like to try a stress test sometime with some scrap to be sure but I’d guess offhand that the fins are at least 5-8 times stronger than bare wood.

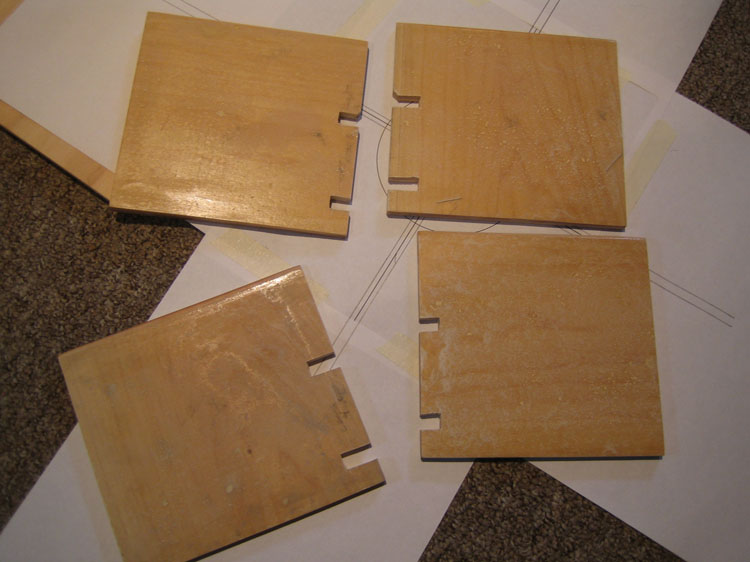
The last Cobra’s fins were epoxied onto the outer body tube. This model’s body tube will be slit to allow the fins to be mounted “through-the-wall”. They will be fiberglassed directly onto the motor core. The notches in the fins allow them to mount over the motor mount’s 1/4″ plywood centering rings within the body.

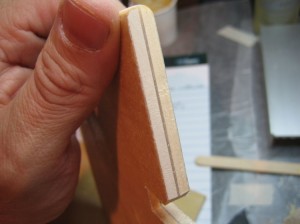
The fresh-but edges of the fins clearly shows the glass-wood-glass-wood-glass layers. It’s a heck of a lot more work than the old balsa fin days!

Rocketry

After sanding the filler, two coats of primer and sanding again the spiral grooves were better but still visible. Time for another coat of filler. This is a very tedious process that reminds me of rotoscoping. I can do about one inch per minute so a four-foot, four inch diameter body tube takes a while. Time to turn up some tunes and get in the zone.

Rocketry

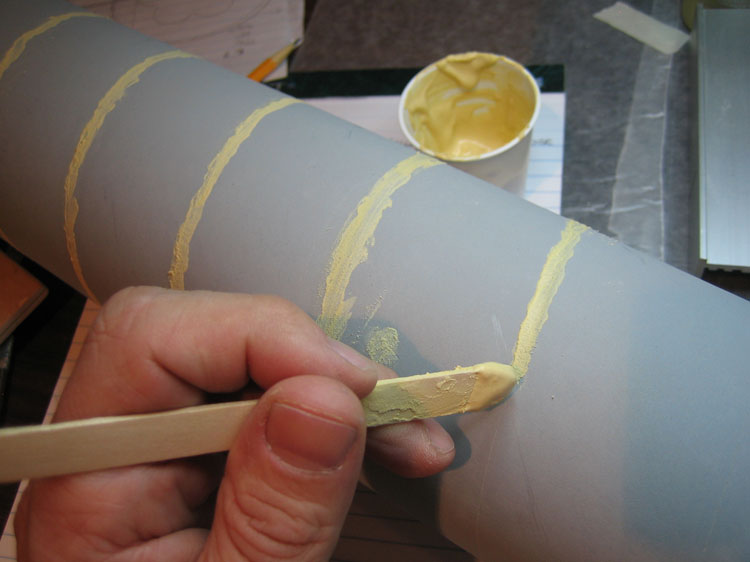
I don’t think we ever even though of filling the grooves in body tubes when we were kids but nowadays it’s standard operating procedure for a good finish. The main body four-inch phenolic tube has spiral grooves in it you could drive a truck through.

Filling them with a 4:1 mix of Elmer’s Carpenter Wood Filler and water works well. VERY tedious to fill these with a stick, then sanding them down lightly, repeating the whole process two to three times. Lots of dust, too.

Now it awaits some primer to really show off the flaws.

Rocketry

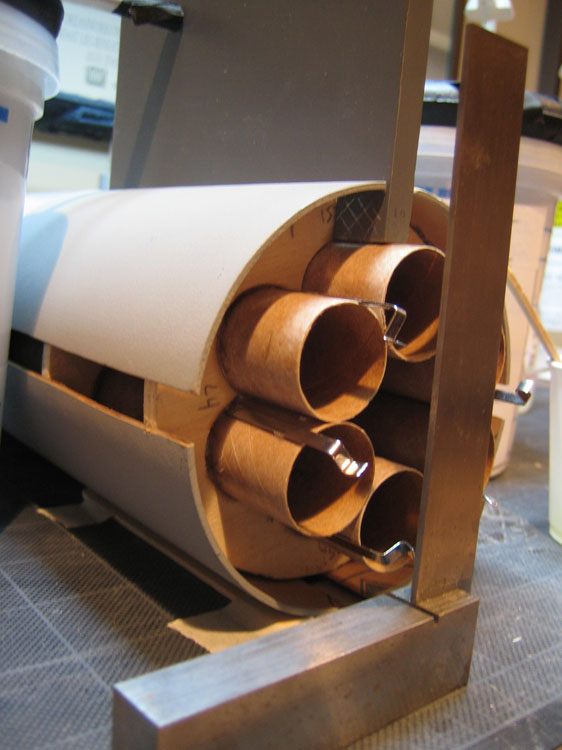
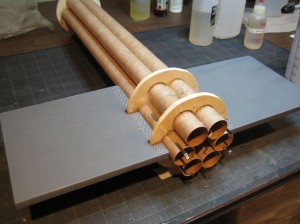
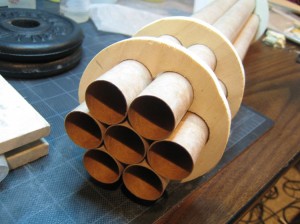
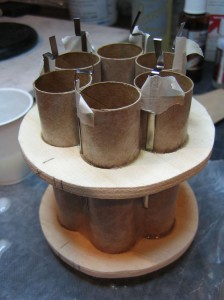
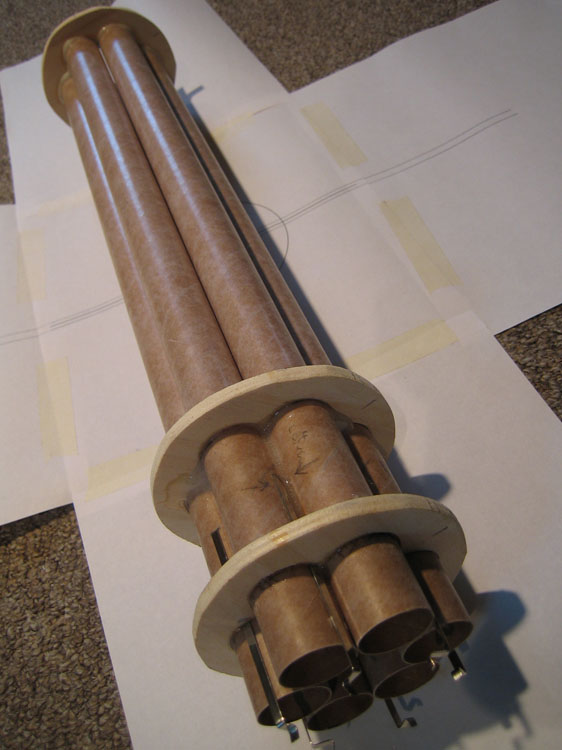
Having settled on a six-engine cluster configuration I began building the engine core. I was also planning on the fins being mounted “through-the-wall” and directly into the core itself. This created a nice little puzzle for planning what could be built & glued first.

I started with the core “short”–that is, just past the length of the engines themselves–so I could work from both sides mounting higher power engine blocks. Later I would mount the ejection charge extensions and fins before mounting the completed core into the main body. The inner seventh engine tube is just a space-holder to keep the outer six in place while the epoxy cures–then it can be removed.

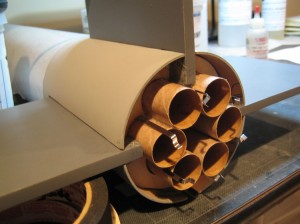
After cutting some 1/4 five-ply centering rings and dry-fitting everything I epoxied the core together. I used expended D-Engine slices as heavy duty engine blocks in addition to engine hooks to hold the engines locked in during ejection. Then a second pass of epoxy fillets thickened with Cabosil to keep it from running. After the fins are finished and epoxied to the engine core I will add heavy fiberglass and epoxy to strengthen the whole core mount.

Here’s the completed motor mounts awaiting fiberglassing for added strength when the fins are mounted to it. Can’t wait to see this puppy loaded with six E30s!

Rocketry

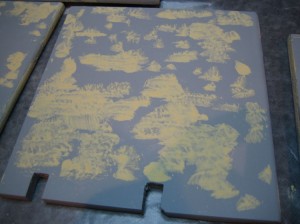
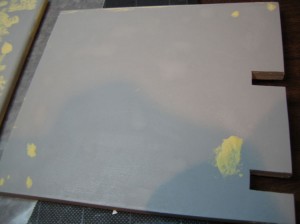
During curing the surface epoxy developed two problems: Irregular surface dent from large bubbles between the epoxy and wax-paper protection layers, and micro-bubble pinholes from the plywood and fiberglass cloth degassing. Here they are highlighted because they are full of fiberglass dust after a light sanding.

I’d encountered degassing resin problems before while building my Arc Reactor prop and new that there was only so much you could cure with higher temperature epoxies and curing. Since this surface was to be painted I would deal with it post-cure.

I experimented with Cabosil-Aerosil thixatives and epoxy but found that an epoxy-based filler was far too hard to be able to sand down without damaging the existing epoxy finish down to the fiberglass cloth. I guess this is why we test on scraps.

I’d planned on using Elmer’s Carpenter Wood Filler as a patch for the body tubes and thought I’d give it a try here.

Worked great! Takes two or three passes of filling with a popsicle stick and sanding with very fine sandpaper. A mix of 3 parts Filler with 1 part water softens the filler enough to “flow” into the finer bubbles….but they do have to be filled individually. Too much filler on the larger surface means more sanding and that means risking sanding down to the fiberglass cloth and ruining the fin.

Rocketry

My original cobras were tested the old-fashioned ways: you measured for center of gravity and center of pressure then “flew” the rocket at the end of a rope around you like a sling to test it’s stability before flight. THEN you launched and hoped you got it all right. Well now we have simulation software that lets you build and test your rocket before you even hit the hobby shop for parts. RockSim is a really nice simulation program and I used it to flesh out my designs.

Once I proofed my new design and had some simulation data to work with I settled on an engine configuration that could handle six D12s, six E9s or six E30s. I could probably jam in six F60s but that might be pushing it’s stability because of the extra engine length. Besides, big fields are harder to find now than when I was twelve years old.

First, fins. Although it worked well for my original Cobras, old-time Balsa wood is out of the question for this size. Some type of enhance composite was required. I had never done epoxy-base composites before so though I’d give it a try. New techniques keep my interest better. I experimented with carbon fiber, kevlar and fiberglass a bit to test some ideas. In the end, fiberglass was the most cost effective method and more than strong enough for this thrust class. Carbon or kevlar would be necessary if I get into the H engine and higher classes. Besides, they cost 4-10 times as much as fiberglass.

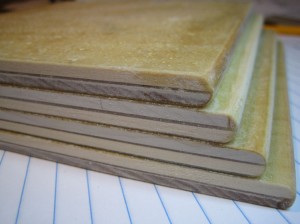
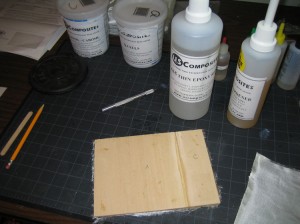
After doing some strength testing for a few weeks I settled on a five-layer plywood & fiberglass composite fin. By laying out the plywood layers with their grain perpendicular to each other I was able to increase the strength of the fin many times before even introducing the fiberglass layers.

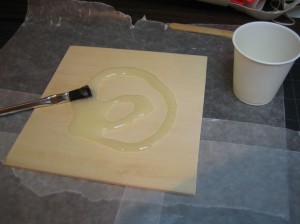
I sandwiched a layer of heavy fiberglass cloth in epoxy between the two perpendicular grained, 1/8″ three-ply plywood bases.

This gave a very strong core for the fins.

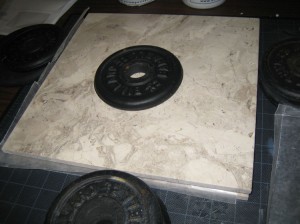
Now for the outside. I layers a medium density fiberglass cloth in an epoxy soup with Q-Cells to make the layer softer to finish. Not enough to lose structural density–just enough to make the outside easier to finish sand. I sandwiched all the layers between two marble floor tiles–the smoothest, least likely to bend material I could find–and weighted them for 48 hours to cure fully.

Lost a test set because I didn’t realize that the epoxy lubricated the layers enough for them to slide out of alignment during the night even with weight on them. Learned a lesson–lock everything down tight!

The finished product is a lightweight, incredibly strong fin. But the finish left a bit to be desired.

Rocketry

In 2011 I got the itch to fly again. I’m hoping to get my nephews out next spring for some flying so I decided to revisit the Cobra design. I think she’s still in my storage room…..

Well, she’s a little dusty and has plenty of dings (character!) and cobwebs but is still flyable.

OR…. I could build a better one with more power!

….Time to experiment with some newer building techniques first.

Rocketry

I think I launched my first model rockets when I was around eight or nine years old at the local school fields. I remember my younger sister molly riding in my wagon as we hauled it and my fleet out for flight. She would chase them down as fast as I could launch them. When my other sister and brother were old enough they would accompany us as well. The early fleet was half store bought and half homebrew.
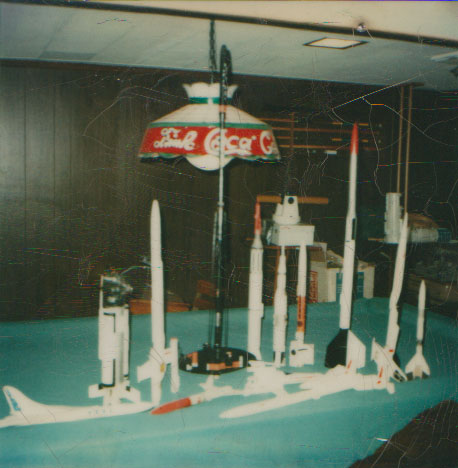
Polaroid! Those who remember Estes might recognize the SkyDart, Atlantis, Condor (sans Glider), Andromeda, Orbital Transport, Interceptor, Photon Disruptor, Mini-Saturn V, Mini-Beta (that was my little brother’s) X-Wing and Mercury Redstone. Also a homemade 110 Titan IIIc camera rocket I had worked up with Tony Campana, another bud. This was the fleet in January 1976. I took a lot of flack for painting the Photon with house paint. Hey, it was cheap and handy!

In Junior High I met Mike Aprile, Brian Hebel and Paul Candel with whom I would launch a lot of rockets. Between the three of us we flew anything Estes or Centuri made. Heilmann Park in Detroit was our field and the trees around that park probably still contain many of our birds that never made it back into our hands!

I entered the state competitions a few time back then and snagged a few ribbons. My dad would drive me to Ford Field for state matches and to watch the R/C Airplane competitions. He drove me around a lot for those things and always pushed me to enter those and join rocketry clubs and such and because of him I learned a lot.
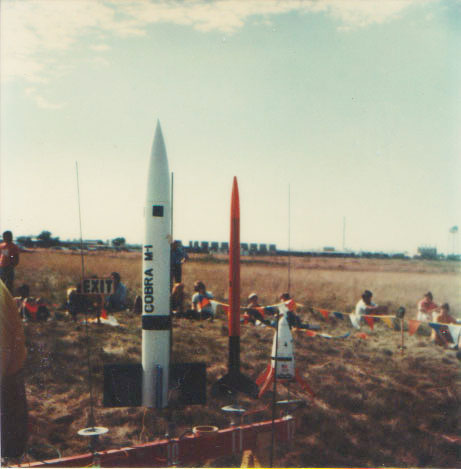
I first saw the Cobra M1 missile in 6th grade in a military book. It was a four-inch diamter, four foot long anti-tank missle. I decided to build one in 1980 that was full-size, the actual size of the real thing. It used a D12 engine and gave a nice, slow, low flight at the state meet that year. I was mighty proud of it. This design became a foundation for me when trying new build techniques in the following years.

The same year one of the advanced rocketeers introduced me to medium/high powered rocketry…..WHAT? You mean there are engines bigger than an Estes D?! I’d never heard of such a thing! I was an E flight that year, and F and a G engine! I was stunned by the power of those things! The next year, I refitted my Cobra for an F100 and flew it at the state meet. However, I wasn’t prepared for the thrust the F100 could put out and it ripped the guts out of the Cobra. That was when I learned that Elmer’s Glue and Balsa were not up to the task.
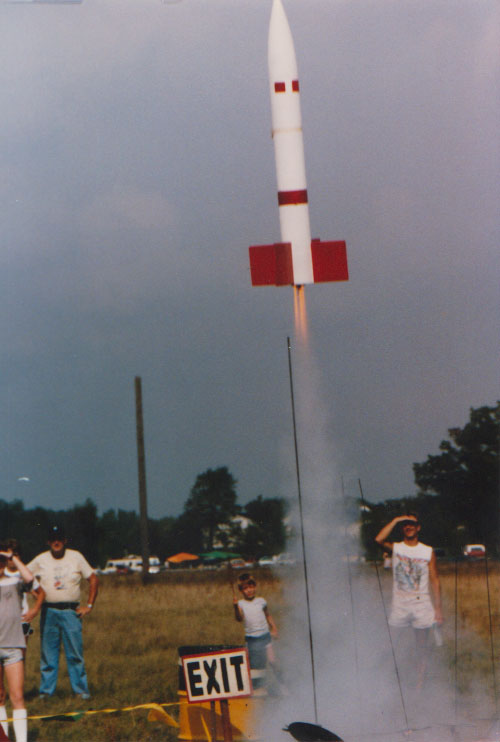
In 1985 I built a new cobra using a three-D12 cluster (F100 engines were expensive!) and got several excellent flights. It was a good crowd-pleaser because it made lots of noise and flew slow enough to watch the exhaust. On it’s last flight I had a an engine core blowout and the remaining engines couldn’t eject the parachutes. After a nose dive from 900 feet she smacked the ground hard enough to wake the prairie dogs.
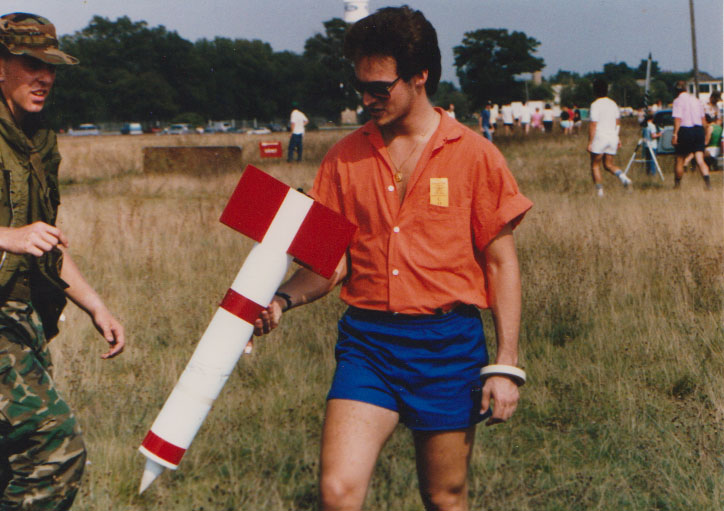
“What the heck went wrong?”

After repairs and a fresh coat of black paint she flew several more times before retiring to storage.
Rocketry