 (Originally started and written in Sept. of 2014, this entry has been updated to reflect the current changes as of December 29th, 2020)
MillDroid CNC is an application written myself to perform CNC Control of my Mill and Lathe. Why would I do that when there are other existing applications out there for CNC? A bit of history may help….
I’m purely a hobbyist when it comes to metalworking. Coming from an editing and visual effects background as I do computers are a very natural tool for me. Programming them is second nature. I’ve been writing code for over 40 years be it flipping toggle switches on a breadboard or typing into a text editor. When I decided to get into metalworking it was only natural to apply my computer skills. I bought a Sherline mill and played with it manually for several months to understand the processes involved in metalworking. Later, I bought some stepper motors and a Gecko G540 driver and built my own controller to run it while converting the Sherline Mill to full CNC. The CNC Software ‘standard’ out in the world seemed to be Mach3 for software control so I purchased it and started making chips.
After spending the better part of a year using Mach 3 on my Sherline CNC Mill making small parts I grew more frustrated. I’m sure that plenty of people are able to work with the antiquated Mach3 software and do fine work. Those same people might not mind the frequent freezes and crashes. Perhaps they don’t write a lot of customized code so it works for them. Perhaps they are fine running on an antique operating system or machine that is very old as Mach 3 required. Perhaps they are also fine with the integrated, incredibly buggy and horrible excuse for a “macro” programming language that is Mach 3’s Cypress Basic.
I am not one of those people.
Bad user-interface design and choices are among my pet peeves, especially when they are never improved upon for “legacy excuses” such as “people are accustomed to it” or “the codebase is too old”. I’ve seen and used (and written) a lot of bad software over the years and consider myself an expert on the subject. If it is buggy or badly designed, I fix it.
I also got tired of waiting for the long-promised, improved version of Mach 4 from Newfangled Solutions. I had been hearing about this updated version for several years and how it was “right around the corner” (their words, not mine). It was going to support Visual Basic Scripting, a much better alternative to Cypress Basic and LUA (a poor choice of a scripting language in my opinion). Why ANYONE writing an application today would chose something other than dotnet or Python (if they require multi-OS support) is beyond me. When Mach 4 announced that it would only support LUA (if it ever shipped) I decided I’d had enough of them. For me, it was time for a better and more flexible CNC application. As of 2014, Newfangled Solutions has announced a Pre-Release, PreBuy Hobby Version that still has no motion control. Ok, right.
I had already built a stepper motor controller system based around parallel port output to a Gecko G540, a fine device. I decided to augment it and move away from the computer’s parallel port connection at the same time to allow for more modern hardware options such as USB and newer OS versions. I discovered Dynomotion’s KFlop boards online and began researching them.
I will say that rarely have I encountered a company with as good support as Dynomotion. Tom Kerekes at Dynomotion read and answered my many emails for information in a timely fashion. Best of all, the software for the KFlop board that they sell, mainly written in C++, included a Dot Net library for access by modern managed programming languages such as VB.Net and C#. Net. I purchased a KFlop and began experimenting. I was now able to use a modern computer and USB interface to communicate with the KFlop, which spoke to the Gecko G540 to drive my stepper motors for the mill. It is now six years later and the KFlop remains rock solid, with great support and one of my best purchases.
There have been a lot of good things said online about the KFlop and how smoothly it manages steppers and I agree with them 100%. Motor control is much faster (too fast, in some cases but easily adjusted) and smoother. It even “feels” better and that isn’t something I can easily describe–the motors movement feels less choppy. The KFlop system is not without some issues. Documentation is the weakest part of the KFlop system and Dynomotion seems aware of this. The docs are a bit “spread out” and searching for something can be a bit difficult. The .Net library documentation is a bit rudimentary (example code really should exist in the documentation) and adding more simple example projects would help a lot. There are a few C#.Net and VB.Net example programs and they help, but they are very specific. Despite this the overall value of the hardware is fantastic.
If you are going to program the KFlop, Dynomotion includes their complete CNC application and it’s source code, called KMotionCNC. It serves as a pseudo-replacement for Mach3 running GCode. If you are an experienced CNC person much of the system is understandable. If not, it takes some time to figure it all out. What I was planning required using C++ code that you then compile and download to the hardware to set motor preferences and settings but I later figured out how to bypass this with 100% managed code. Once I was over the initial hurdle of understanding the system and getting motors moving, I set about designing my own custom CNC software.
Phase 1 was to learn the KFLOP hardware itself. I breadboarded the KFlop to my Gecko G540 to make it easier to figure out the IO lines of the board and make changes as I attempted to control my Gecko G540. I then built an enclosure for the KFlop. Done.
Phase 2 was to attempt motor control with the KMotionCNC software of my Gecko and Mill, despite the fact that I didn’t intend to use KMotionCNC.
Phase 3 was to dive into the code for the new application. Here’s where the fun begins. My end goals were
- A multiple window, modern user interface that was configurable and persistent.
- A robust preferences system.
- Extensive error trapping/correction including intelligent saving of parameters in case of a crash for easy restart..
- A DRO module that allowed for “undo-able” changes.
- A Jog/Manual module for the mouse, including keyboard and potential external hardware devices.
- The ability to load, save, edit and run GCode files.
- A CustomTool module for easily adding vb.net code and custom milling. This would be my “plug-in” system for what some call “conversational G-Code programming”.
- Preparation for Backplotting options later by using existing code from my SubSpace 3D digitizing application.
Thanks to Tom’s support at Dynomotion, answers to my questions were never more than a day away. It took about a couple months of spare time to write the code and get it all running. When this was originally written in August of 2014 I had milled several pieces successfully and only broken one end mill because of a bug! But, hey, at least I can fix my bugs! (Note, it is now 6 years later and Dynomotion’s support continues to be great).
I approached the writing of the application by breaking it into the modules I knew I would need. I began with what I call my Skeleton Framework code. This is a UI/Application codebase that I wrote years ago when DotNet first appeared that serves as the foundation for all my applications over the last 15 years. This foundation gives me a non-modal UI with all the library code I’ve written over the years including:
- Advanced Generic Collections
- Application and User Interface persistence
- Common string parsing and handling
- Process and Threading management classes
- Form handling
- History and Undo management classes
- Hot Key management
- My MScript scripting language for startup parameters
Using my existing Skeleton Framework as a starting point lets me skip all the mundane code and jump directly into the fun stuff. It provides the foundation for most of the applications I write for work and home.
Update: Originally titled MillDroid because it was specifically for my Mill, I’ve since added a Sherline Lathe and converted it to CNC. Now the software can control both my Mill and my Lathe, switching between them with a button press. I have updated all the images in this blog entry to reflect updates I’ve made to the application over the last few years.
I started the application design by blocking out the User Interface into the following modules and began building them:
Note that I have updated these UI images as I have improved the application over the years.
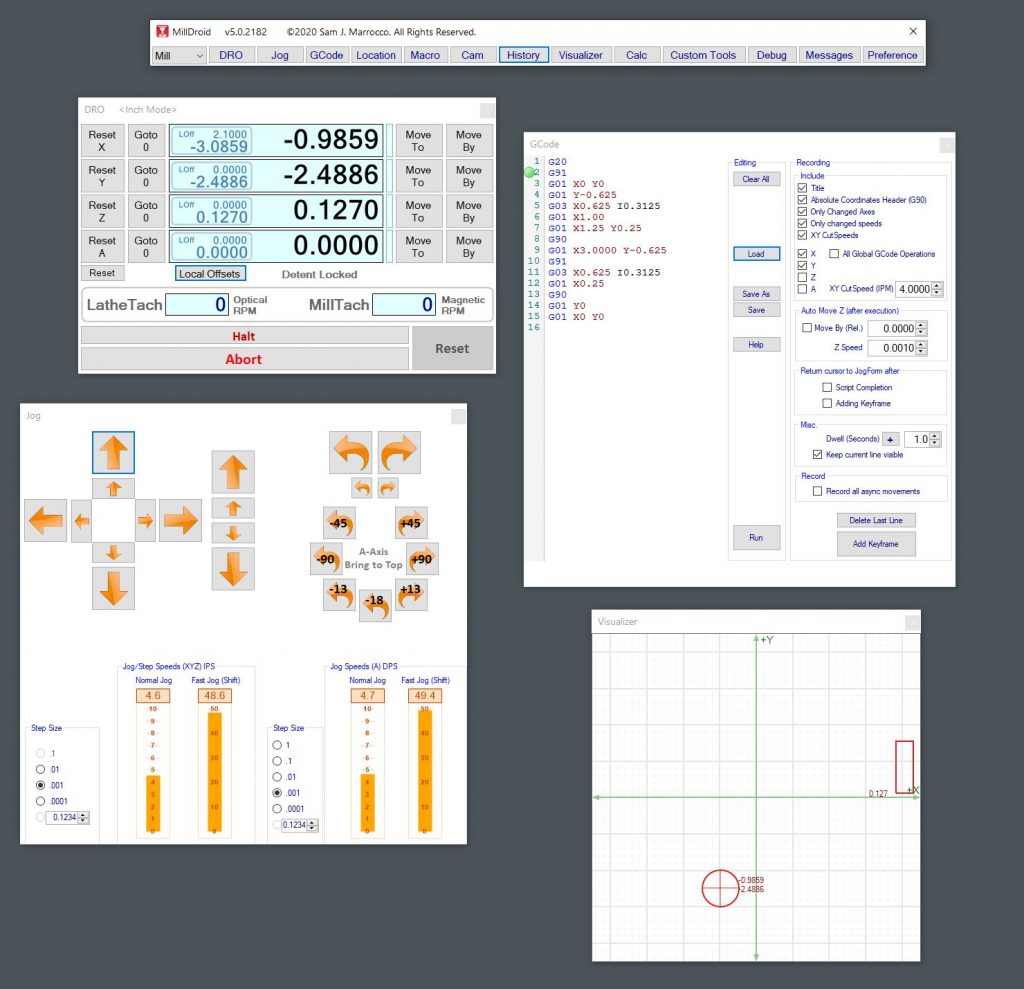
First, the Tool Form, from which all other windows are launched. This is the center point or hub for the entire UI.
After the Tool Form, every form can be made visible or not and positioned anywhere on the screen and persisted. This makes your UI as configurable as you monitor size allows. I use a 30″ monitor in my shop and like to have everything visible on screen.
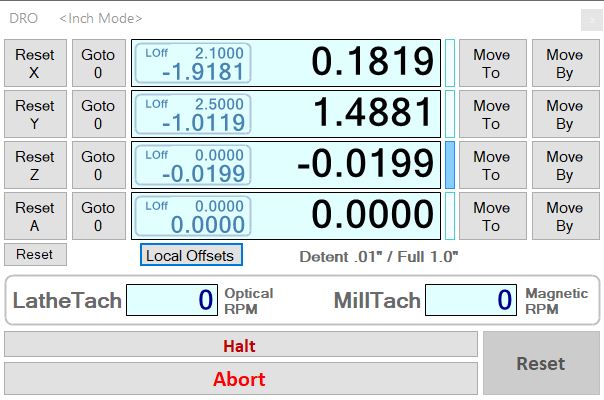
The DRO Form to display location data and allow changes to the data. It also provides functions for quick navigation and movement on the Mill and Lathe. Both my mill and lathe now have magnetic tachometers that provide pulses for the system. The Lathe also has an optical encoder that I built for spindle speed and threading functions that require tying it to the other motors. It also shows local offsets (if any), translations of machine space and information on my Pendant Hardware for full manual operation of the motors when needed.
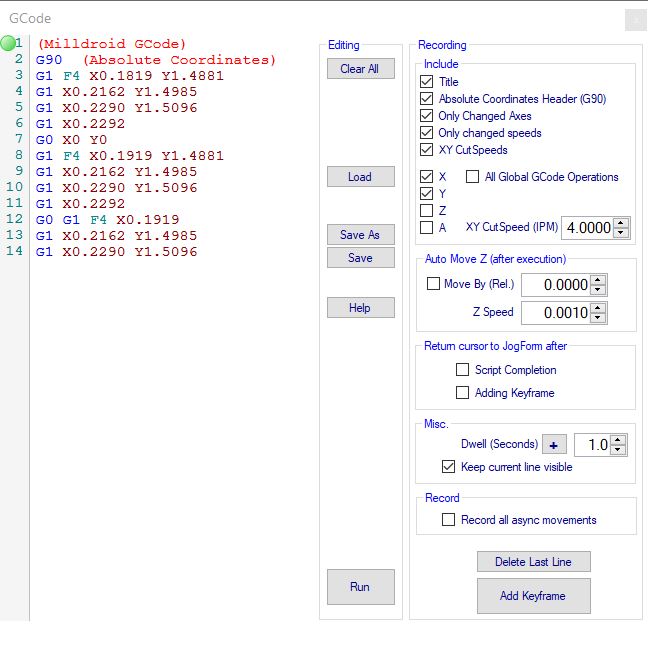
Next came the GCode Form for editing and running already prepared GCode. This allows me to edit GCode manually and contains a recording mechanism for auto-creation of GCode. I can jog the mill or lathe around manually or with the pendant and add key frames at any time, recording everything or only changes in certain axes depending on my needs. A nice addition that allows a building GCode for future use from operations done manually.
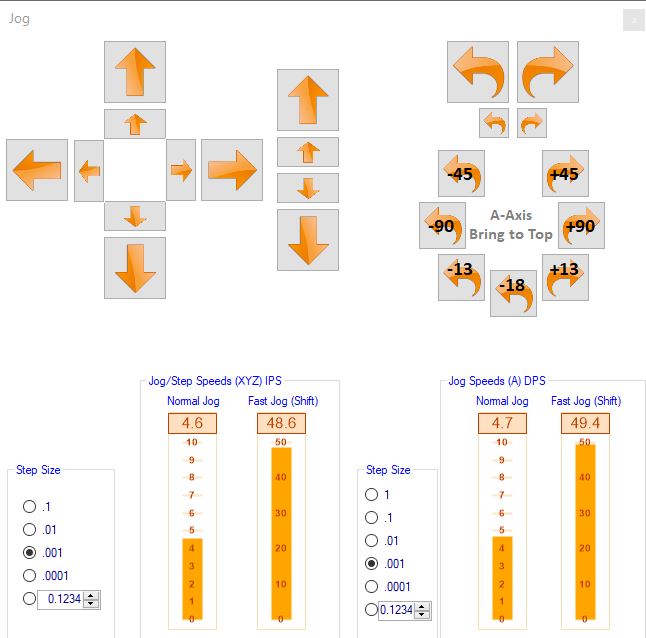
The Jog Form, for mouse and button manual control of the mill and lathe. All the buttons in this form can be accessed by hot-keys such as the cursor buttons, or an external device on a USB port. I used a Griffin Knob USB wheel for a while but they stopped supporting newer OSes and it was a bit laggy. That led to the development of my pendant box (see MillDroid Pendant elsewhere on this blog for details). I added a few macros for my rotary table control for functions I find myself using often. All jog or step speeds can be changed as well.
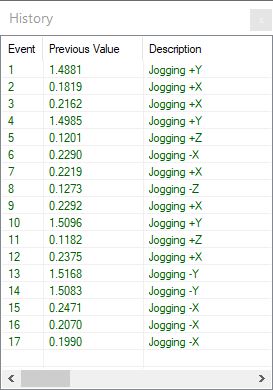
Between the DRO and Jog Forms there are plenty of ways to move the axes manually, but what about when I make a mistake? Ever move an axes then realize that you shouldn’t have? Now you have to figure out how far you’ve moved off course That’s what this History Form is about–it records every change you make anywhere in the application and displays it for you. A true Undo would be far too dangerous on a motion control device, so this lets you see what you did, then copy and paste the old value where you might need it in the DRO. Much more flexible than straightforward Undo/Redo functions.
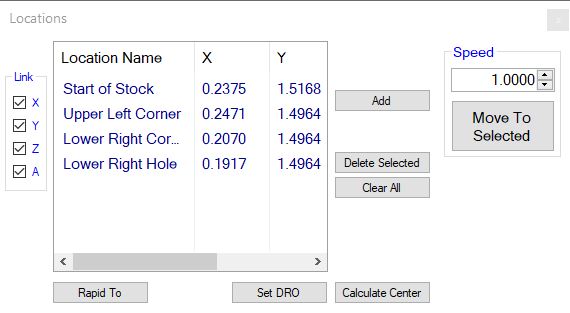
The Locations Form to allow quick movement and recall of positions on the mill and lathe. I can record current positions of the mill for any or all axes, then move between any of those stored positions quickly at rapid or cutting speeds. Notes can be added to each location to help when human memory fails. Think of this as ‘bookmarks’ on the mill & lathe that can also be used for straightforward cutting operations.
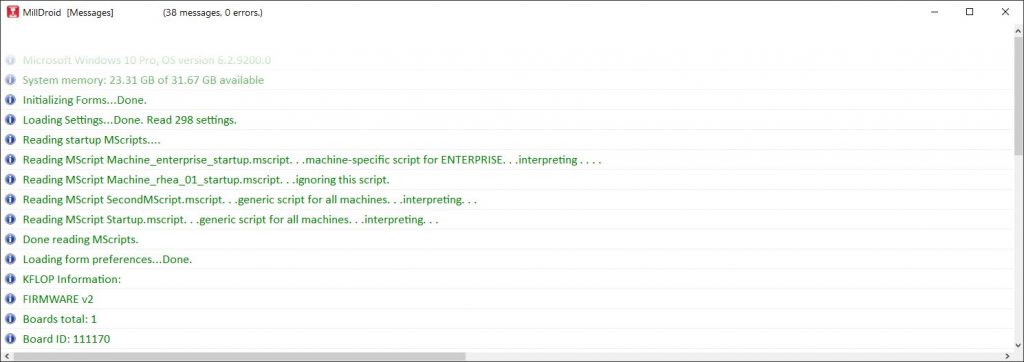
The Message Form provides feedback from the application. This is where general message, warning or errors are presented so they can be logged, without bringing up an application-halting dialog box. It’s proven handy for later review of debugging issues also.
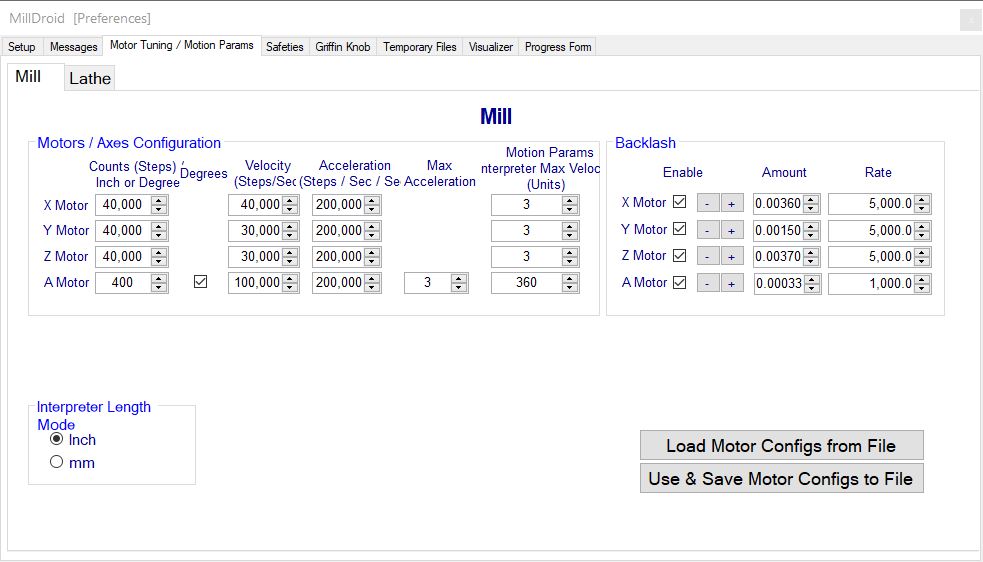
The Preferences Form for the default settings on the application. Every setting in the application can be changed here. The most complex is the Motor Tuning/Motion Params tab. Since multiple preferences can be save/loaded, I have some very fast motion settings for testing and everyday settings I use with safer motor speeds that are more appropriate for a mill/lathe of my sizes. It’s nice to be able to switch quickly between them.
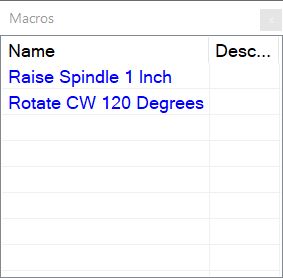
This is the Macro Form. A folder is parsed at startup and a macro “button” is shown for each script. This allows quick additions of little GCode Snippets that can be accessed quickly.
This is the Visualizer Form. It provides a simple view of the mill or lathe cutting tool and stock locations. It isn’t very elaborate, but it helps when debugging or working on my code when I’m not actually connected to the mill.
A simple Debugging Form lets me see which threads on the KFlop hardware are running C-Code.
CustomTools are my “plugins”, or options for what “conversational gcode programming”. These plugins are modules with user interfaces that make it easy to perform complex operations for which you don’t want to write repetitive G-Code. They are grouped into Mill and Lathe Custom Tools.
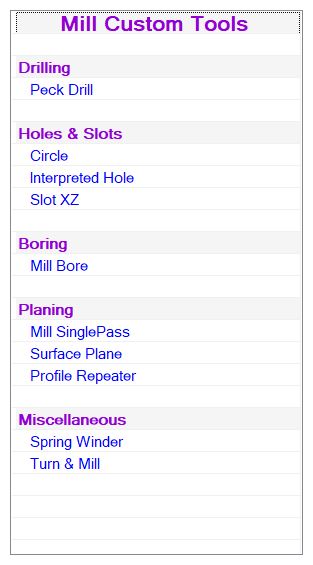
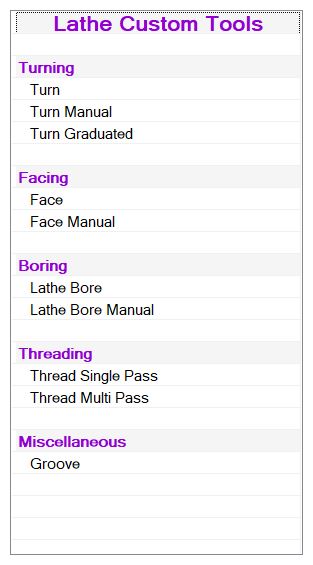 Programming-wise, there is a Base CustomTool Class, which is inherited by each of my custom tools. It takes only minutes now to write a new CustomTool and I have many. CustomTools give me the option of starting anywhere in their cycle in case I need to redo something. Each has an accompanying help file. They can also output their commands to a G-Code file log for later re-use. A Last Pass Alert plays a tone (and voice) and shows a Dialog box awaiting a continue order before a finish pass is made (if desired). This lets me decide if I want to increase the spindle speed or decrease the table speed for the finish pass–very useful when flycutting or performing other finish cuts. Most support spring passes if useful. I often like to add a little cutting fluid and increase the spindle speed for a better finish on the last pass and this keeps me from “missing” the chance on a long-running operation. I can also chose to repeat the last pass as many times as I like. All CustomTool setting can be saved to files for later use.
You will notice that some of my CustomTools, such a PeckDrill, perform operations that can also be done with GCode. Sometimes I like to write my own custom tool for an operations just because I want to understand the process better; other times just because I wanted some added flexibility or control.
All CustomTools have an accompanying ProgressForm. It allows modification of the functions all CustomTools have in common, along with starting/restarting and monitoring of passes, their elapsed time and prediction of completion. The Progress Form allows start or end on any pass, previewing the cuts, graphing the pass depths for debugging and listing of all the passes. Handy for preventing accidental crashes.
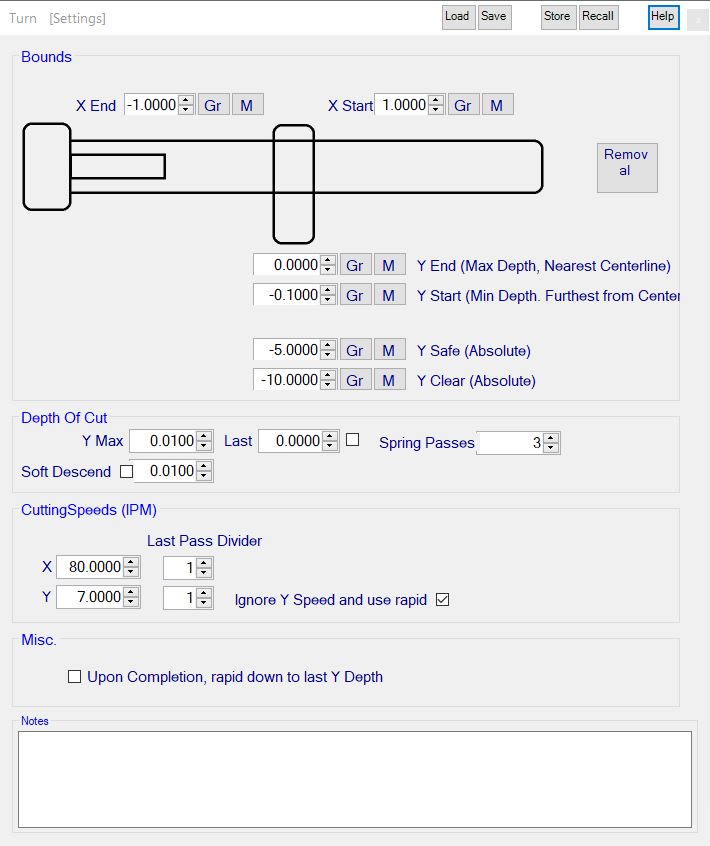
One of the more useful CustomTool plugins is Turn. Set the start and end, beginning of cut and depth of cut along with some other items and lathe turning/stock reduction become fast and easy. Most of the CustomTools support similiar options, including notes, what to do upon completion and the ability to load save settings and transfer them into a buffer for use in other CustomTools. Built it help is available as well for each tool.
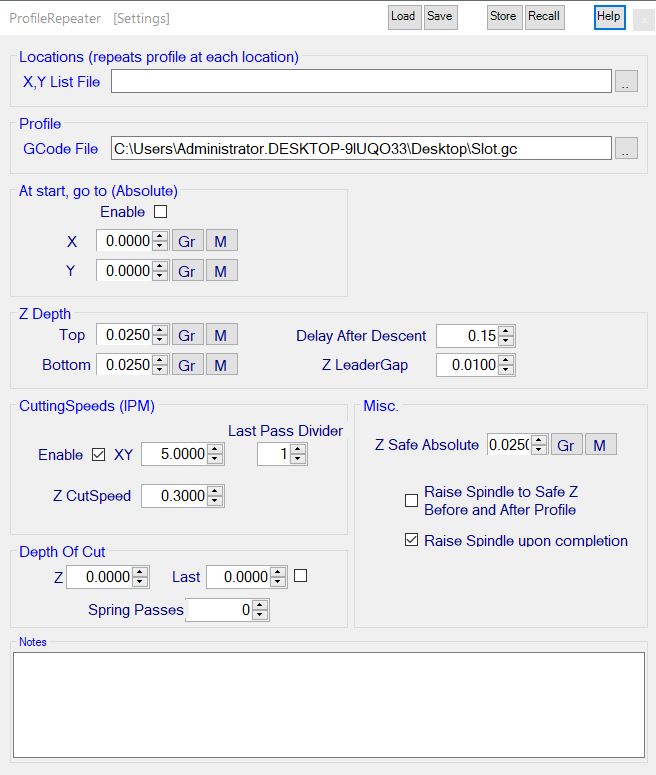
The ProfileRepeater CustomTool takes a G-Code file and repeats it over various depths. Lots of options to play with here including repeating the profile in multiple x and y locations for multiple parts builds.
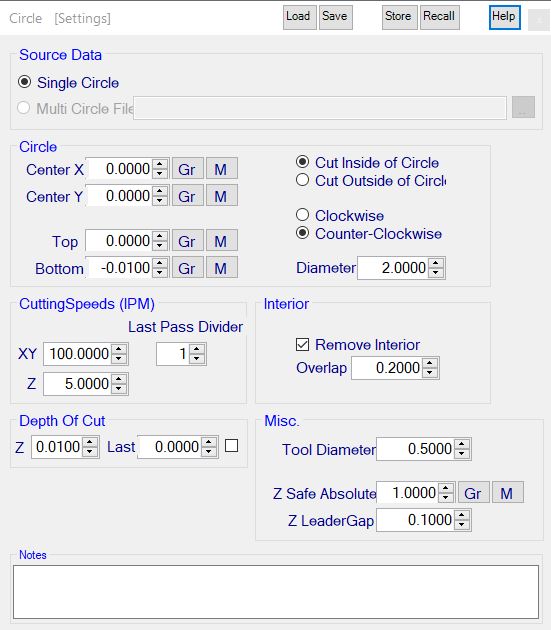
The Circle CustomTool cuts single or multiple interpolated holes (circles), removing the plug or all of the stock within the circle. Good for generating all types of circular holes. Again, plenty of options with which to play.
I’ve recently added CustomTools for internal and external threads, part arrays and boring operations. Some days I spend more time writing interesting tools than making parts, but that’s what keeps it interesting! I’m now working on a g-code backplotter to visualize all the work before and while it happens.
I used the alpha and beta phases of my MillDroid software to create a bunch of additional hardware tools for my mill and bandsaw. Like most of my code writing projects I’m continuously adding features and the apps become dynamic projects, evolving over time as my needs change. Now that the code has matured past the release phase, I can use it daily, confident in its stability.
I now have over 30 CustomTools written for the application.
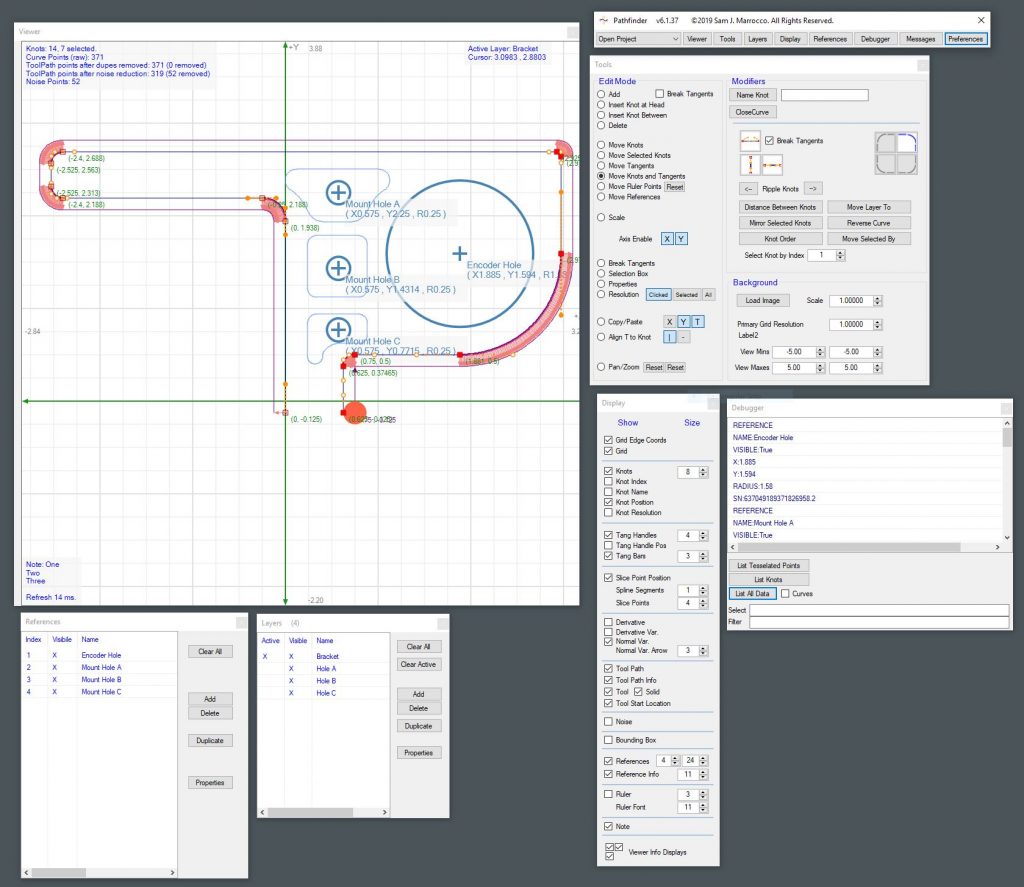
The Curves CustomTool started as a quick drawing tool for milling directly from a drawing or sketch. Like most of my projects it snowballed into a bezier curve-based drawing application that I now call Pathfinder. You can find it in the Projects section of this blog, but here’s a snapshot. I now use it to design parts using curves and output GCode directly to MillDroid.
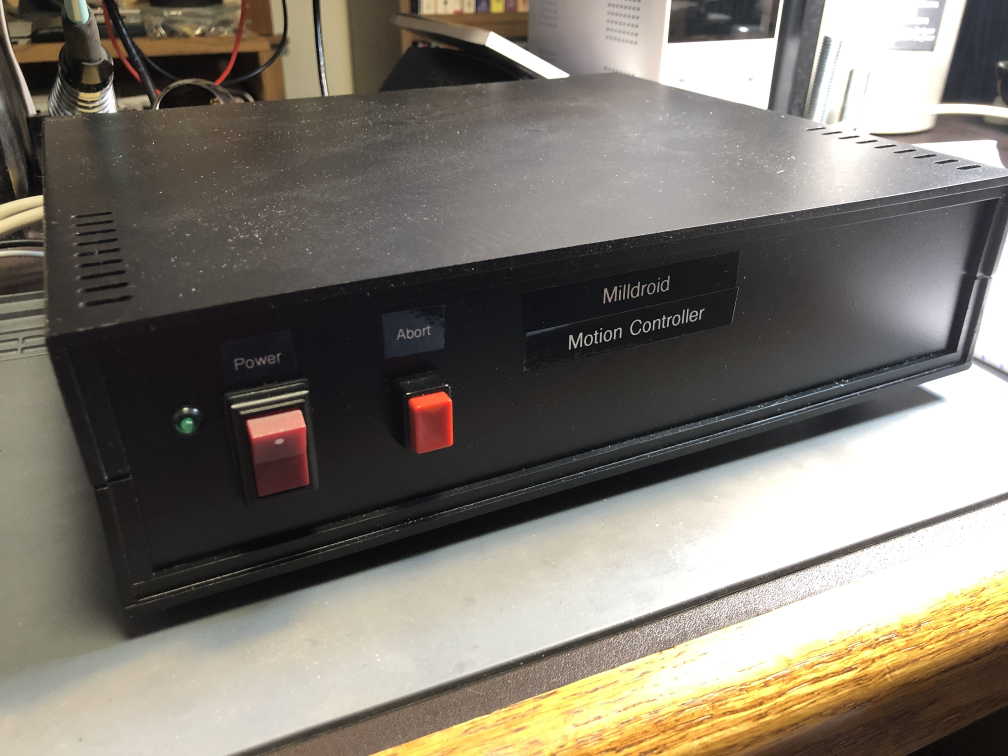
Here is a pic of the original KFlop-based Motion Controller I built for the application:
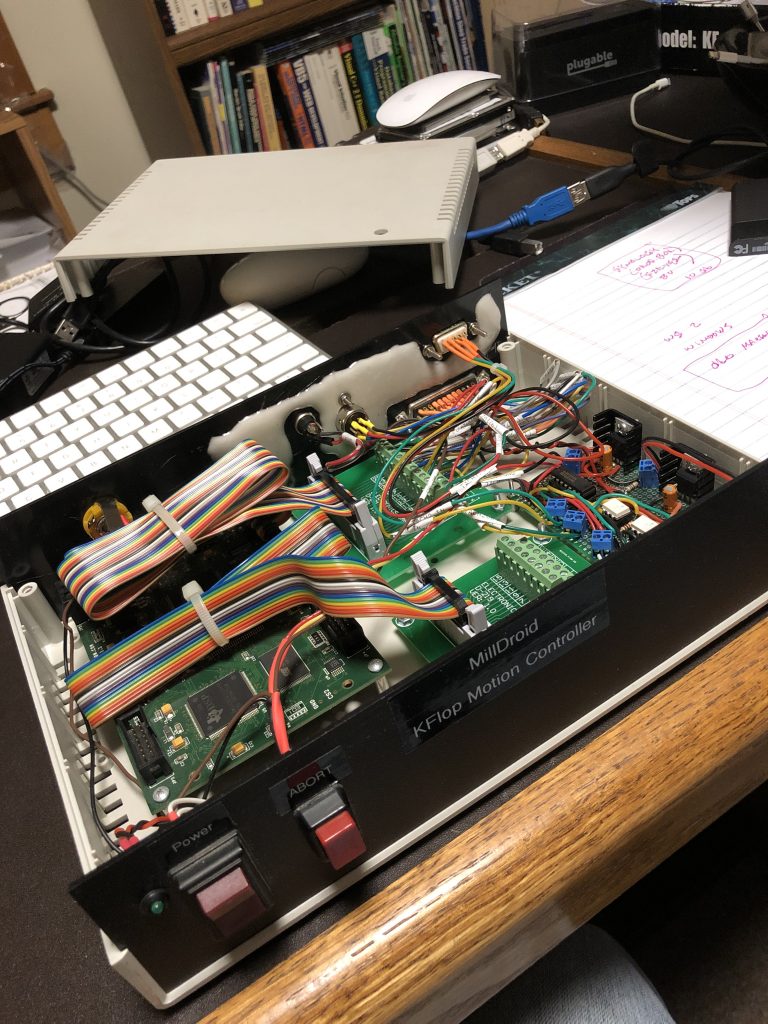 A few breakout boards for troubleshooting and some Schmitt trigger circuitry to clean up the magnetic encoders I built and internal 3.3 and 5 volt power supplies for add-ons. In 2020 I decided to build my Pendant Control for it, but the case was getting a bit crowded for circuitry. I built a new case from Styrene, using the mill to machine all the curves and holes for buttons.
The new KFlop-Controller case. A couple inches wider, deeper and an inch taller gave me plenty of room for new circuitry, including another 32 IO ports for the coming Pendant Control and an external Abort Button. The circuitry doesn’t generate that much heat, but it didn’t hurt to have a few air vents for circulation and they look nice. I may get around to making the Abort Button wireless, but I’d probably lose it into the same other-worldly dimension to which old keys, socks and tv remote controls vanish.
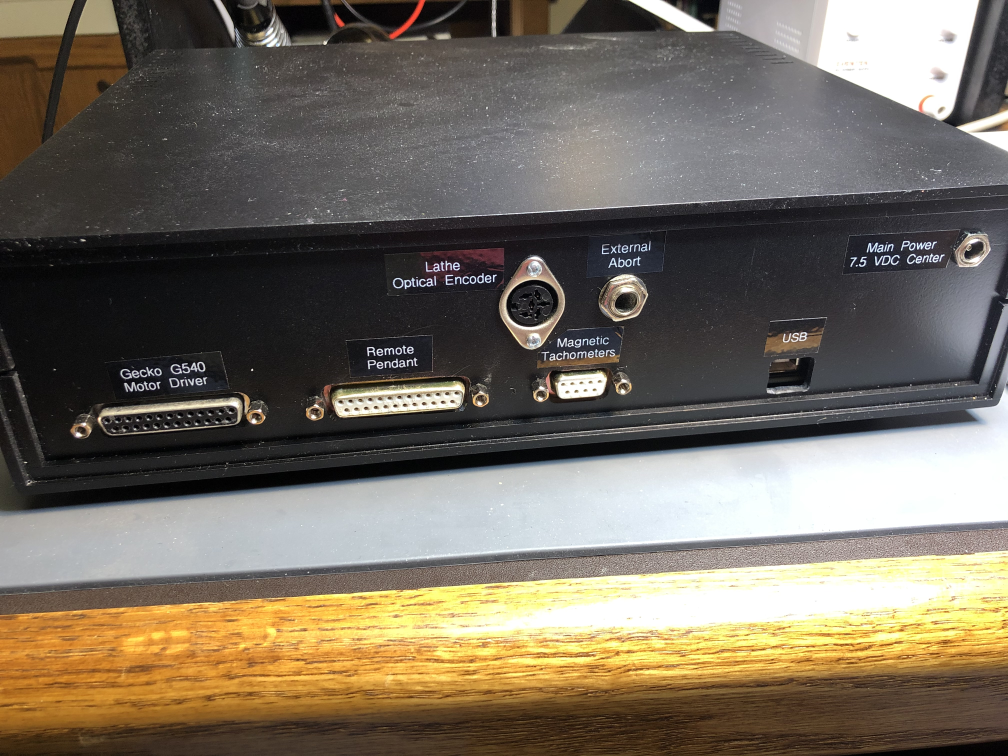 Plenty of external device connections at this stage.
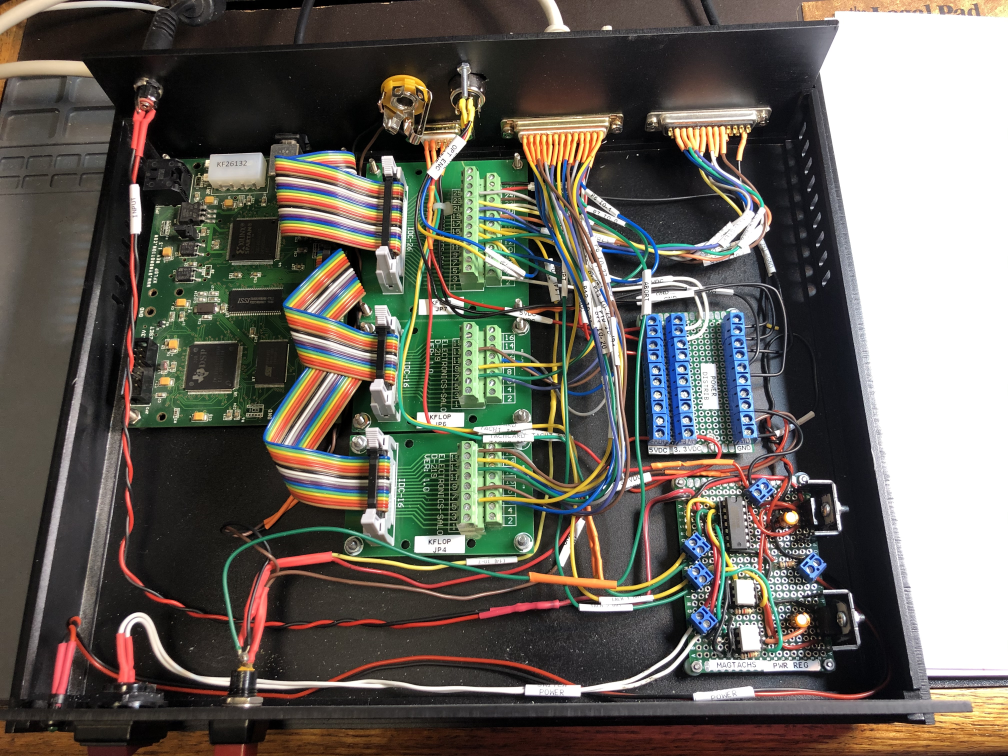 All the new circuitry, cleaned up a bit and still some room to expand later.
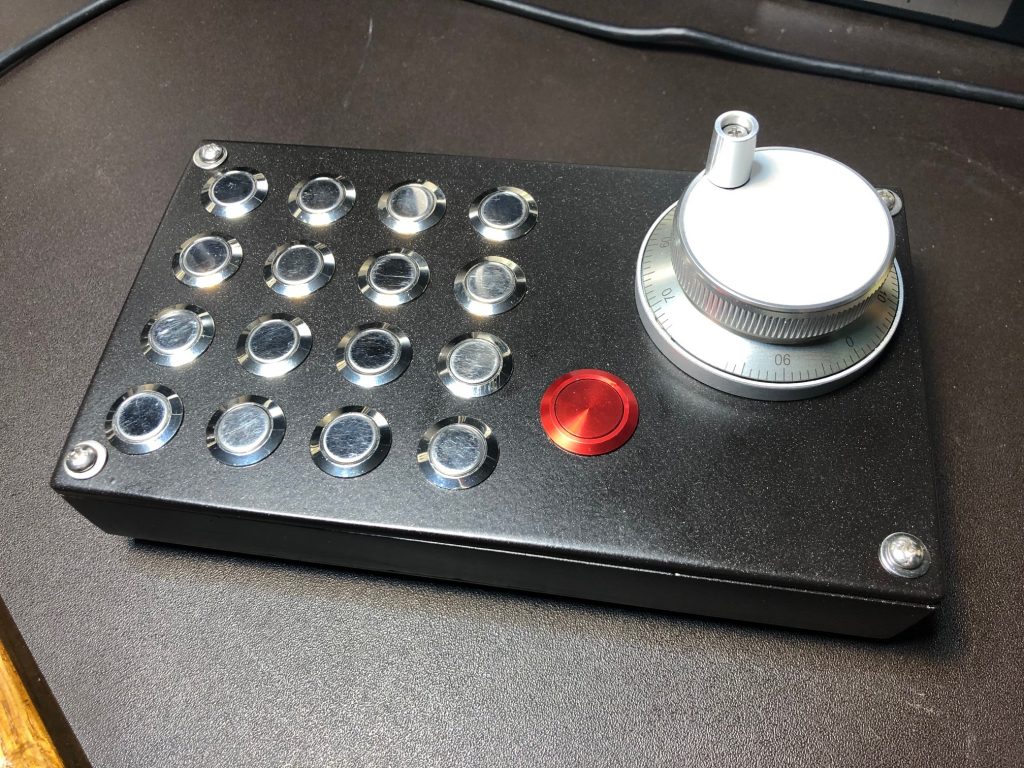
Here is a pic of the finished Pendant Control. Connected by a 25-pin cable, it give me 16 programmable buttons, another Abort Button and an optical encoder knob for precise movement of the mill and lathe without having to use the keyboard and mouse. I should have built this years ago. See the CNC Pendant Control entry on my blog for build details.
MillDroid continues to grow. I update the software almost weekly or everytime I think of something new. A few online sites have scraped my blog pages, leading to a lot of interesting speculation as to its future, availability and other things. Here are some questions and answers for those who care:
Q: Will MillDroid work with controllers other than the Dynomotion KFlop?
A: No. The application is coded very tightly around the KFlop and it’s libraries. It’s a wonderful device and I haven’t found anything elsewhere that is as flexible for programming.
Q: Is the MillDroid softwarefor sale?
A: No. I’ve written and sold commercial software in the past and the limited user base for which MillDroid would appeal does not justify the work that would go into maintaining it for others and support. It just isn’t worth it either from a time or financial standpoint.
Q: Is MillDroid’s source code available or open source.
A: No. I wrote this code for my use, to solve very specific goals I had, and in the manner in which I like to write code. Its limited user base, specific hardware needs and programming language (mainly VB.Net and some C and C#) make it a very niche application designed for programmers that like to modify their applications. If you want to write your own app I’d be glad to offer suggestions; just check out the Dynomotion KFlop user forums where there are plenty of people who have written CNC code for their KFlop (like me!)

