After I began to use my Sherline lathe in earnest, I started to appreciate the amount of time that went into switching the tooling involved in turning operations. There were a few options available for quick change tool posts, or QTCP abbreviated. Sherline makes one that seemed very overpriced, required wrenches to change the tooling, and just didn’t seem like it was worth it. AtoZCNC made one, but I read about a lot of holding issues and they always seemed like they were on the verge of going out of business (they did). Since the Sherline is tiny, most other QCTPs didn’t git. I had read a lot about an older ‘pillar-type’ toolpost that larger lathes used many years ago. The style doesn’t seem to be very popular today but it seemed like a very sturdy design so I decided to make one.
I read a lot of older machinist’s designs and downsized it to fit my lathe. I’d make a bunch of spare toolholders because you can never have enough of those. I would also make two tool posts: one for the standard Sherline Lathe configurtion, a taller second post for when I use the Sherline headstock riser for working on larger items.
I picked up some two-inch square 1018 steel bar stock for the tool holders and two-inch diameter 1144 Steel Rod for both toolposts.

I turned both toolposts, feeling guilty about turning away so much steel, but without a welder I wanted the stability of the base and the post being a single piece. I then used my mill to square up the base.
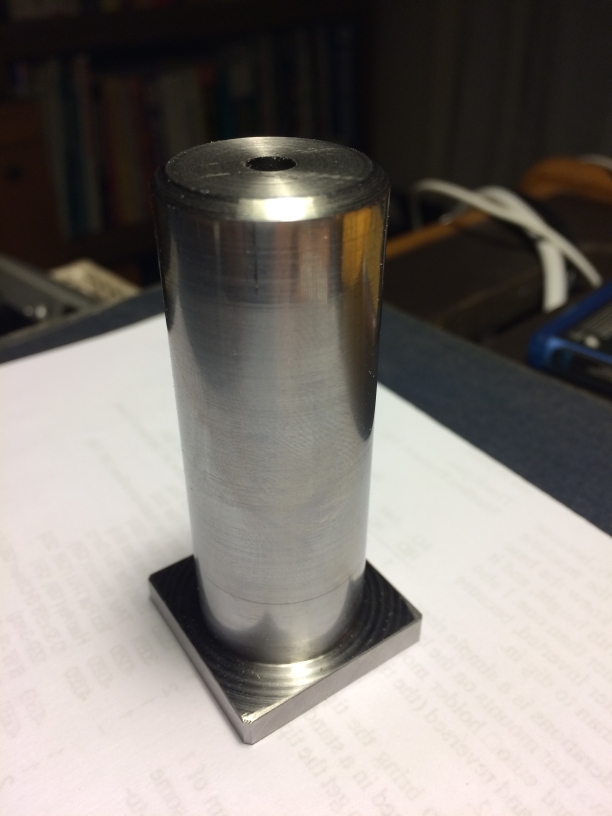
The finished taller toolpost. I beveled all the edges and drilled and reamed the center hold for holding it to the base of the lathe.
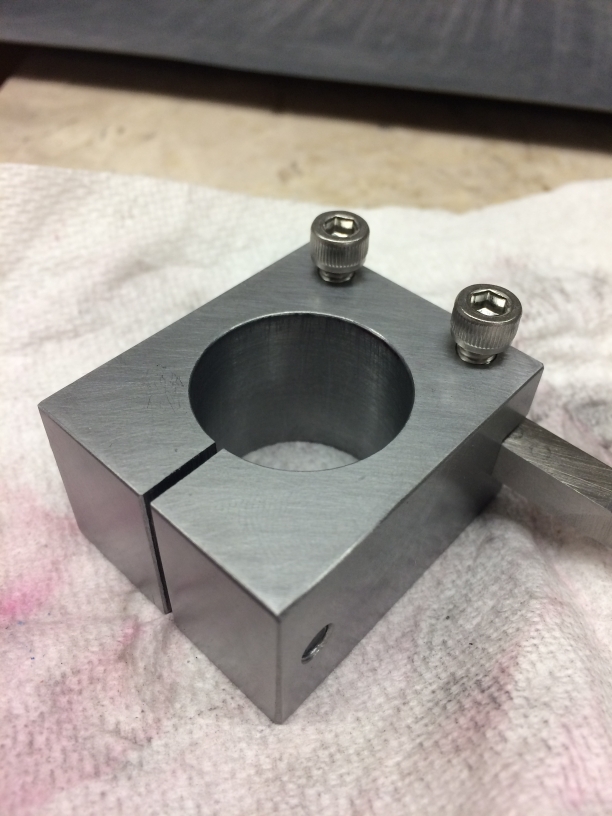
A finished tool holder. In all, I made 12. Some for 1/4″ and 3/8″ tooling, boring bars and others purposes.
I used a 7/8″ hole saw on my drill press to rough out the center opening, then a bandsaw to cut the compression slit. My mill and a boring headwas used to cut the center opening to exactly the correct size to slip onto the tool post. The clamping bolt holes were cut on the mill and hand-threaded. I ‘polished’ the final pieces under water on my wet-sanding/lapping rig (see elsewhere in this blog for details), then immediately upon drying oiled them to prevent rust. I use a local foundry to do my heat-treating to temper/harden the steel for final use. For 10 dollars a batch, it isn’t worth the price of installing my own heat treating oven.
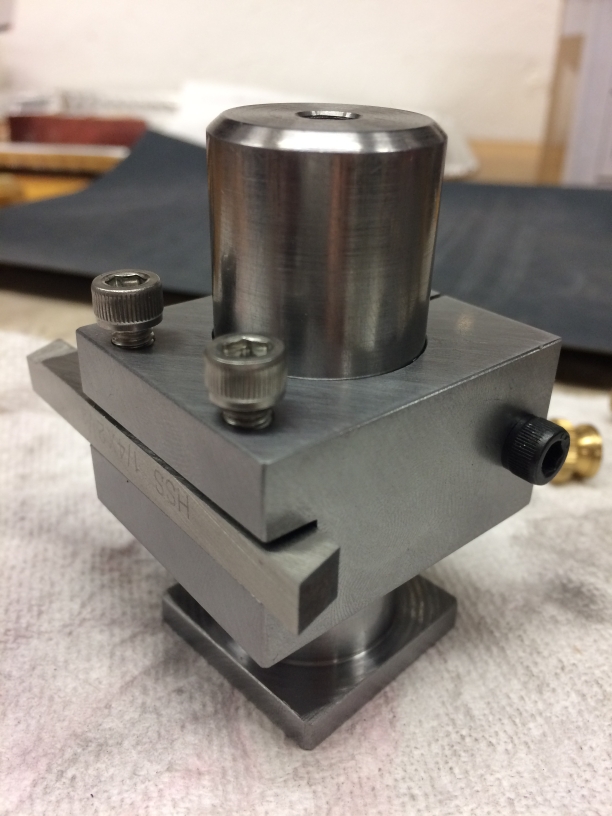
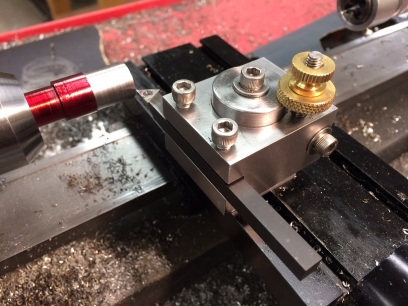
A nice close fit on the toolpost.

The first half dozen, before I realized I should make more. I turned two brass knobs for each toolholder, knurling them for ease of use. These made locking height adjustments for more accurate tool changes.
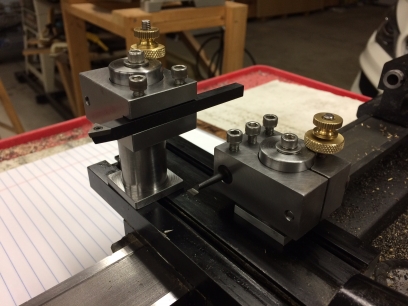
They came out perfect in concept. However, in practice they have a few flaws:
1-The toolholders are a BITCH to make. It takes a lot of time and effort to remove all the one inch of steel from the center of each one and bore them perfect.
2-The base had a tendency to pivot. This was fixed by milling out the bottom, but it really needs a plate along the edge of the lathe carriage to prevent it from pivoting. Cleaning the base before clamping helps a lot.
3-The toolholders have a tendency to pivot around the center of the toolpost when cutting aggresively. Again, cleaning the post helps, but it is a fundamental flaw in having a round post.
I still use them, but I have since moved on to a wedge-style OXA-sized QCTP.. It was a worthy challenge, but the advantages of the OXA offset the issues with the pillar-type QCTP. Because of the Sherline’s small size, I had to make some adaptations to the OXA style toolpost such as a custom base to keep it at the proper height. I also added a second arm/knob to eliminate the need for using a wrench to lock it down. Overall the OXA was a better choice.