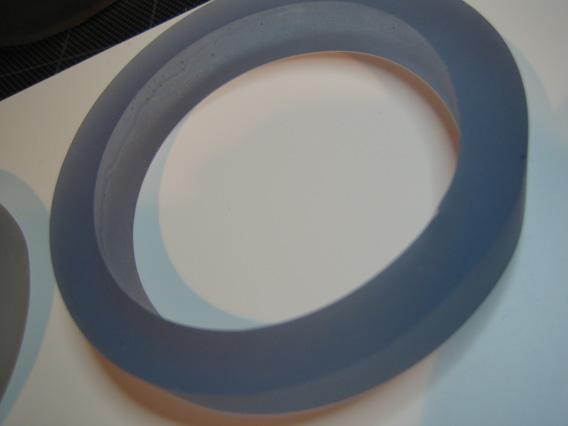
Now that the silicone mold is working I can concentrate on the clear epoxy ring itself.
The first ring, with just a little blue/green tint, contained a massive number of large bubbles. I learned a lot online chatting with people who do casts for a living. Basically it all boiled down the temperature and pressure. The only way to totally remove the bubbles it to cast in a “pressure pot” that basically keeps your mold in a vacuum, causing all the bubbles to expand and pop. Since this requires an investment of about $1000, I decided to adjust the temperature. By arranging some light bulbs around my molds during curing (and testing about $12 in epoxy resin to make five or six test rings) I discovered that the ideal temperature was around 90 degrees Fahrenheit for 24 hours. Any lower and the bubbles continue to expand. Any higher and the epoxy cures too fast. This was the first attempt so you can see how many bubbles are created:
Ick. Looks like frozen Seven-Up.
Castin’ Craft, the company that makes the clear resin, also makes some nice tinting agents. I began adding those to get more blue in the color. I knew I would have to live with a certain amount of bubbles but I was determined to minimize it as much as possible without having invest in a pressure pot.
Notice that my ring is a bit less green than the movie prop pictures. Online research seemed to indicate that the actual prop had faded towards green or that the pictures weren’t color accurate–the actual ring in the movie was a bit more blue and I decided to go that way since the ring’s blue glow never looked green in the movies. Call it a creative decision.
After casting, I polished all sides and surfaces of the ring. I followed a regimen of grits as follows:
-300 light pressure passes with 80 grit dry sandpaper.
-500 light passes with 120 grit dry sandpaper
-750 passes with 220 grit dry sandpaper
-1000 passes with 400 grit wet sandpaper on glass
-1200 passes with 1000 grid wet emery paper on glass
This gave me a super-smooth surface (and hands that were sore for a few days). I intended to clear glosscote the ring, but experiments showed me that this gave me a bit more of a “wet look” than I wanted. Leaving it unglossed kept a slightly fogged look, but also helped hide some of my old enemies, the bubbles.
The final, color correct ring, after polishing:
I then drilled some holes for LED lighting that would be hidden under the “transformers” in my designs…Epoxy is an interesting material to work with; it remains a bit soft to work with and even after curing can be bent by squeezing it too hard. Caution is required when handling it.


