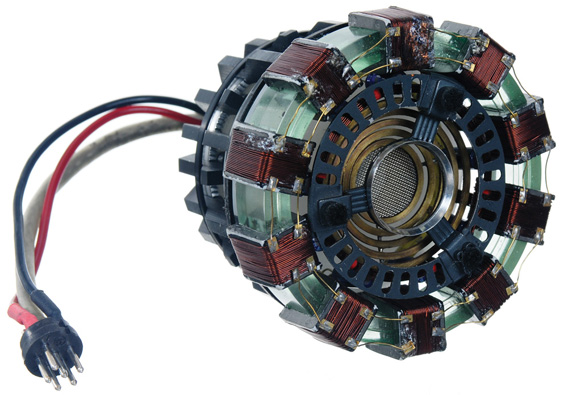
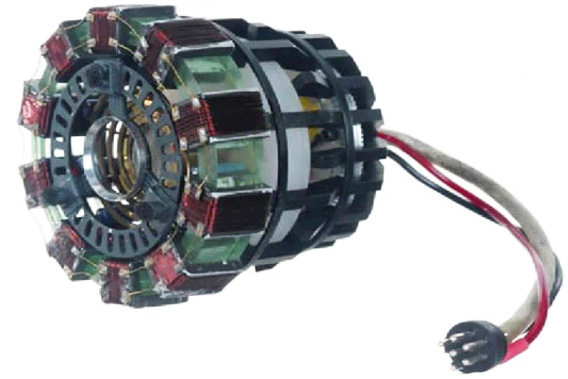
Category: <span>Arc Reactor</span>

I decided to create a stand for the whole thing by using my existing silicone ring mold and more urethane plastic resin but in a candy apple red/black to match the Iron Man armor. This combined with a bronze nameplate and a soft resting plate allows the arc reactor to remain removable for close examination or in the stand without scratching anything.

A power plug that matches the movie prop and we’re done!

About two month’s spare time went into it and I’m very happy with the final result.

When the lights are on it’s so bright that it’s hard to look at directly (perfect!).

Arc Reactor

I built each “layer” of the reactor so that each could be built independently of each other in case I made design changes along the way, and I was glad I did so.

I had planned on adding an inner ring of light to the interior of the reactor using an LED ring light used in car taillights. When I bought one it wasn’t as bright as I’d hoped to I scratched the idea. I decided to place eight more high-intensity LEDs behind the repulsor emitter in a 1/4″ area of space.

Here’s a pic of the layers disassembled and assembled:

The layers consist of:

The main ring, the repulsor shielding, the main power cabling, the repulsor emitter, the repulsor reflector, the light chandelier, the secondary lighting ring, the repulser emitter light, the electronics layer, the mechanical layer (gear) and the heat sink foundation.

Here everything is stacked together and some of the heat sink fins are removed.

An inner lighting test….neat!

Here it is with all parts assembled:

Arc Reactor

I found some nice thin brass stock and brass wire for the transformer exterior wiring. I had intended to solder the fittings together but then realized that the plastic transformers would melt from the nearby heat. Time to make simulated solder!

After bending the brass wire to the correct shapes and sizes and cutting small brass mounting plates, I glued everything into place with medium-viscosity CA glue and CA accelerator. This causes the CA to cure before it levels too much and gives it a more “blobby” appearance. I augmented this appearance by moving the wires slightly as it cured to look more like manually soldered shaped. After all, Tony Stark built his in a cave from a box of scraps….it shouldn’t look too perfect.

A little solder-colored paint on each blob and the illusion is complete. I was very happy with this look.

Arc Reactor

Winding the transformers was one of the more difficult tasks on the project. I experimented with painting fake surface to simulate wire windings and several other methods but I couldn’t come up with anything that looked as well as actual magnet wire. That meant manually winding the 10 transformers by hand since the ring was a single piece. Cutting the ring wasn’t an option although that would have made winding the transformers a heck of a lot easier. The process took about eight hours total spread over a few evenings.

It takes three complete windings of the 30 gauge magnet wire to completely cover the transformer and get the proper “rounded” look at the edges. The black cores you see are vinyl to block any light from leaking through the windings and spoiling the illusion of transformer thickness.

I would start by winding approximately 40 feet of magnet wire onto a small custom “spool” that I made. Then I could pass the spool around and through the ring the hundreds of times it took to wind each transformer.

Although magnet wire this thin can be stretched I was unable to do so because it would actually distort the resin ring if taxed too much! A lot of patience went into winding these buggers and trying to get the wires as straight as possible.

You can now see the little “fake screw” details on the transformer sides highlighted by the polished chrome paint–Floquil chome paint is nice stuff that take a light polishing very well.

Arc Reactor

Originally I planned to have the arc reactor be just the ring itself in thickness so it could be worn under a shirt. Like most of my projects it evolved into the complete prop including it’s base. The base as it appears in the movie looks very much like a heat sink (given some creative liberties). This added a few inches of thickness to it but also gave it more accuracy.

I started by trying to carve the heat sink “fins” (of which there are twenty total of two types) of styrene–my medium of choice. They turned out to be too thick for that approach so I went with plan B.

I carved a prototype from thin styrene, then “traced” that onto a rolled piece of Sculpy clay of appropriate thickness. I then baked this in the oven for hardness, finished it with files and coated it with a sealer so it couldn’t absorb moisture. This gave me a prototype fin (two different prototypes, one for each fin type actually).

Then I built a mold box to accomodate the Sculpy prototype and cast a negative mold in my old friend, Smooth-on Oomoo silicone rubber after spraying it with lots of mold release.

I did this one using a two-piece mold technique: I poured liquid silicone into the mold box while empty to the half-way point and let it level and cure for 90 minutes. This gave me a flat base thanks to our friend gravity. I then sprayed it with more mold release and place the sculpy heat sink fin prototype flat onto the silicone base. I then poured more silicone onto the fin to the top and let that cure. After 90 minutes this gave me a nice two-part mold in which one half contains the actual part. This has the benefit of keeping the “flash” caused by resin leaks at the very edge of the part and makes it easier to finish.

For the resin itself, I used Smooth-On’s “liquid plastic”, called Smooth-Cast 300. This stuff is fantastic! It’s very important to get the ratios precise–the tiniest amount off and your castings are too flexible and mushy. Even though the measurements are by volume, you need to be very precise about it–no eyeballing! The resulting urethane plastice is hard enough to be finished like plastic but it is difficult to get paint to stick to it. Washing it with a degreaser (I use Simple-Green) and a resin-prep compound it critical and it helps to rough it up a bit with 1000 grit we sandpaper before a base coat.

Because I made a creative change to the shape of the fins I had to start over, but it was worth it. The new shape I have for the fins utilizes them to actually hold the internal parts, eliminating several brackets that I was going to create. Now the fins become actual structure parts of the arc reactor.

Here’s the finished 20 cast heat sink fins of the final shape. The first two have been glued to their base….

They are so closely aligned that I had to create a jig to mount them properly after painting–I knew I’d never be able to get paint between them if I waited until after mounting.

The completed Heat Sink foundation:

Arc Reactor

My original plan was the mount ten high intensity LEDs underneath the transformers. By lighting the ring from these hidden sources I thought I could hide the actual lights and cause the ring to appear to glow on it’s own. However, I cornered my self when I began to plan how to wrap the transformers with magnet wire. I found that I couldn’t wrap the transformers until after the LEDs were mounted, but I could mount the LEDs and run the wiring until after the transformers were wound.

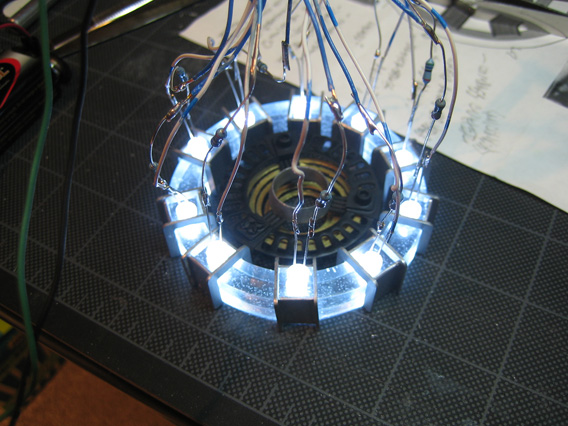
I decided to redesign my lighting by placing the LEDs into a “chandelier” configuration underneath the repulsor emitter. This actually gave me a brighter light than my original plan.

Here’s a test lighting arrangement with LEDs and their current-limiting resistors….

Lighting also revealed my old enemy, the bubbles again. GAK! I hate those things!

Here’s the “Chandelier” arrangement I came up with to light the ring from within–it had to fit within a very small area of the repulsor emitter rings:

Arc Reactor

The palladium ring–a roughed up copper wire ring painted with a thick, blobby mixture of aluminum paint to look like a cast piece of palladium.

Matches the movie piece pretty nicely…..

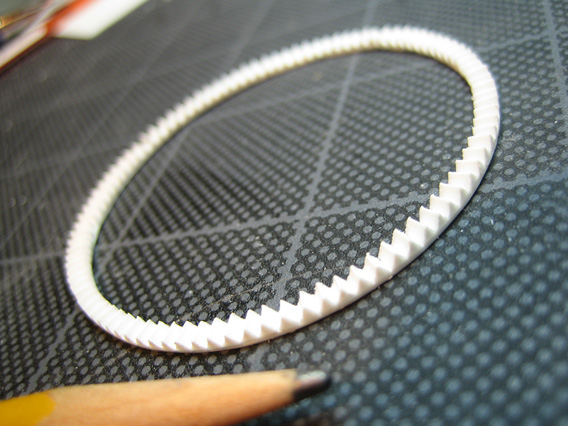
Needed a gear-like device with 200 teeth, so built that from styrene triangular stock and flat stock….one tooth at a time….

Not too painful. About two hours of work under a magnifier.

Now the circuitry layer–I mined a couple old computer motherboards I had for interesting looking pieces (chokes, larger electrolytic capacitors and diodes) then built a chassis for them. These are mostly hidden, but closer inspection of the arc reactor shows the inner detail even though the movie prop is never seen that close.

A little more brass paint and fake solder (chrome paint).

Arc Reactor

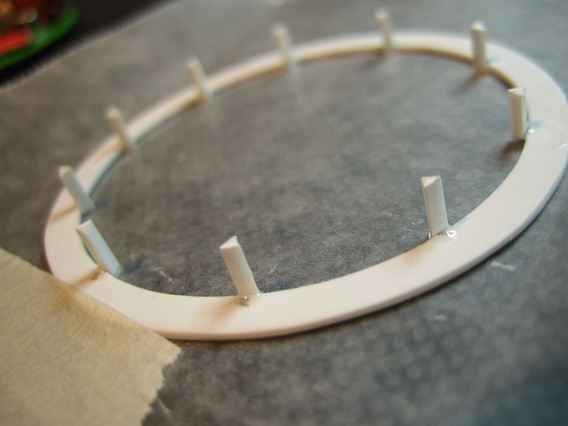
Some small custom styrene circles painted with brass paint for the repulsor reflectors.

The Main Power Cable, from copper wiring and styrene tubing…..

Assembly of the main power cable, shielding and focusing ring holder along with flat metallic black paint for that nice “industrial build” feel….

Now add the repulsor focusing rings. The only “screen-type” material I could find at the proper scale was a tea-strainer! I painted it chrome, then cleaned out every hole in the screen because the paint had filled it in solid.

Arc Reactor

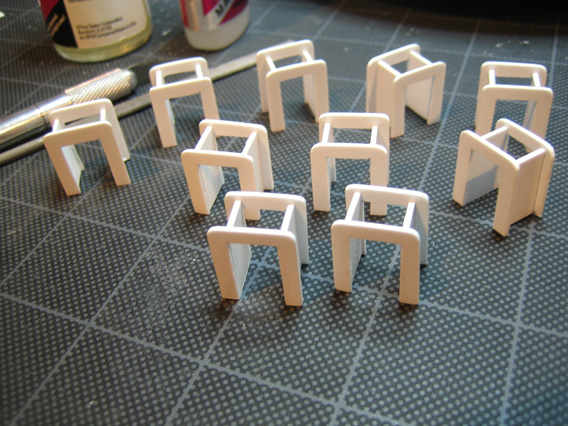
I built the ten transformers from styrene sheet with the intention of hiding the lighting LEDs underneath; hence their need to remain hollow.

These were a tedious bitch to create. In hindsight I would probably have made one, then cast it in resin to make duplicates. Live and learn.

Time to test fit all existing parts on the earlier prototype resin ring (to avoid scratching the final ring)….

The transformers have a total of 80 tiny screw in the sides. I couldn’t find anything small enough so I experimented with carving my own using a template. I carved some brass into the shape of a tiny screw then heated it with a soldering iron and pressed it into the styrene. Took a little practice considering the scale.

Arc Reactor

Time to make some of the internal parts (I was sick of clear resin at this point).

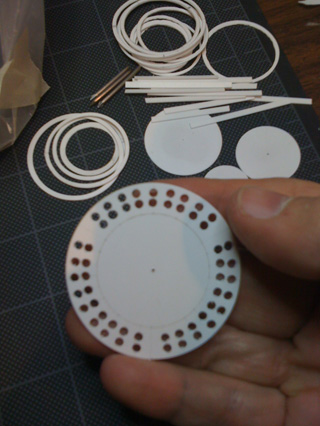
After trying to track down small, thin plastic or metal rings simliar to washers I decided to create my own. I created a circle cutter out of an old drafting compass by replacing the pencil with a finely sharpened steel pin. This made it easy to created the many circle cuts I would need, all smaller than 2 inches in diameter.

I started with the Emitter Shield….

I created a small jig for my drill press to make this a bit easier. Lots of fine filing involved in those oval vents.

Next, building the regulators and emitter brackets. Everything is carved from styrene at this point and glues with cyanoacrylate glues. I love CA….I use several different viscosities and epoxies but rely on the CAs the most. They’re very easy to control and predict because their speed of cure is so reliable.

I found some tiny scale screws and allen bolts that perfectly matched my requirements in my hobby shop’s scale railroad department. CA bonds them perfectly to styrene without the mess of epoxy. I also carved a few pieces from some sprinkler system hose attachments that were made of a very tough Urethane. One of these days I’m going to buy myself a lathe for this type of thing.

Arc Reactor

Now that the silicone mold is working I can concentrate on the clear epoxy ring itself.

The first ring, with just a little blue/green tint, contained a massive number of large bubbles. I learned a lot online chatting with people who do casts for a living. Basically it all boiled down the temperature and pressure. The only way to totally remove the bubbles it to cast in a “pressure pot” that basically keeps your mold in a vacuum, causing all the bubbles to expand and pop. Since this requires an investment of about $1000, I decided to adjust the temperature. By arranging some light bulbs around my molds during curing (and testing about $12 in epoxy resin to make five or six test rings) I discovered that the ideal temperature was around 90 degrees Fahrenheit for 24 hours. Any lower and the bubbles continue to expand. Any higher and the epoxy cures too fast. This was the first attempt so you can see how many bubbles are created:

Ick. Looks like frozen Seven-Up.

Castin’ Craft, the company that makes the clear resin, also makes some nice tinting agents. I began adding those to get more blue in the color. I knew I would have to live with a certain amount of bubbles but I was determined to minimize it as much as possible without having invest in a pressure pot.

Notice that my ring is a bit less green than the movie prop pictures. Online research seemed to indicate that the actual prop had faded towards green or that the pictures weren’t color accurate–the actual ring in the movie was a bit more blue and I decided to go that way since the ring’s blue glow never looked green in the movies. Call it a creative decision.

After casting, I polished all sides and surfaces of the ring. I followed a regimen of grits as follows:

-300 light pressure passes with 80 grit dry sandpaper.

-500 light passes with 120 grit dry sandpaper

-750 passes with 220 grit dry sandpaper

-1000 passes with 400 grit wet sandpaper on glass

-1200 passes with 1000 grid wet emery paper on glass

This gave me a super-smooth surface (and hands that were sore for a few days). I intended to clear glosscote the ring, but experiments showed me that this gave me a bit more of a “wet look” than I wanted. Leaving it unglossed kept a slightly fogged look, but also helped hide some of my old enemies, the bubbles.

The final, color correct ring, after polishing:
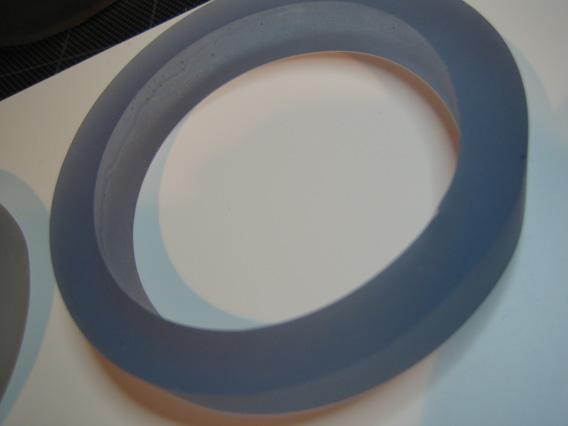
I then drilled some holes for LED lighting that would be hidden under the “transformers” in my designs…Epoxy is an interesting material to work with; it remains a bit soft to work with and even after curing can be bent by squeezing it too hard. Caution is required when handling it.

Arc Reactor

I built a full scale hollow ring prototype from styrene sheet plastic as a positive full scale ring and finished this perfectly smooth.

After building a mold box from styrene and locating a proper mold release agent, I poured and molded a proper silicone negative mold.

I decided to use an “open-face” mold as opposed to a two-part, sealed mold because it would allow me to better control the temperature of the epoxy during the curing process. I made the The prototype (and silicone mold) are therefor approximately 1/8″ deeper than the final ring to allow for later polishing. I used Smooth-On’s Oomoo 30 Silicone rubber–I recommend it highly. Good viscosity and tear strength and very easy to manage when it comes to bubbles.

Arc Reactor

The first item to attack is the semi-clear ring that forms the foundation for the reactor. I looked into having clear acrylic milled (something for which I lack the tools) but most of the quotes I received were at least $60 each. I’d wanted to try casting polyester & epoxy resins for some time so I decided that this would be a good time to learn that skill.

Most of the casting methods I explored were expensive and toxic. Since winter temperatures were forcing this project indoors I decided to go with epoxy resins. My first attempt, after creating a plastic mold negative used a vegetable-based oil as a mold-release.

Major failure. The epoxy resin, normally clear, leached moisture out of the veggie oil and fogged the resin. As it turns out, moisture is the number one enemy of epoxy resins. Lesson learned.

I then obtained some mold release made by the same company that makes the epoxy. This failed to release from the plastic mold. What a mess….

You can also see some chunks of color from tinting that I added. During curing, the tint clumped together.

Arc Reactor

While browsing online as some movie prop reproductions I noticed the large number of Iron Man Arc Reactors–hundreds, actually–created by fans. At the same time, I was amazed at how many weren’t even close to accurate. I don’t expect everyone to be able to build perfect replicas but I don’t expect tape, cardboard & 15 minutes work to garner hundreds of “wow that looks amazing” comments.

Of the Arc Reactors used in both Iron Man movies my favorite was the model he builds in the cave. It has a more “rustic”, built from leftovers feel to it. I found a few photographs of the actual prop used in the movie (which sold for around $50,000 at auction) and proceeded to attempt to duplicate it.
Here are two photos of the prop from the first Iron Man movie…..

Arc Reactor