I wanted to make a tooling plate for my mill to give me more versatile holding capabilities. I thought this would be a good project to practice my drilling. After experimenting on my drill press with some scrap I learned a lot about wandering and peck drilling. Like most of my projects this one led to another project: A PeckDrilling plugin for my CNCDroid software.
After truing up some 3/8″ 6061 aluminum stock with a facemill I proceeded to test out the new software. It was a good project to play with for things like dwelling at the bottom of a drilled hole and how far to actually peck and wait before returning the swarf to the top of the hole. It also made me start thinking about some type of directed airflow/blower for the mill as I was continuously hovering with my airgun to blow away the chips from the holes.
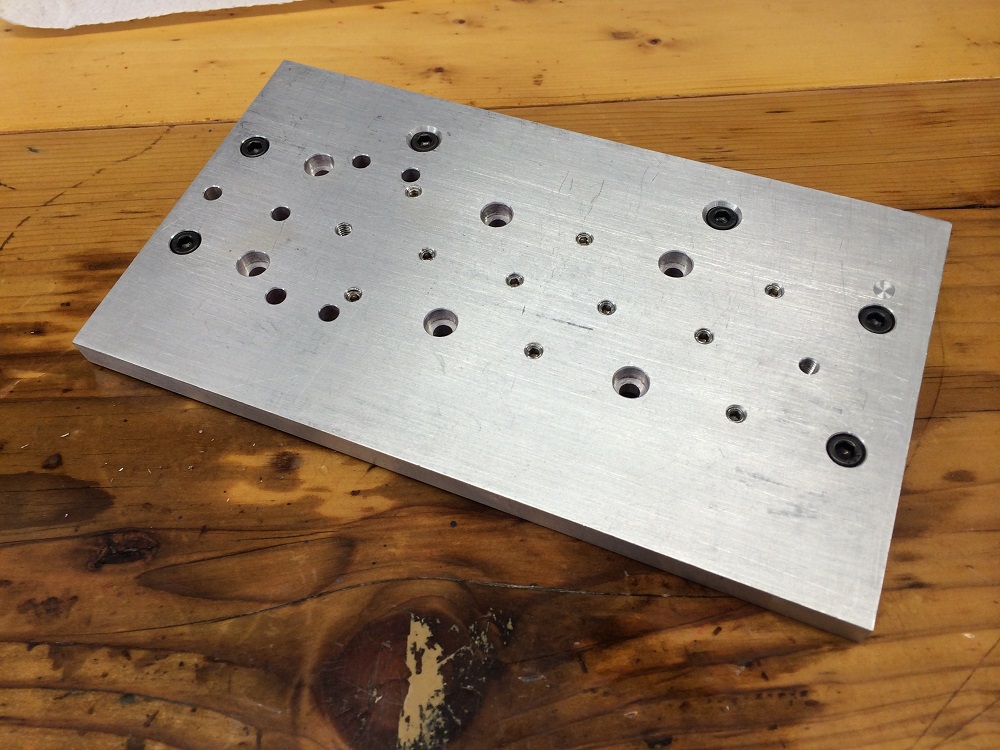
Eight 10-32 counter-bored holes give lots of table mounting options for T-nuts, and twelve threaded 10-32 holes give ample locations for clamping screws. To keep the threaded hole free of swarf I keep them plugged with twelve inset machine screws that are only removed when the tooling requires it.
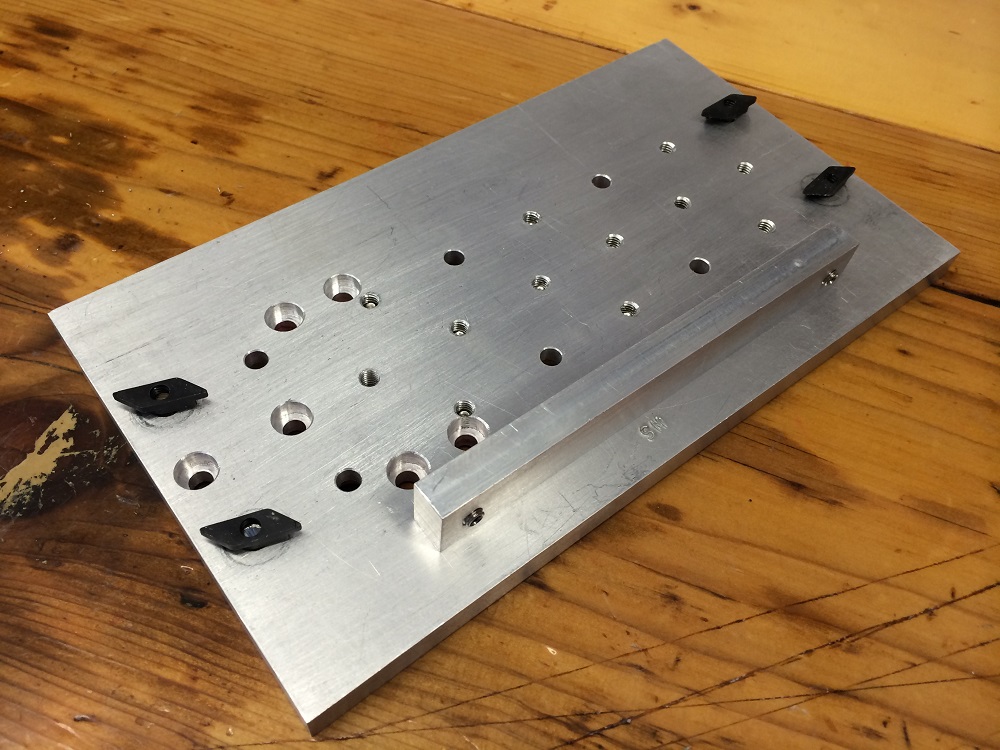
On the bottom of the plate is a 3/8″ aluminum bar mounted as a reference for the mill table edge. This allows for very quick alignment of the Tooling Plate to the X-Axis table of the mill without having to measure. Along the bar are two inset 10-32 machine screws that are used to micro-adjust the plate into exact alignment to the table top. A drop of loktite keeps them from drifting.
UPDATE: I’ve been using some A2ZCNC T-Nuts for this and other projects on my Mill. Of the 12 I bought, I’ve bent/broken 9. Everyone of the TNuts from my original Sherline purchase is still in great shape. I would advise against purchasing the A2ZCNC T-Nuts. Yes, they offer to replace any that break, but why bother with that high a failure rate?