A little history first….
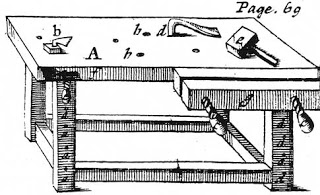
Sometime around 2010 a woodworking blog revitalized the use of the Joseph Moxon Twin Screw Vise. Originally published by Moxon in “Mechanick Exercises” in 1703, this is an engraver plate of the device….
Since that 2010 article there has been a large resurgence involving the use of this vise, with kits becoming available at several woodworking establishments. Since I needed a better woodworking vise, this seemed like a good project that would utilize a variety of techniques…..and I was sure I could come up with some method of making it more complex than it looked.
A little googling reveals hundreds of designs from woodworkers around the world. I perused ever single one of them and after digesting it all picked and chose the qualities that I wanted for my own design.
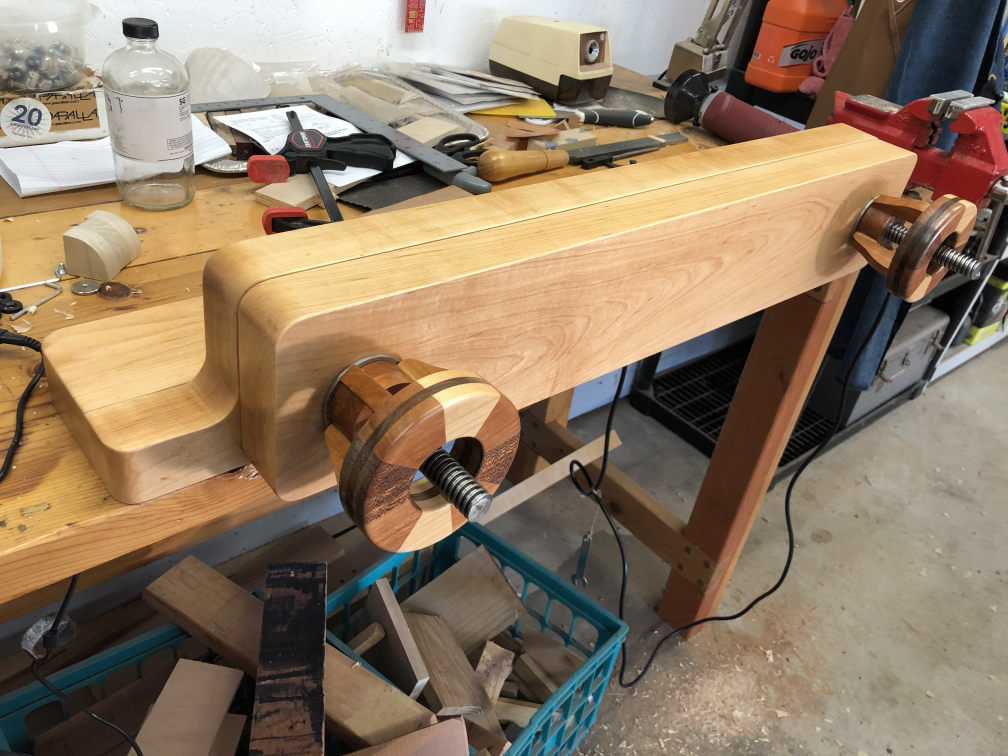
I knew that I wanted the vise wide enough to handle 24″ wide planks. I also knew I did not want the usual vise “bar-type” handle. A hand wheel seems like a much more elegant method of controlling the jaw. Metal hand wheels abound, but I stumbled upon another woodworker’s design in which he had made hand wheels from several differing species of wood and I fell in love with the look–plus it made the wheels very difficult to make and that made it a nice challenge. Mitch, I thank you for the inspiration that your design provided!
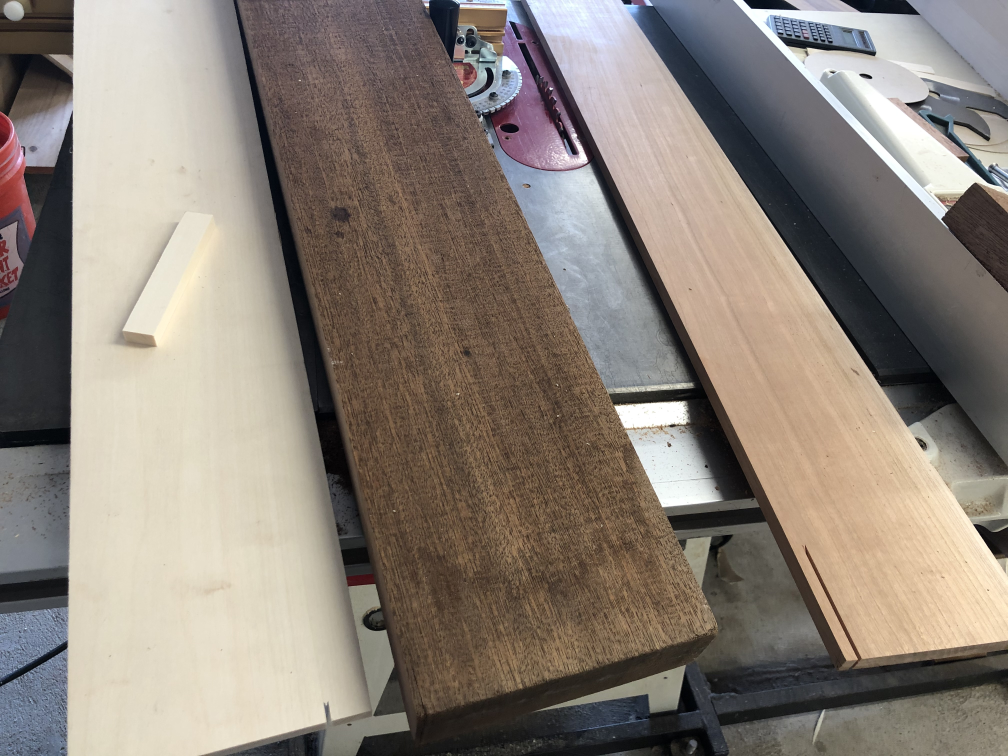
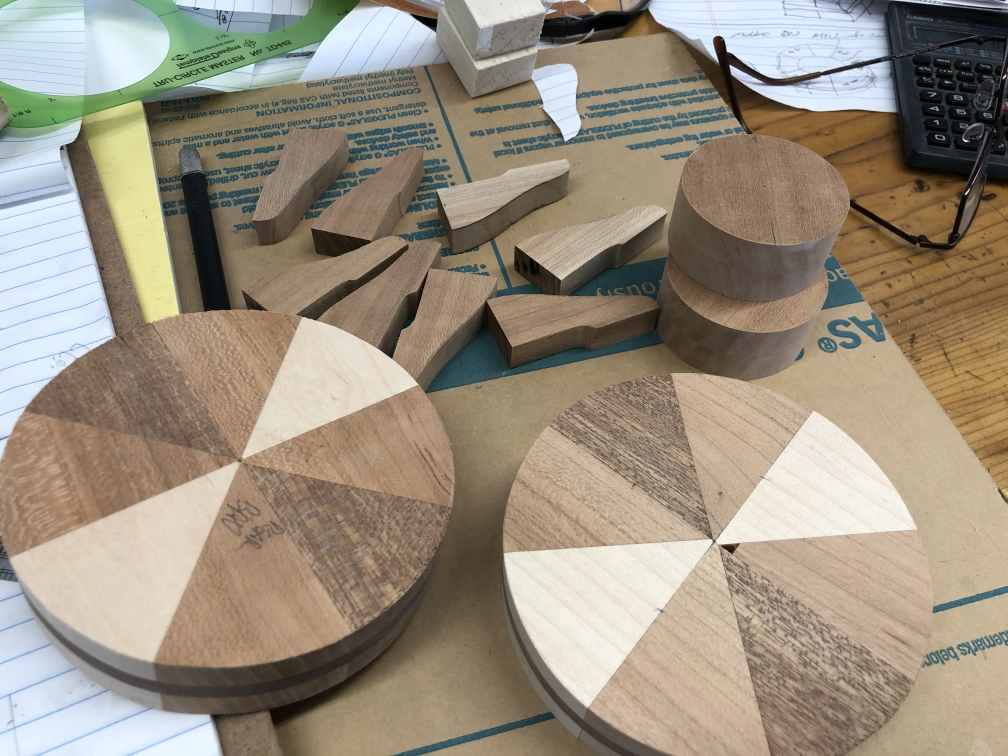
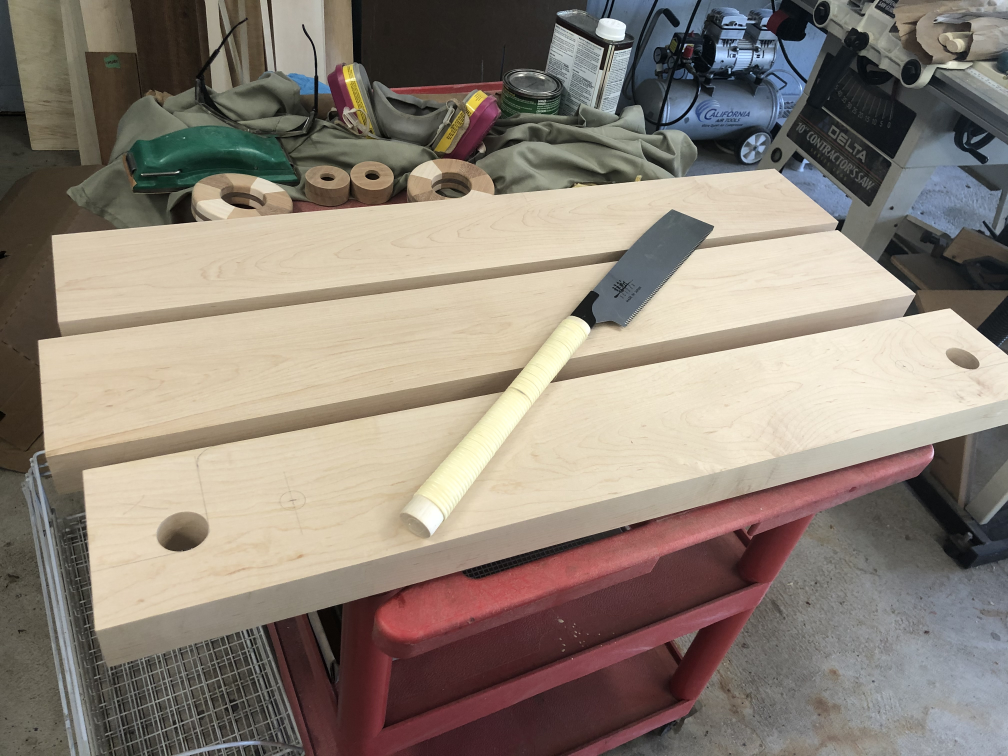
I obtained some 2″ thick hard maple for the main body and used Maple, Cherry and a neighbor-provided piece of mahogany for the hand wheels. A trip through the band saw to re-saw down to proper thickness into manageable planks.
Using metalworking angle blocks on the band saw I was able to make some precise cuts of the stock into the building blocks I would need for the hand wheels.
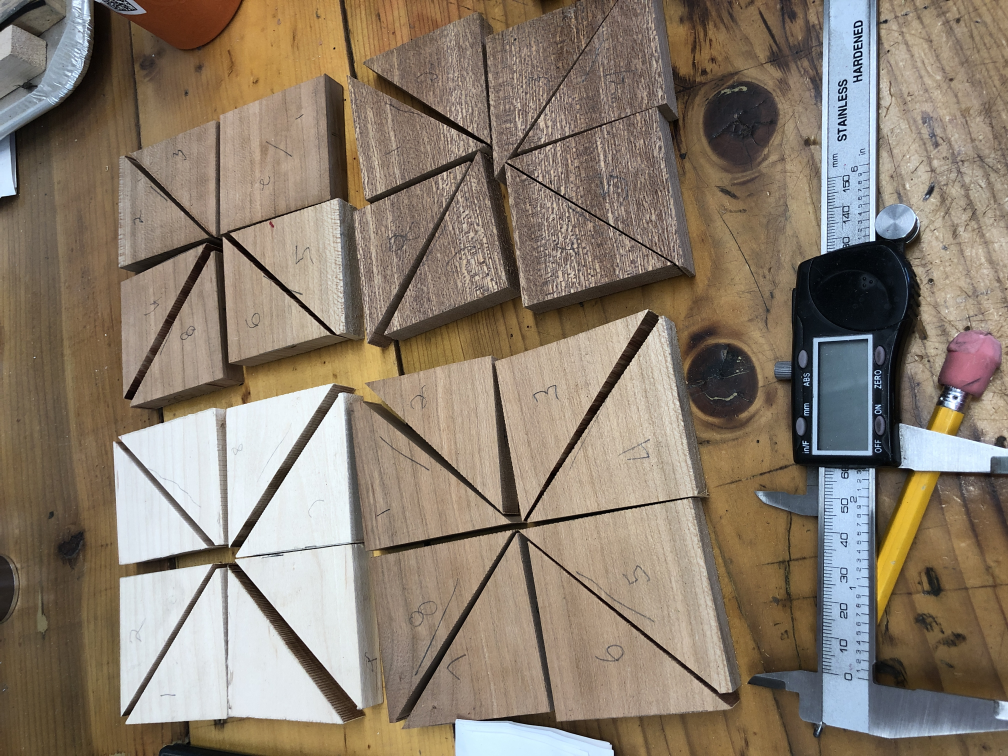
Some of my stock was different thicknesses. This would come back to haunt me later.
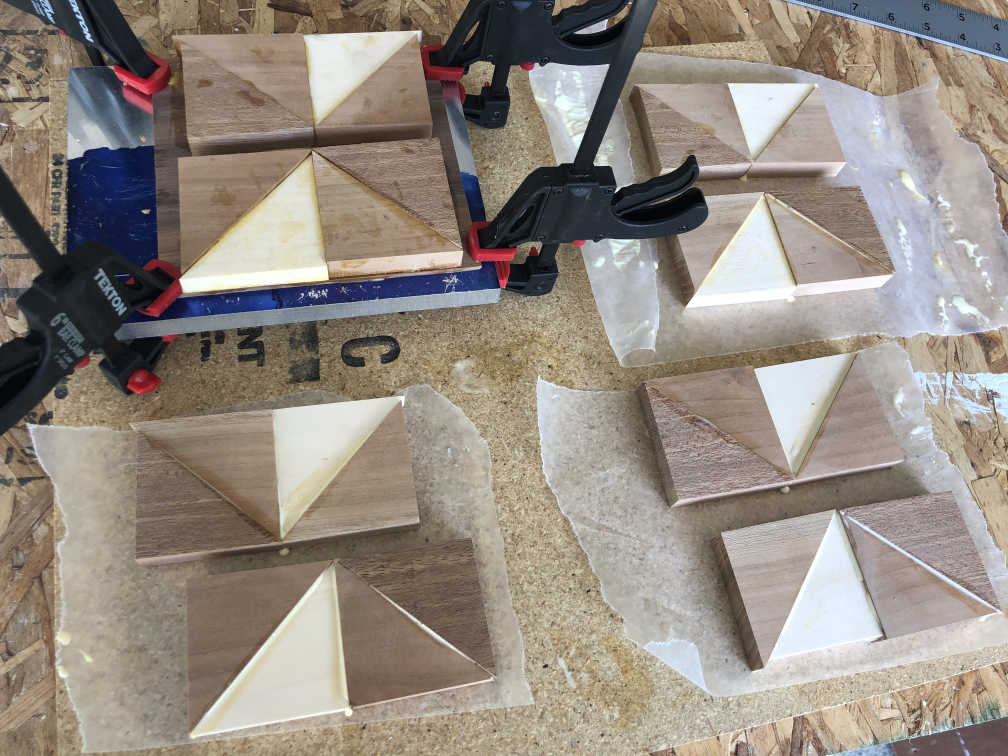
Gluing blocks together carefully as to keep the grain of each block in the same direction. To keep the pieces flat I clamp them on a scrap piece of MIC-6 Aluminum Sheet that I use for other projects since it is about as flat as flat can be.
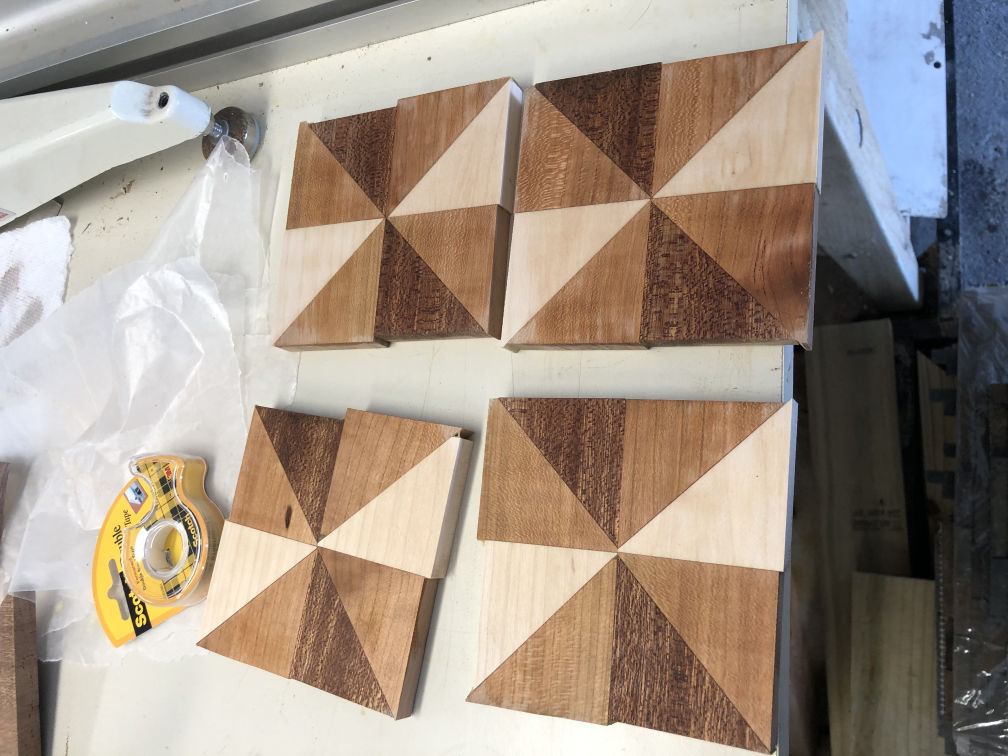
My plan had been to run the completed pieces through my jointer to flatten the remaining side. This is where I made a critical error, forgetting that the jointer would flatten, but not guaranteed that the newly flattened side would be parallel to the previously flat reference edge. What I really needed was a planer, but I don’t own one. Dumb, Dumb, Dumb. The pieces were off enough that I knew I would see the edge design “wobble” as the wheels turned. So I decided to re-cut everything and start over……better take a break and work on……
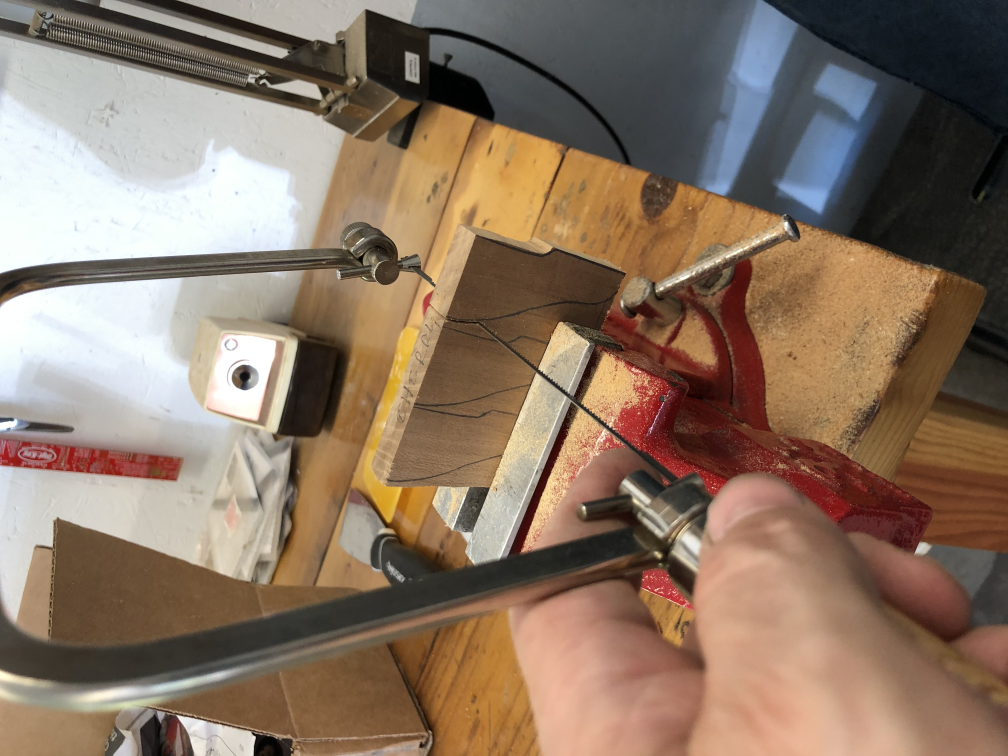
….cutting the 8 spokes of the hand wheels from cherry with a coping saw. I really need to be a scroll saw one of these days, but hand tools are therapeutic.
After re-cutting and assembling the new ‘pie slices’ of the hand wheels, they became the “bread” in a sandwich with a filling of 1/4″ walnut. It gives them a nice stripe around the wheel’s outer diameter.
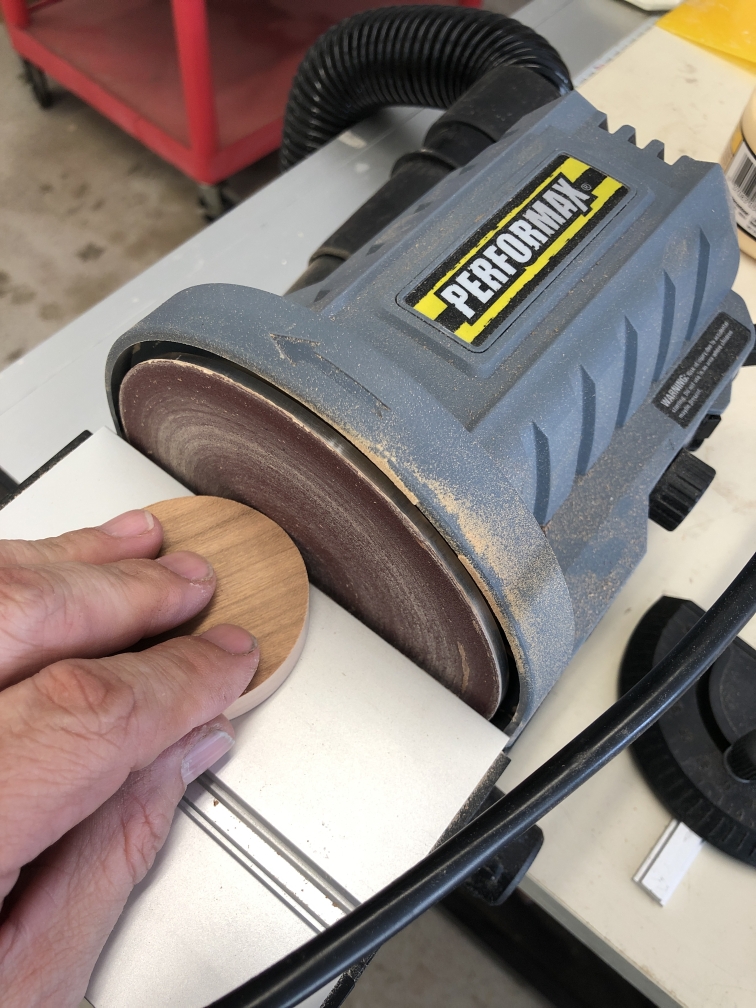
I didn’t save any pictures of it, but my new method of “planing” the disks to the same exact thickness involved using my metal working mill. It’s a small Sherline, but I was just able to fit the project into its working envelope.

On my grinder, I ground a piece of high-speed steel into a large radius fly-cutter, then used that to ‘plane’ the surface of my newly re-constructed hand wheel disks into exact thickness prior to glue up.
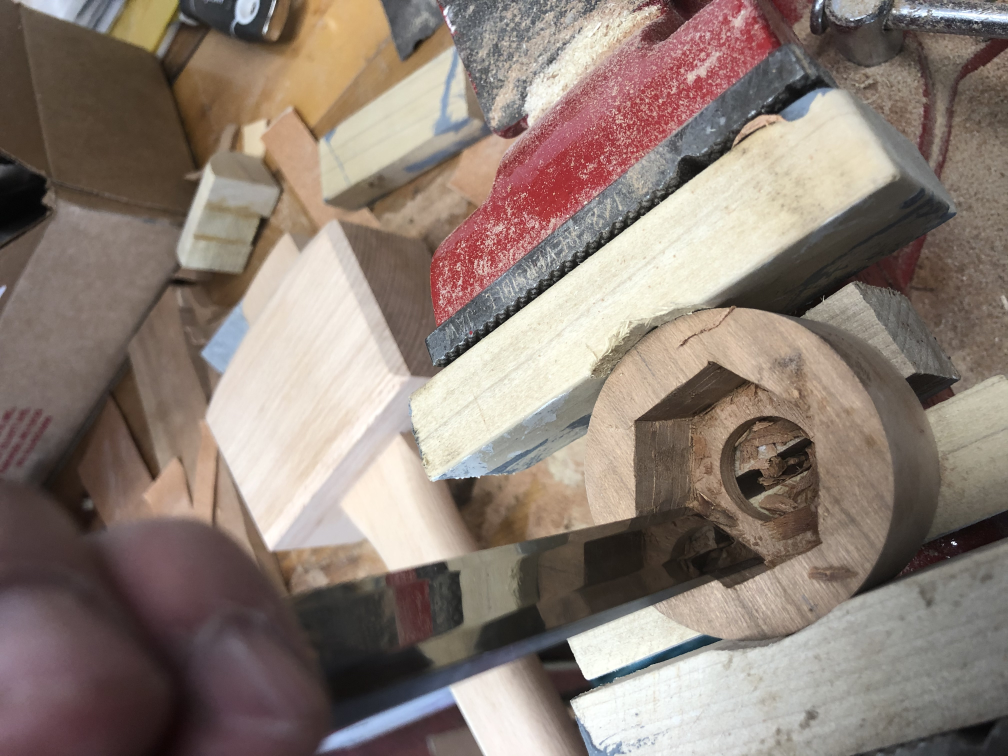
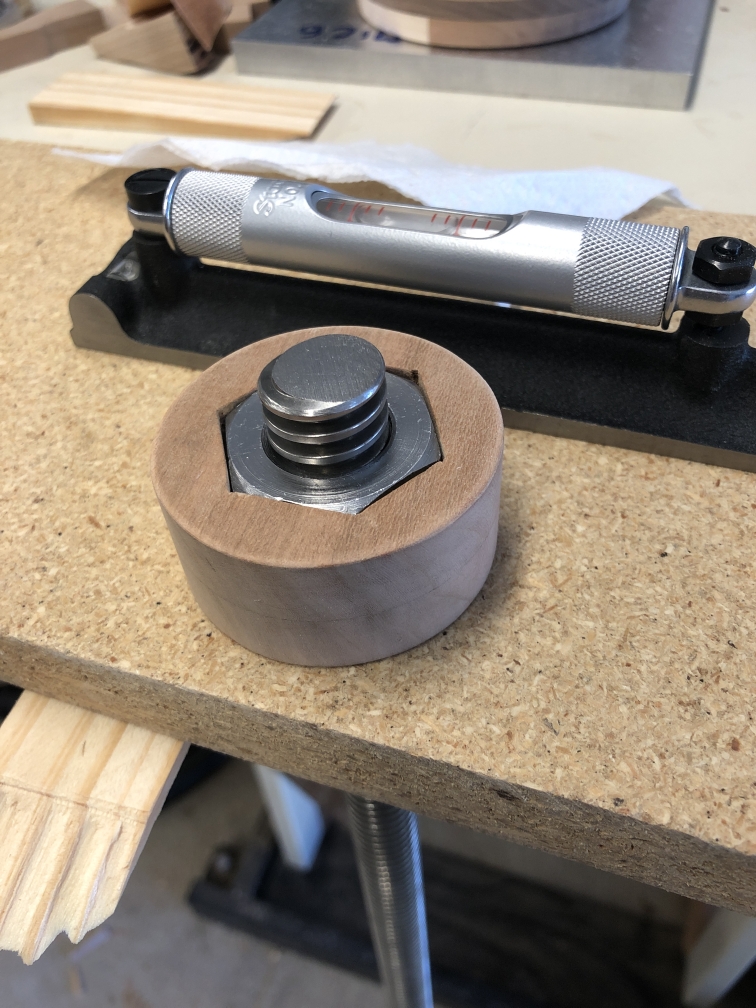
A good amount of chiselling with a mallet to carve out a place for a large hex nut in the wheel bases. Similare square holes were chiseled into the base of the vise for the other end of the rod. The nuts, both square and hex, match the characteristics of a 3/4″ Acme threaded rod that I would use for the vise. I wanted Acme rod instead of a normal threaded rod because of the accuracy of the machining that would give it smooth movement and less backlash. I bought 36″ inches with plans to use the rest for something else, and only needed 18″ for the vise. I cut the Acme into two 9″ pieces with a hack saw manually as my grinding wheel wasn’t large enough without risking damaging the rod. Heck of a good workout cutting 3/4″ steel rod with a hacksaw, even with lots of cutting fluid. I think I put an inch on my biceps making those cuts.
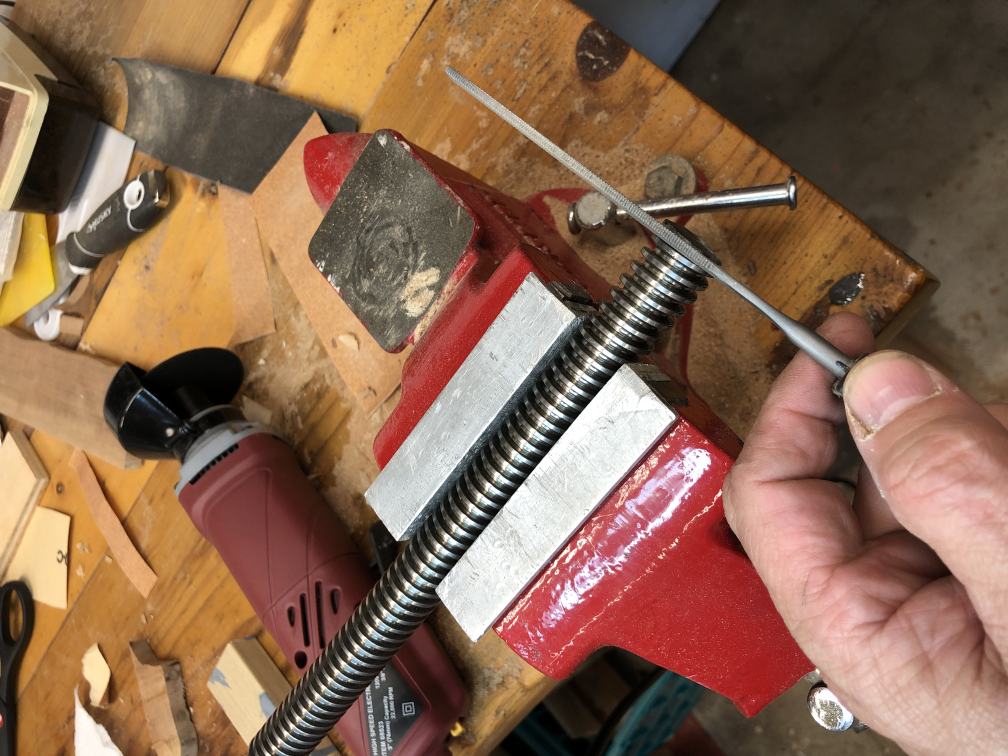
Alignment of the Acme threaded rod into the handwheels would be critical. If it was off a tiny bit, the hand wheels would wobble when spun and vibrate. I made a simple jig from MDF with holes large enough for the rod to hang through with room to spare. I place small wood angles as shims under the corners of the MDF board and used my precision machinist level to make certain the board was level in two dimensions. Now the Acme rod goes through the nut, which is placed into the hand wheel base with 30 minute epoxy. By setting the base/nut/rod combination through the hole and letting the rod hang down, gravity will cause the rod to act as a plumb line, pulling it perpendicular in two axes to the previously leveled MDF tabletop. Within the wood base, the nut is sitting in a little pool of epoxy, giving a a little “wiggle room” in which to pivot. Because I didn’t trust gravity, I also broke out my precision machinist square and verified that the rods were indeed hanging at exactly 90 degrees in two axes. I knew it would work….really 🙂
All the other hand wheel parts were hand sanded and scraped into shape. The ‘gravity jig’ was again used to let the weight of the acme rod hold the spokes, base and wheel together for glue up.
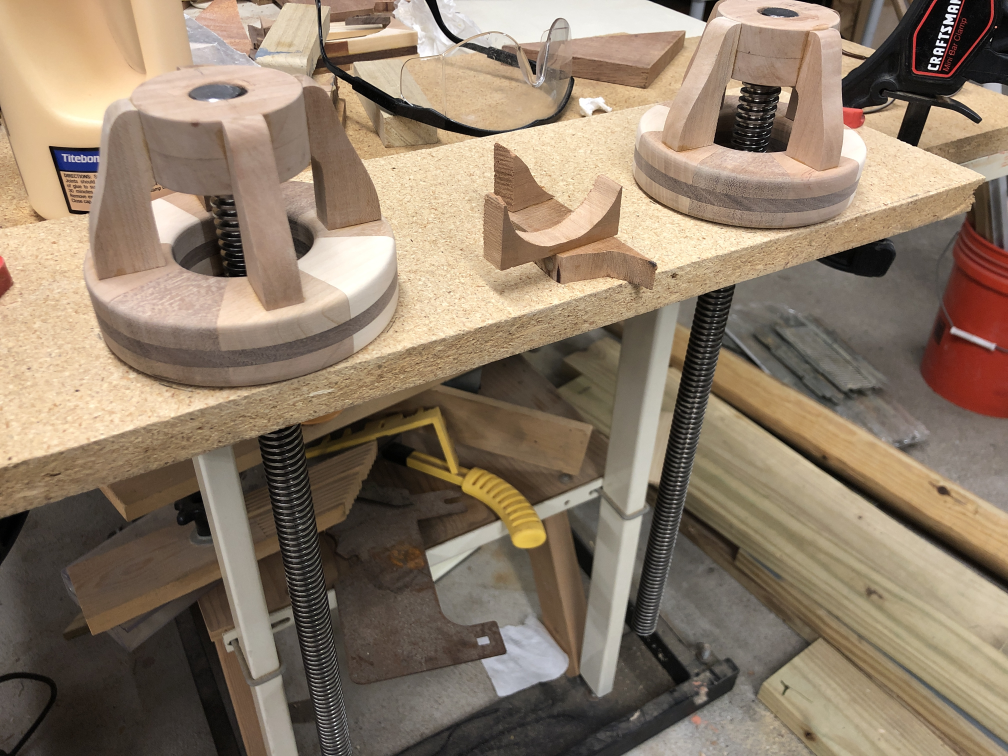
I figured I needed to keep the handwheels from scraping the vise jaw to I made a couple stainless steel washers from 2-1/4″ SS rod. Stainless is tough to machine and drill with smaller machine tools but it can be done. Slow and steady wins the race, plus it was worth it to help minimize rust potential with the stainless.
I had recently purchased several japanese pull saws and wanted to learn to use them properly. This was a good project for it, and I now prefer them to the typical western ‘push’ saws. It takes a while to get used to the reversed cutting direction as does handling the thin blade, but the thinner kerf seems easier on the muscles. The technique takes a bit of getting used to for certain.
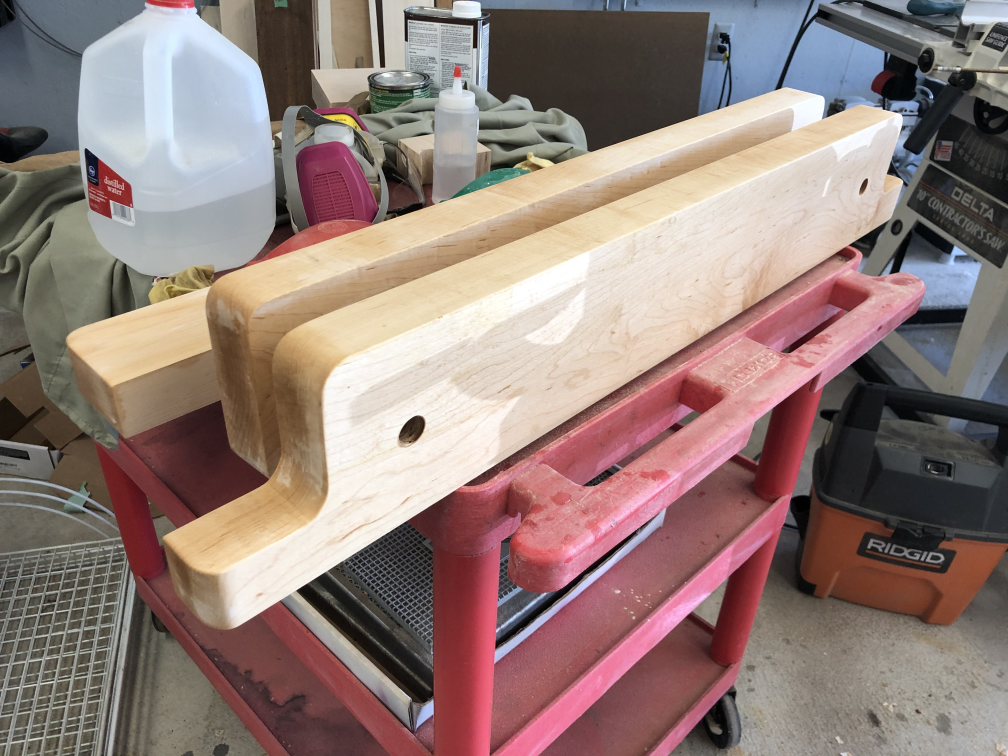
I tried initially to cut the inside curves with a Forstner bit but this burned the maple. It then became an tedious excercise in using the coping saw and sanding. Did I mention I need a scroll saw?
I uses a series of boards and clamps on my drill press to align and drill the 3/4″ holes in the jaws. The Forstner burned the maple again but I got through it by cooling the bit between passes.
The front jaw holes were widened in the left-right direction by 1/8″ on the exterior of both sides. This would allow the front jaw to ‘rack’ when tightened and allow non-square items to be held tightly. This should provide about 1-2″ of non-parallelness in the item being clamped.
I used my (newly) standardize finishing chemistry/technique for the entire vise and handwheels. The process was…
1-Scrape or sand everything with ~220 grit. Blow out all the dust with compressed air.
2-Wet everything with distilled water (to avoid contaminates) and let it dry for a several hours to raise the grain.
3-Scrape or sand the newly raised grain with 220 grit.
4-Get rid of the dust again with compressed air and wipe with mineral spirits. Let dry for several hours.
5-Soak with a saturated rag of Danish Oil (Watco works for me). Spend about 5-10 minutes keeping the surface of the wood wet until it won’t absorb any more or 10 minutes has passed. Any longer and you risk the oil getting thick on the surface and you’ll have difficulty removing it. After the 10 minutes has passed, wipe off all the excess. Make sure you get it all and wipe it *hard*.
6-Let the Oil soak in and dry for at least 3-4 days (depending on humidity and temperature) since I’m going to topcoat it.
7-Brush on General Finishes Arm-R-Seal, which is a oil/eurethane resin, then wipe it lightly off. Let dry 24 hours minimum, then lightly sand off any dust/bumps with 600 grit sandpaper. Repeat over three days to get three coats. Don’t sand after the last coat, but use a brown paper bag and buff out any dust bumps.
8-Let the topcoat cure for several days to maximum hardness before putting weight on it.
….and behold! My new Moxon Twin-Screw Vise.