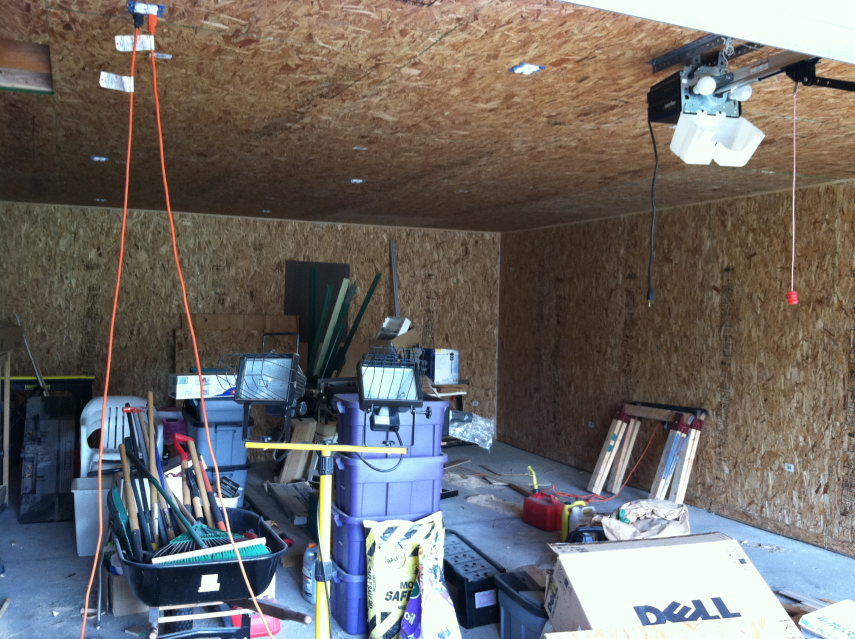
My garage was little more than storage as it came with our home. Plastic lined the ceiling to avoid drips, 10 amps of power and no heat. I could only work in it during the warmer months.
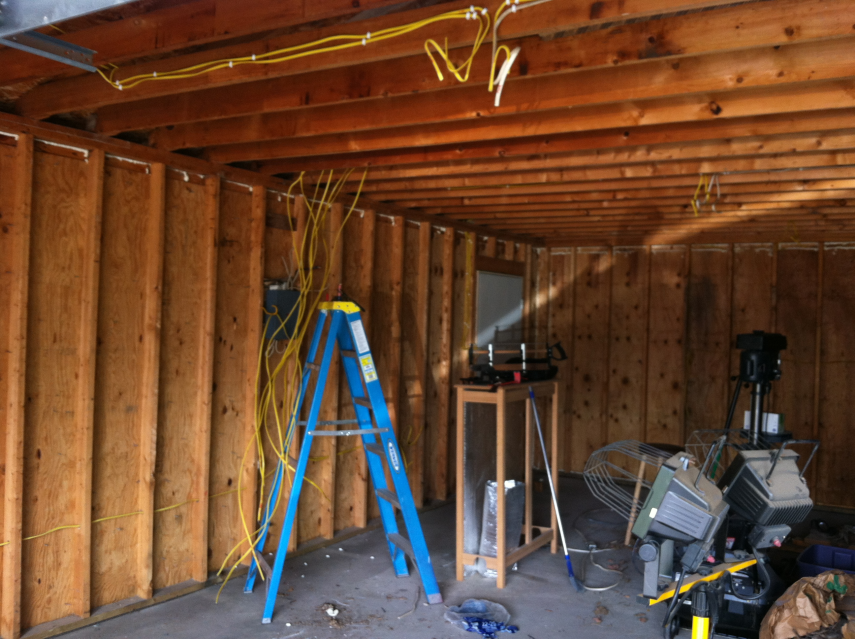
The first thing was to clean it out–attic rafters filled with old boards and doors from the original owner, pieces of siding and junk. Because it was very rainy I was forced to continuously re-arrange the contents of the garage as I worked. That made it more time consuming. Like most remodeling projects it got worse before it got better.
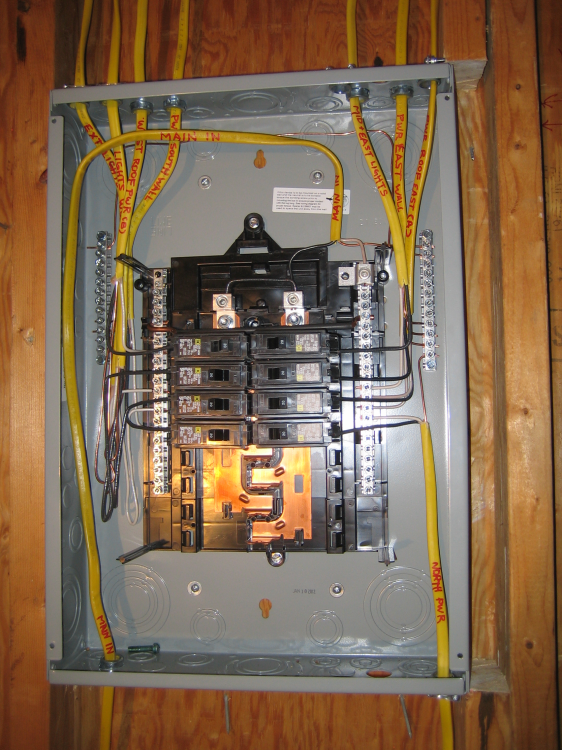
THAT is one ugly sub-panel. The line from the house was only 10 amps. My vacuum and saw together would blow the fuses in the house.
After ripping our every wire in the garage I re-wired it all with 20 amp electrical and all new outlets. I placed outlets on the ceiling for both tools and lighting with everything into independent new breakers. When as estimate for the electrical came in over $1200 I decided I would do it all myself.
I also foamed and sealed the entire garage to eliminate air leaks and fixes any roof leaks that actually turned out to be water coming in through wall joints.
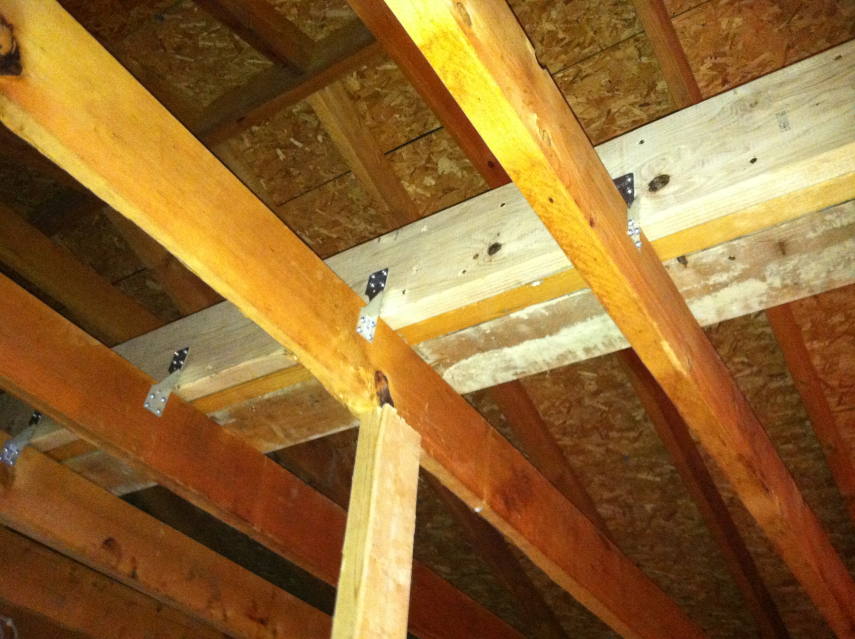
The original owner had built the garage with a two 16 foot 2×10 beams spanning the entire length of the 36 foot garage. Where the beams met in the center of the garage, the ceiling had sagged 5 inches because of this dumb design. I wedged and jacked up the center of the beams, then reinforced them for their entire 36 foot length with two more 2×10 in parallel. I glued and screwed the entire assembly together into a single tremendously strong beam. I also reinforced all the trusses to the ceiling and used hurricane braces to line up and reinforce all the other construction of the roof and ceiling.
Ahhhh. Clean wiring and a real sub-panel. Loose wire is kept outside the box if needed.
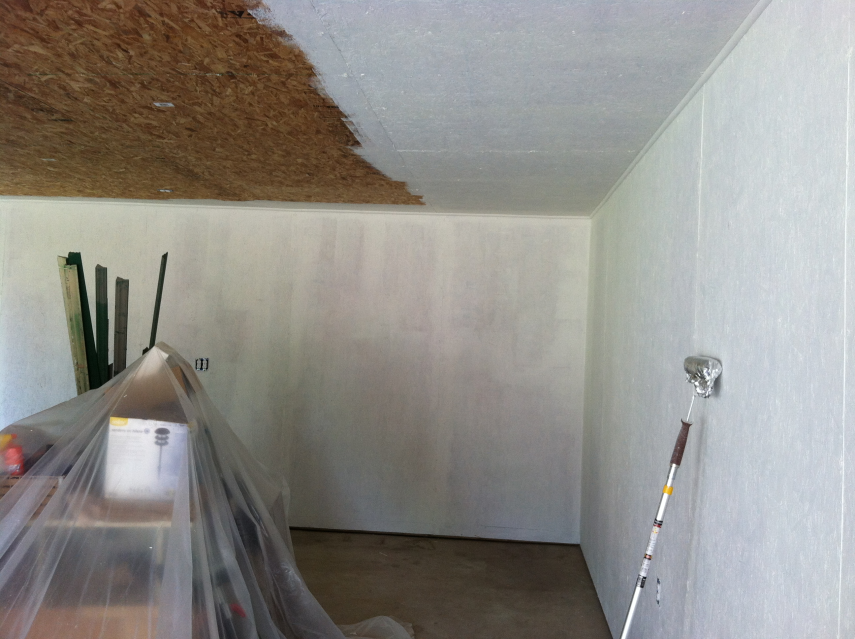
Wood or drywall? Every drywall garage I’ve every seen has suffered from split seams and cracks. Whether from settling, humidity changes or anything else drywall just isn’t very durable. I decided to line the shop with OSB because I liked the texture when painted. It’s durable and takes a beating. It is a shop, after all, and I was certain I’d be banging into walls and ceilings often. My brother in law helped with the ceiling–that just isn’t a one man job–then I could do all the walled myself. Of course the ceiling height was 8-1/2″ so I had do a lot of cutting using 4×8 sheets placed according. The home supply shop wanted nearly 50% more for 4×10 foot sheets and I wouldn’t throw away the money on that option.
The painting. Next time I’ll buy a HPLV sprayer. It took two coats of thick oil-based Killz to primer and seal the wood which acted like a sponge on the paint. Then another two coats of white over that.
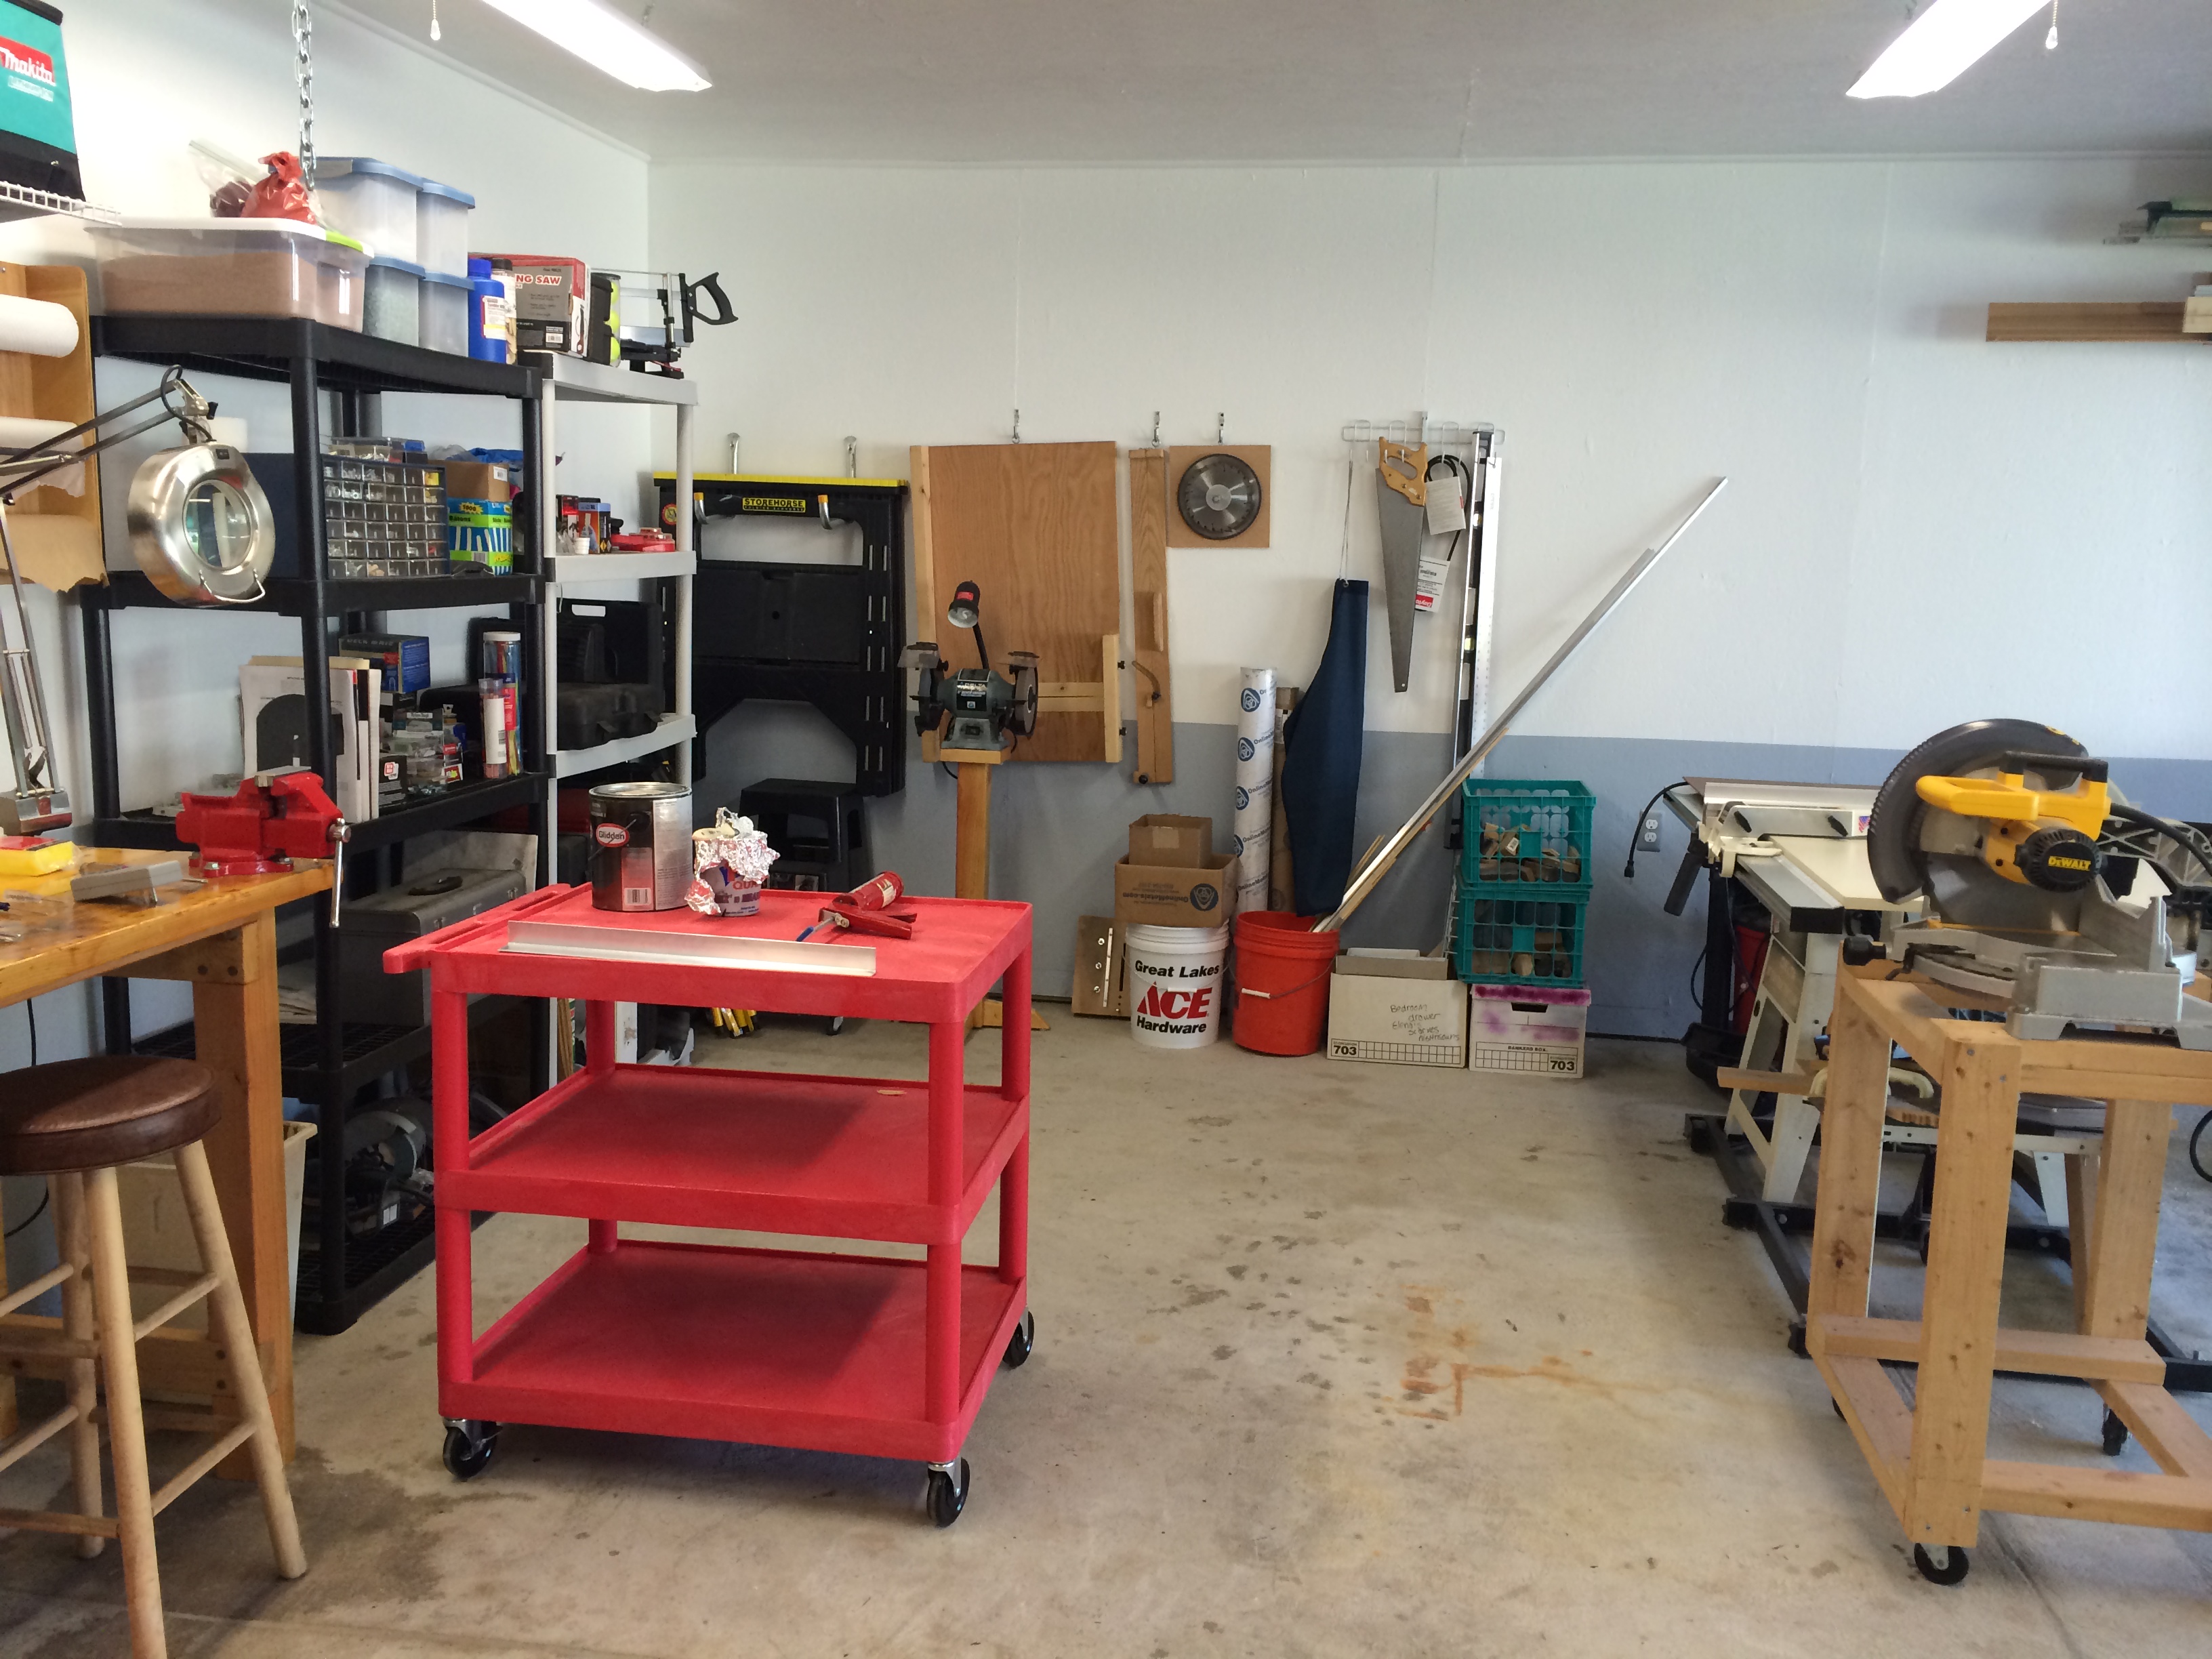
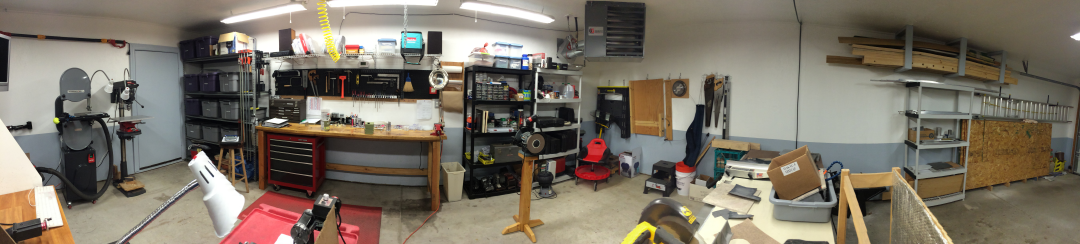
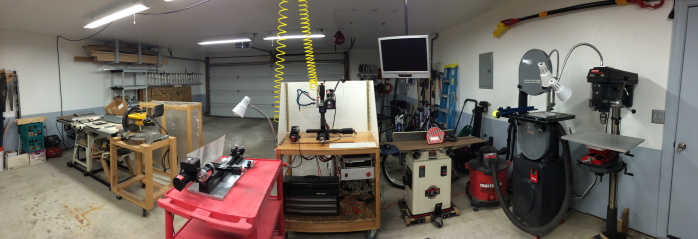
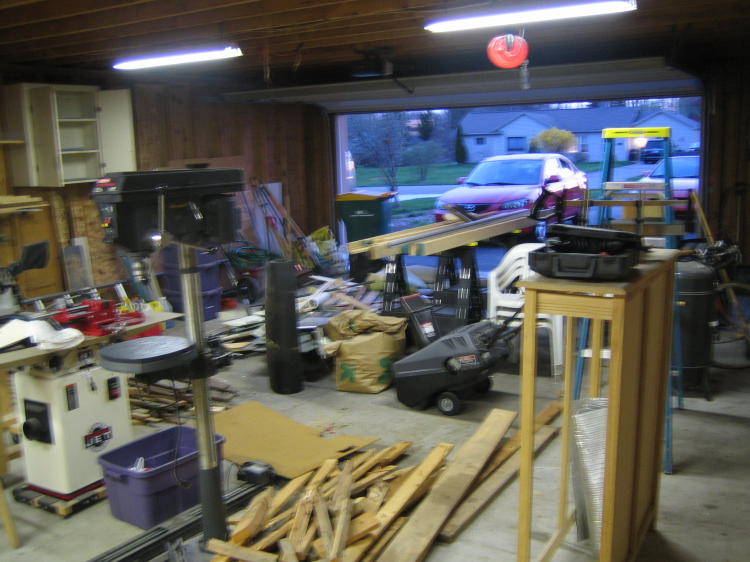
A couple more coats of gray-blue along the base of the walls for contrast. Then all eight new T8 fluorescent lighting fixtures with nice white balances tubes. All of a sudden everthing seems the right color! Then replacement of the two external doors that had rusted over the years.
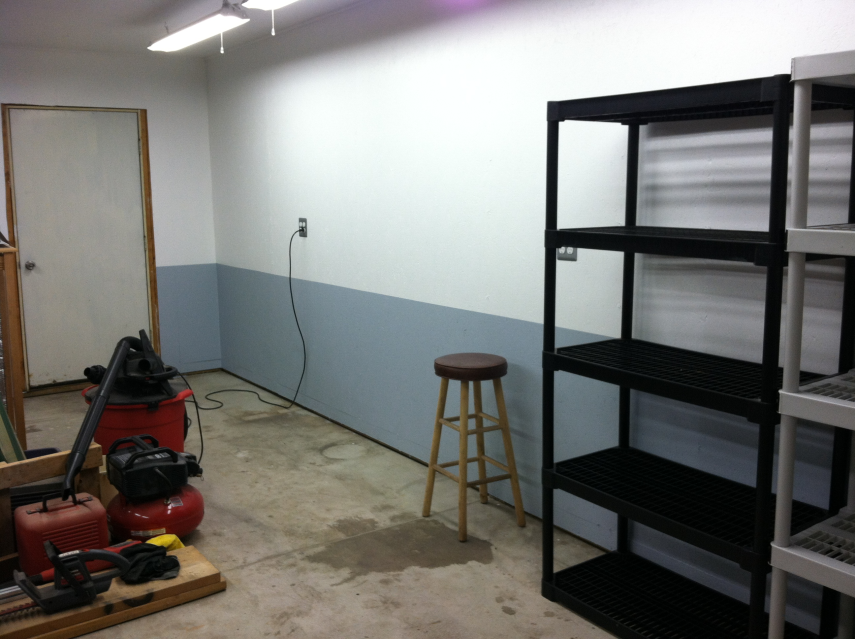
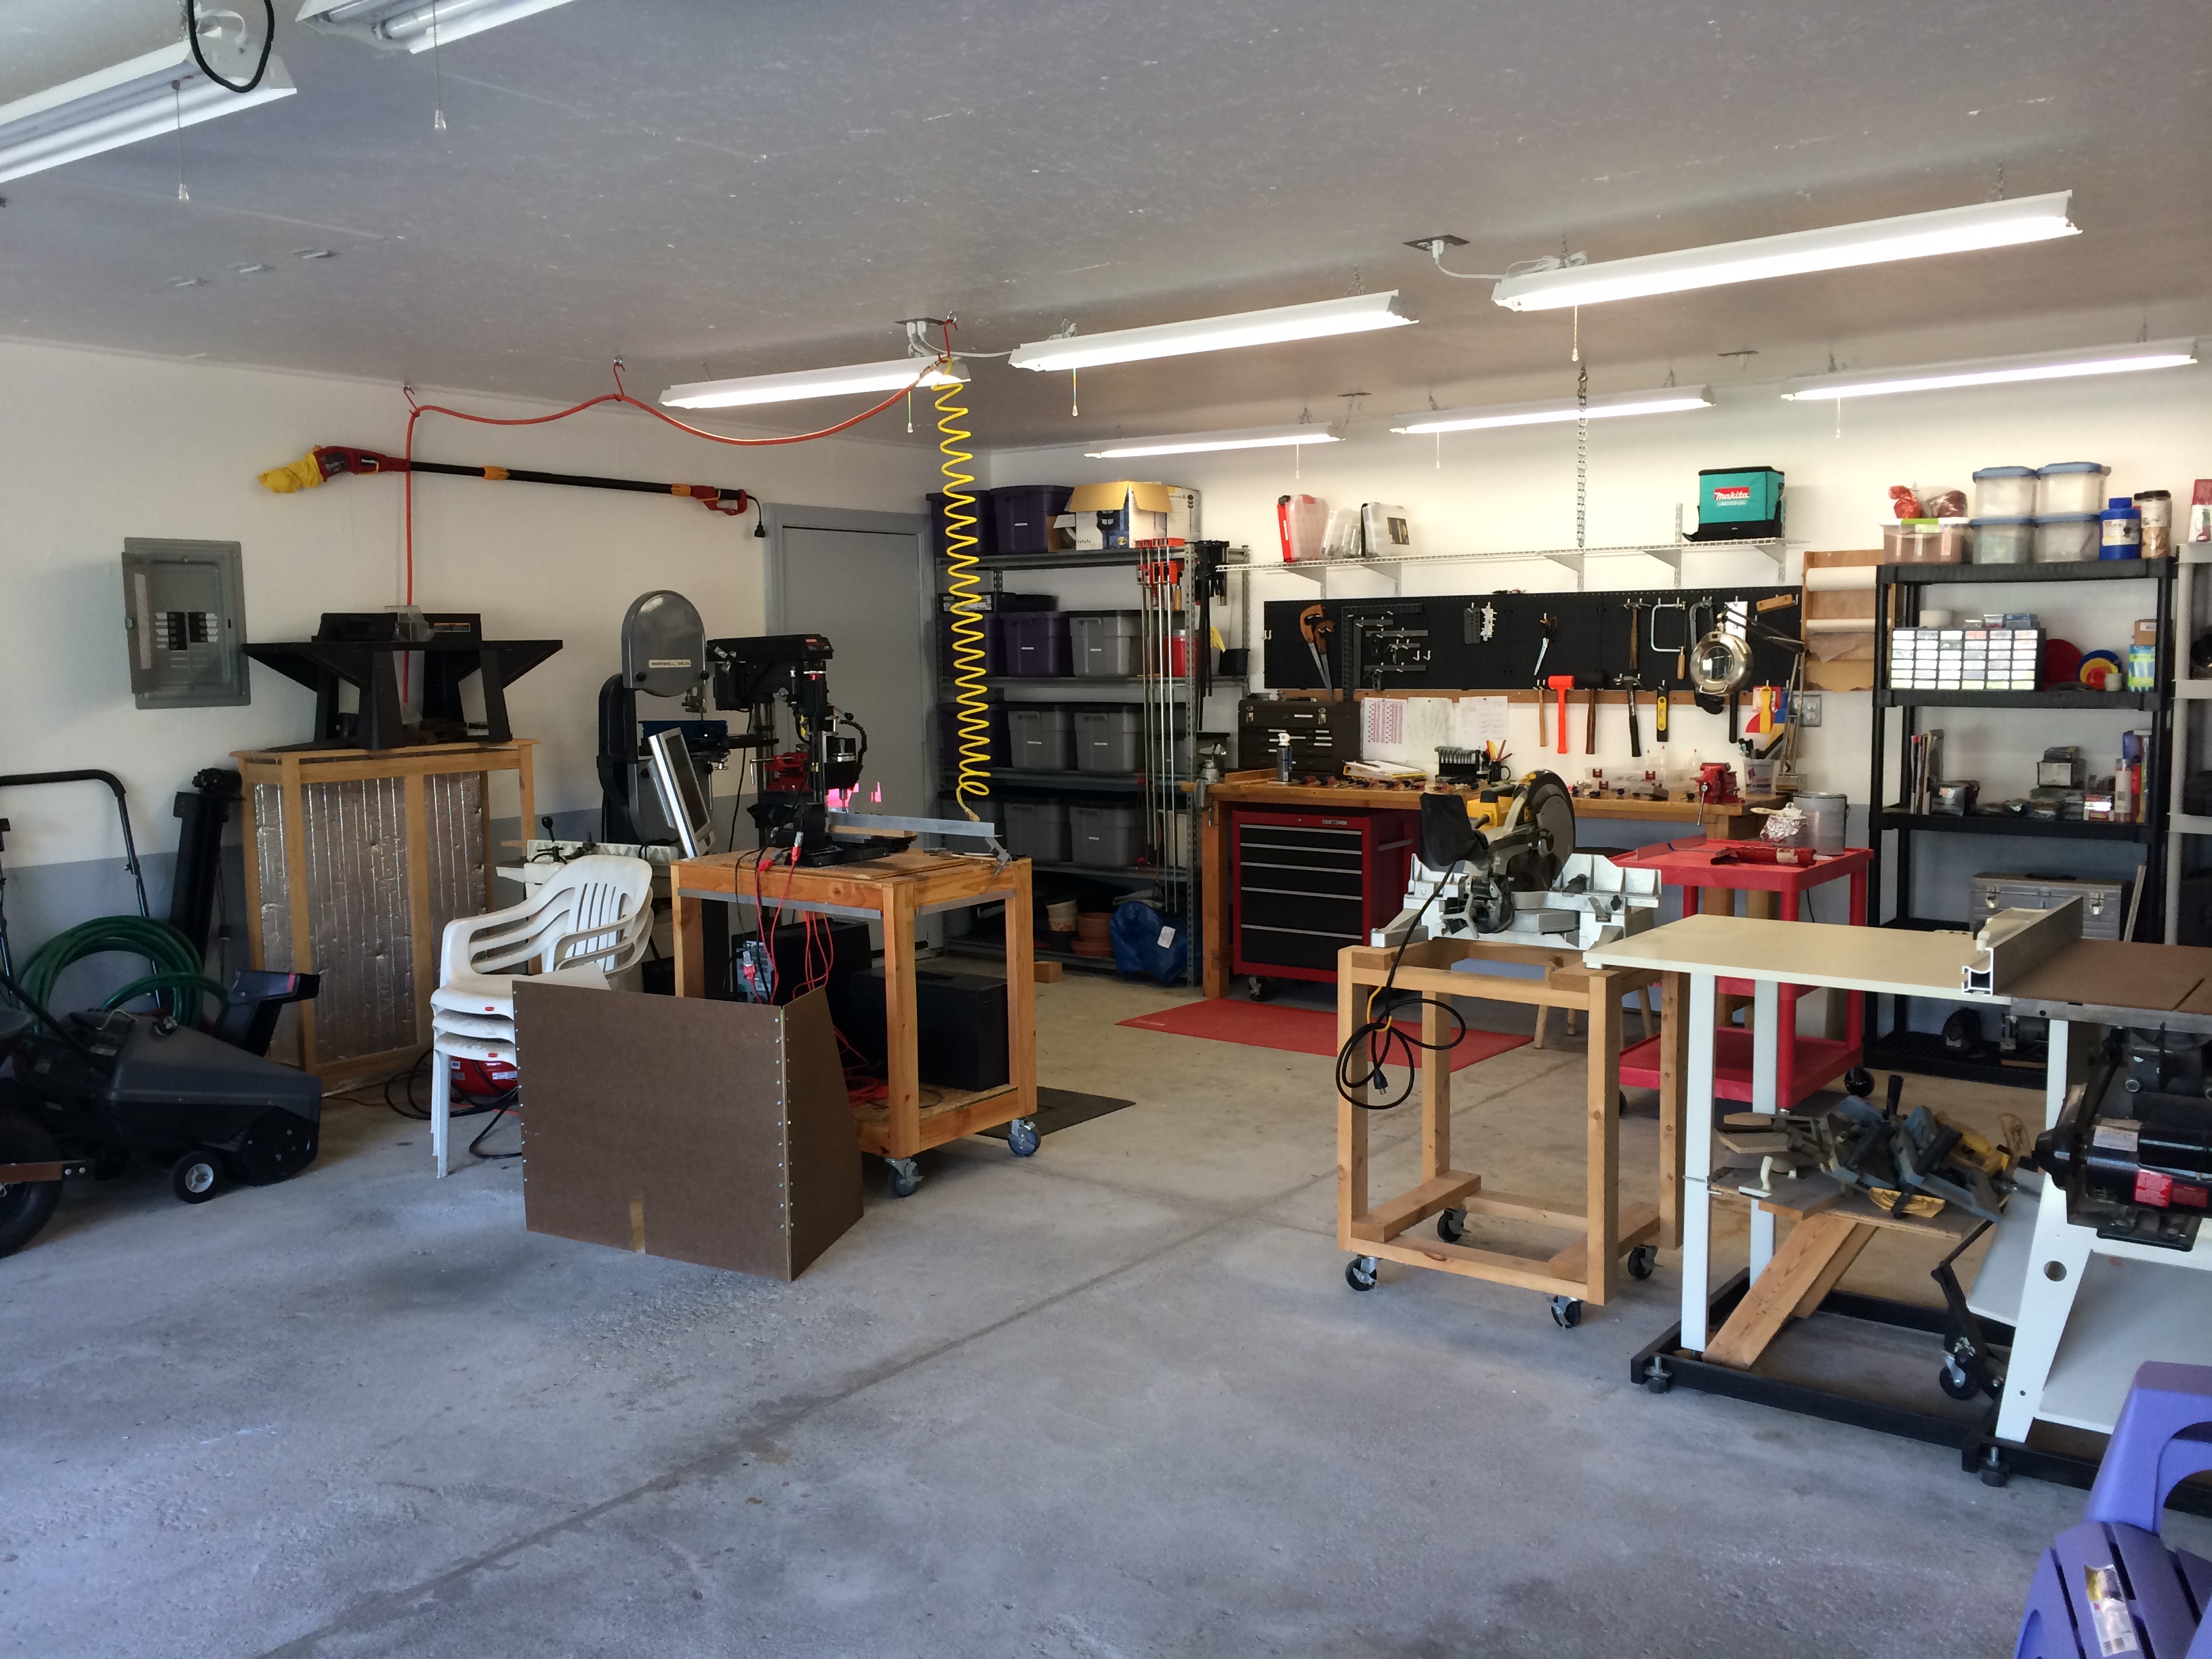
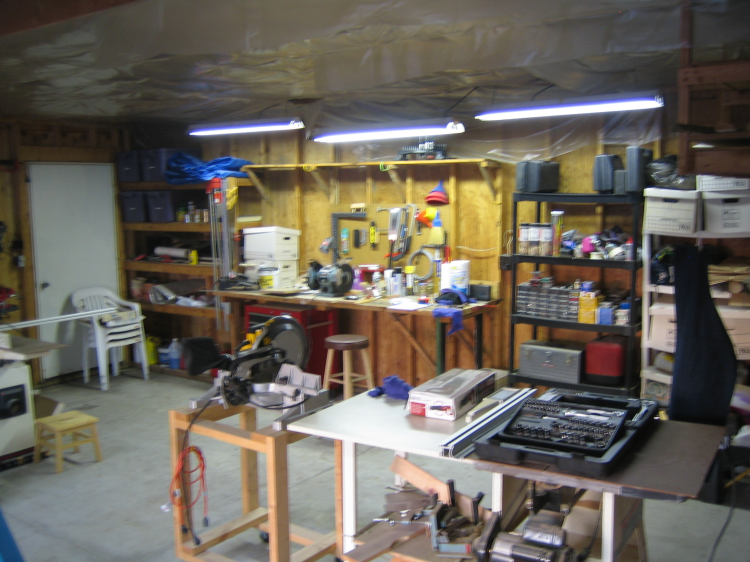
Replacement of the original bench and all new plastic (non-rusting) shelving for tools. I found some heavy duty plastic pegboard for over the bench and cast my own resin hooks for tools.
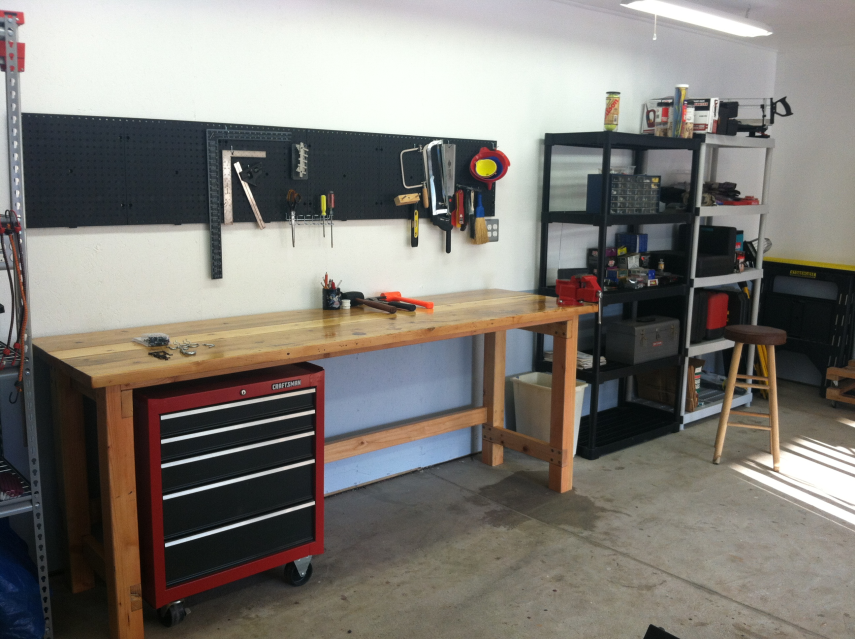
Finished pics of the shop. Two wide angles of each side. Room for two cars, normal garage stuff and the complete shop in the front half of the garage. It came out very nice. Heat will soon follow as soon as the exterior gas line is run to the house.