Most of the hand sanding that I’ve done while in the process of finishing metal has been on a makeshift surface plate. I had found a few marble floor tiles that were remarkeably flat–close enough to a Grade-B surface plate to be usable for most of my projects. I polished out any imperfections that were objectionable and I “grade” them with a magic marker on the back so I can use the best when more accuracy is demanded. They have worked very well and for $4.00 are a great value.

Usually I would place the tiles on my flat bench within an old cookie sheet with a squirt bottle of water, washing away dust as I worked. Since I’m spending a significant amount of time doing this I thought I’d come up with a better method.
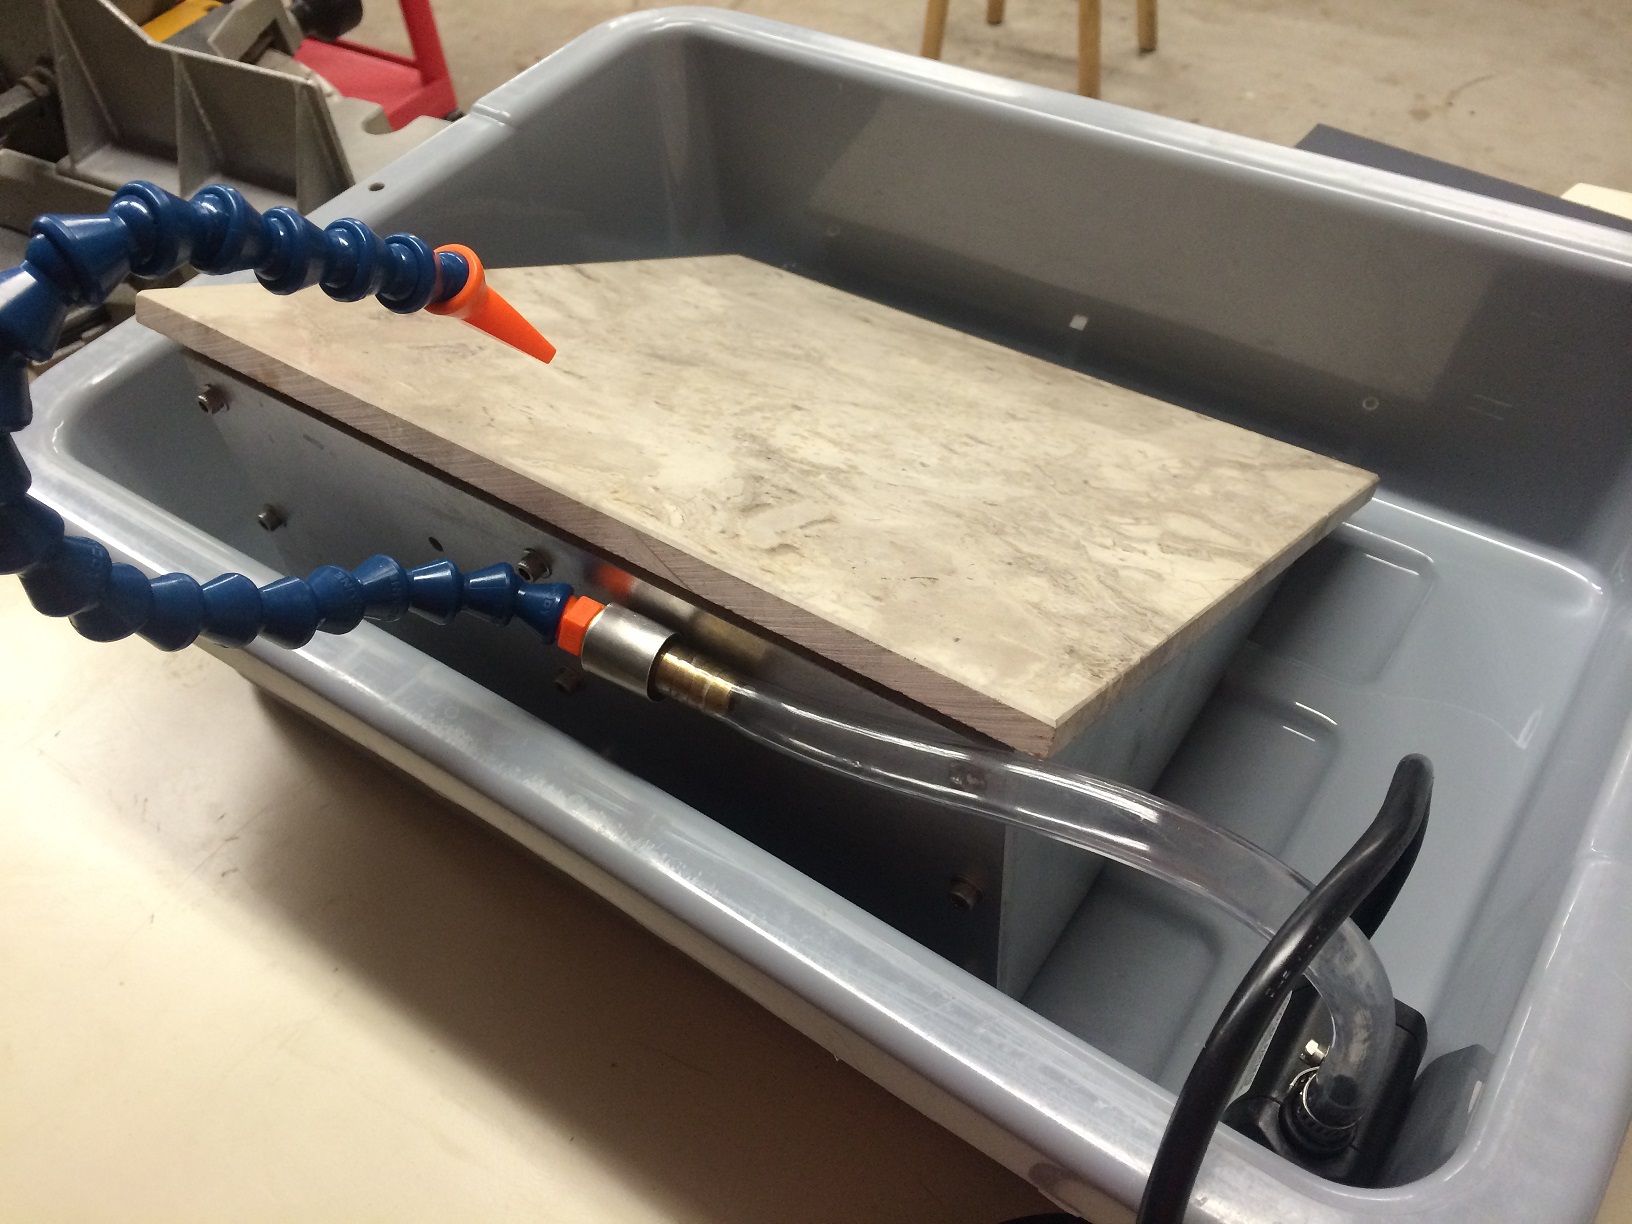
I recently found a local metal source that has boatloads of “drops”. These leftovers from large cutting jobs are a great deal for a hobbiest such as myself and are usually priced much lower than it would cost anywhere else without even including shipping. With a large assortment of aluminum, steel, brass and bronze I can’t imagine going anywhere else now. I picked up several 12 x 36 x 1/4″ 6061 aluminum plates for a several dollars each with the intention of building a wet sanding station.
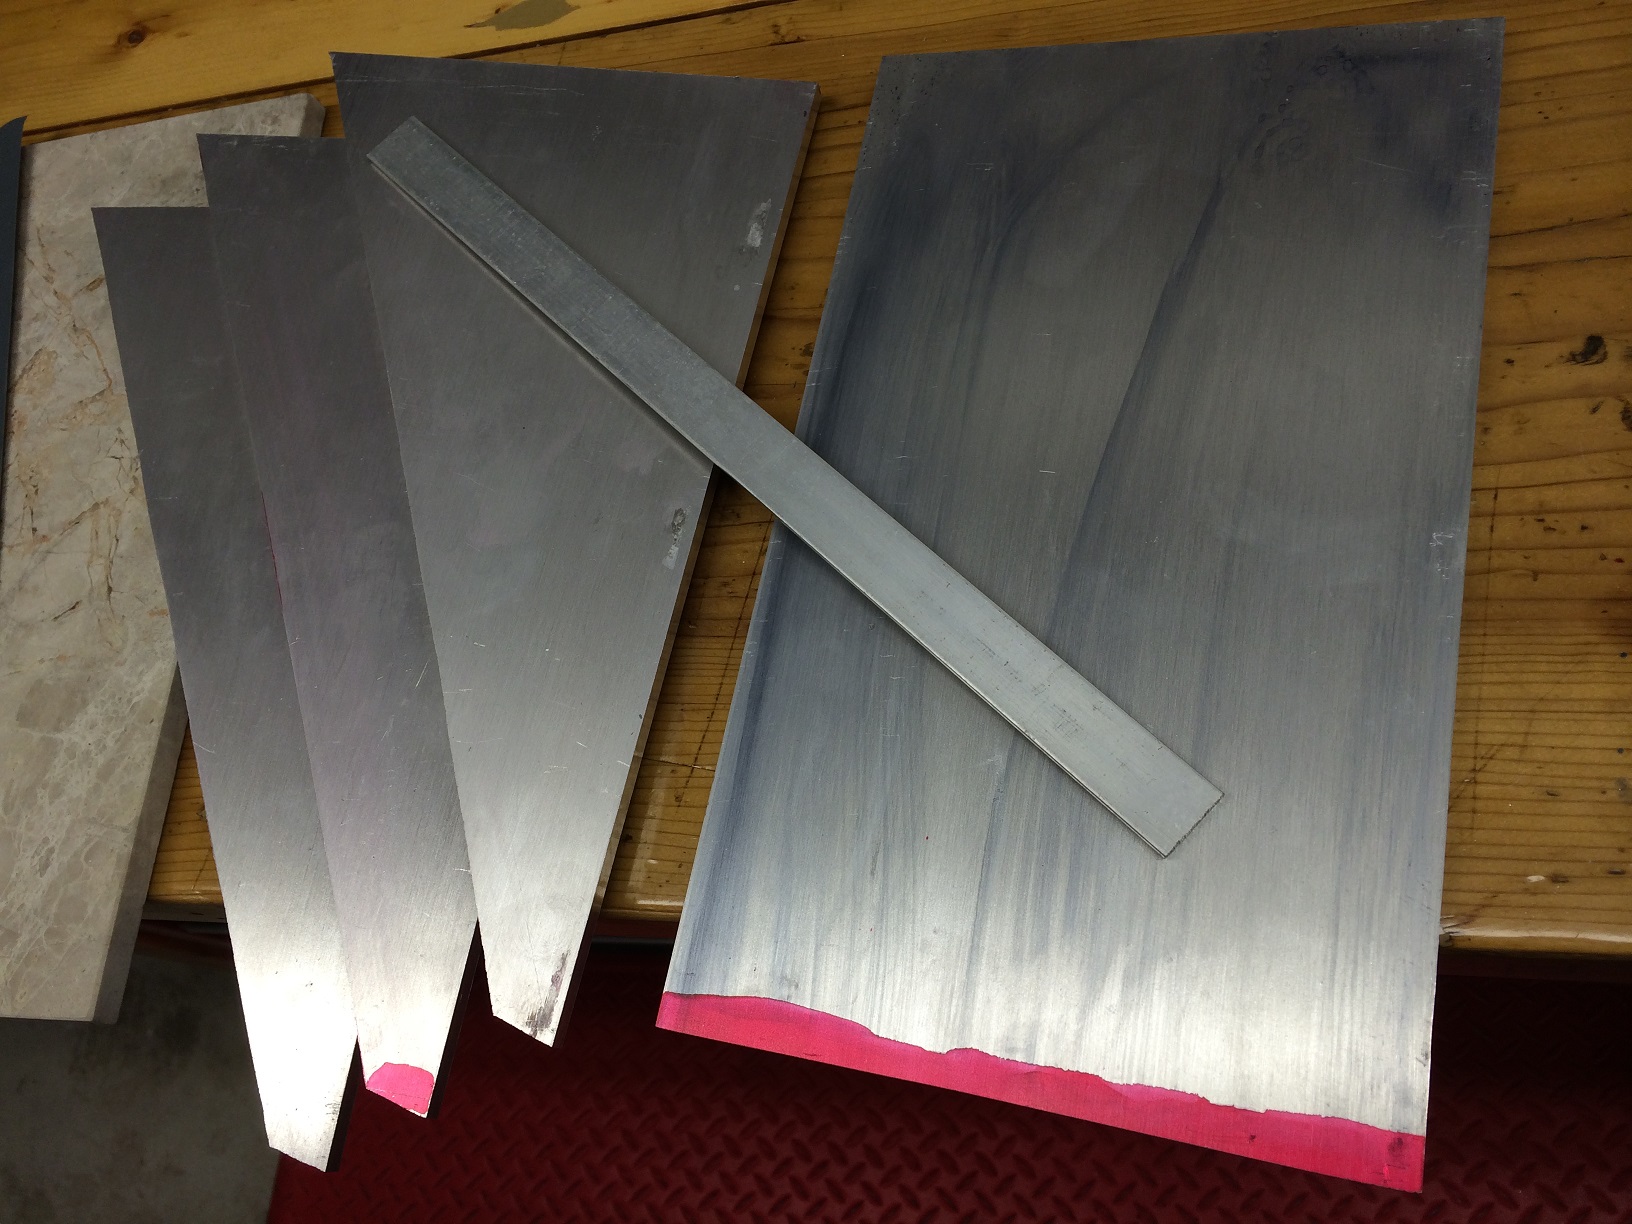
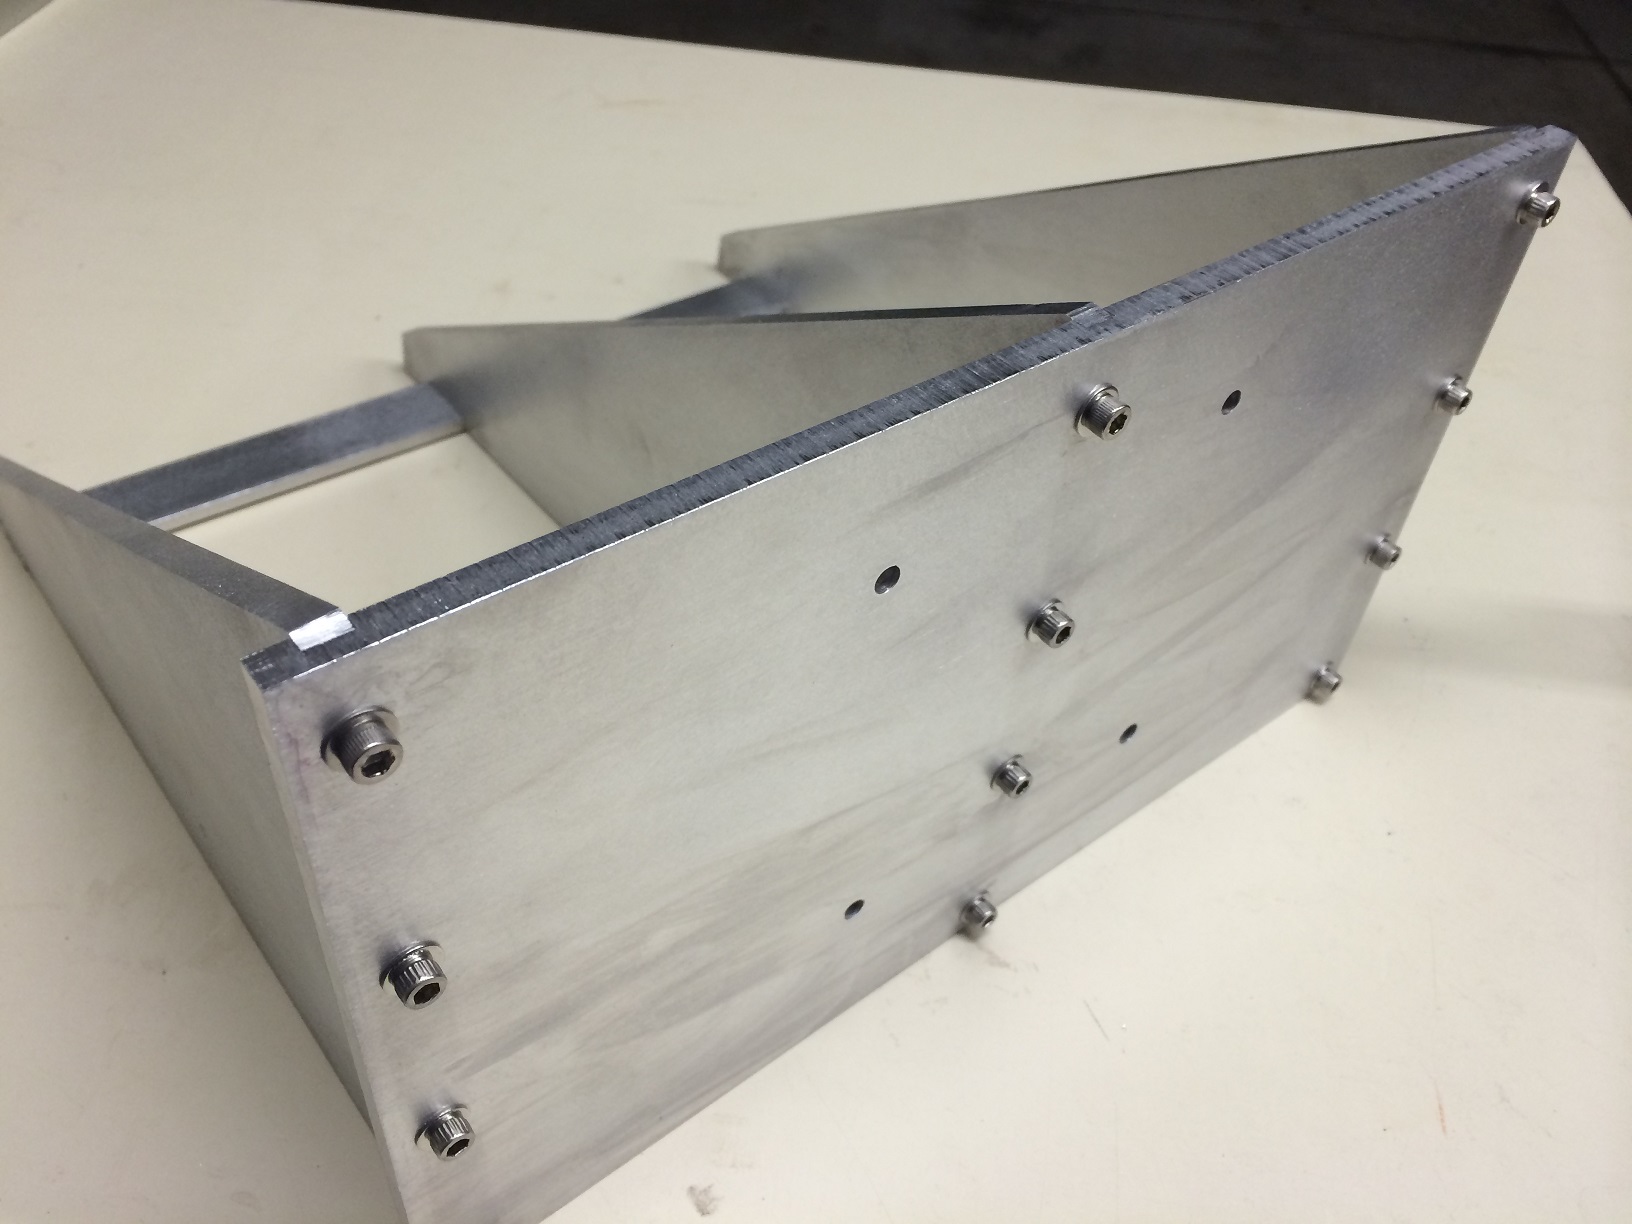
I cut the sheets into three triangular rib plates, a cross brace and a backplate, then notched the backplate to take the verticle ribs. I used stainless steel machine screws and tapped all the holes 10-32 to match with my drill press. This gave me a very strong skeleton on which to place the flat tiles.
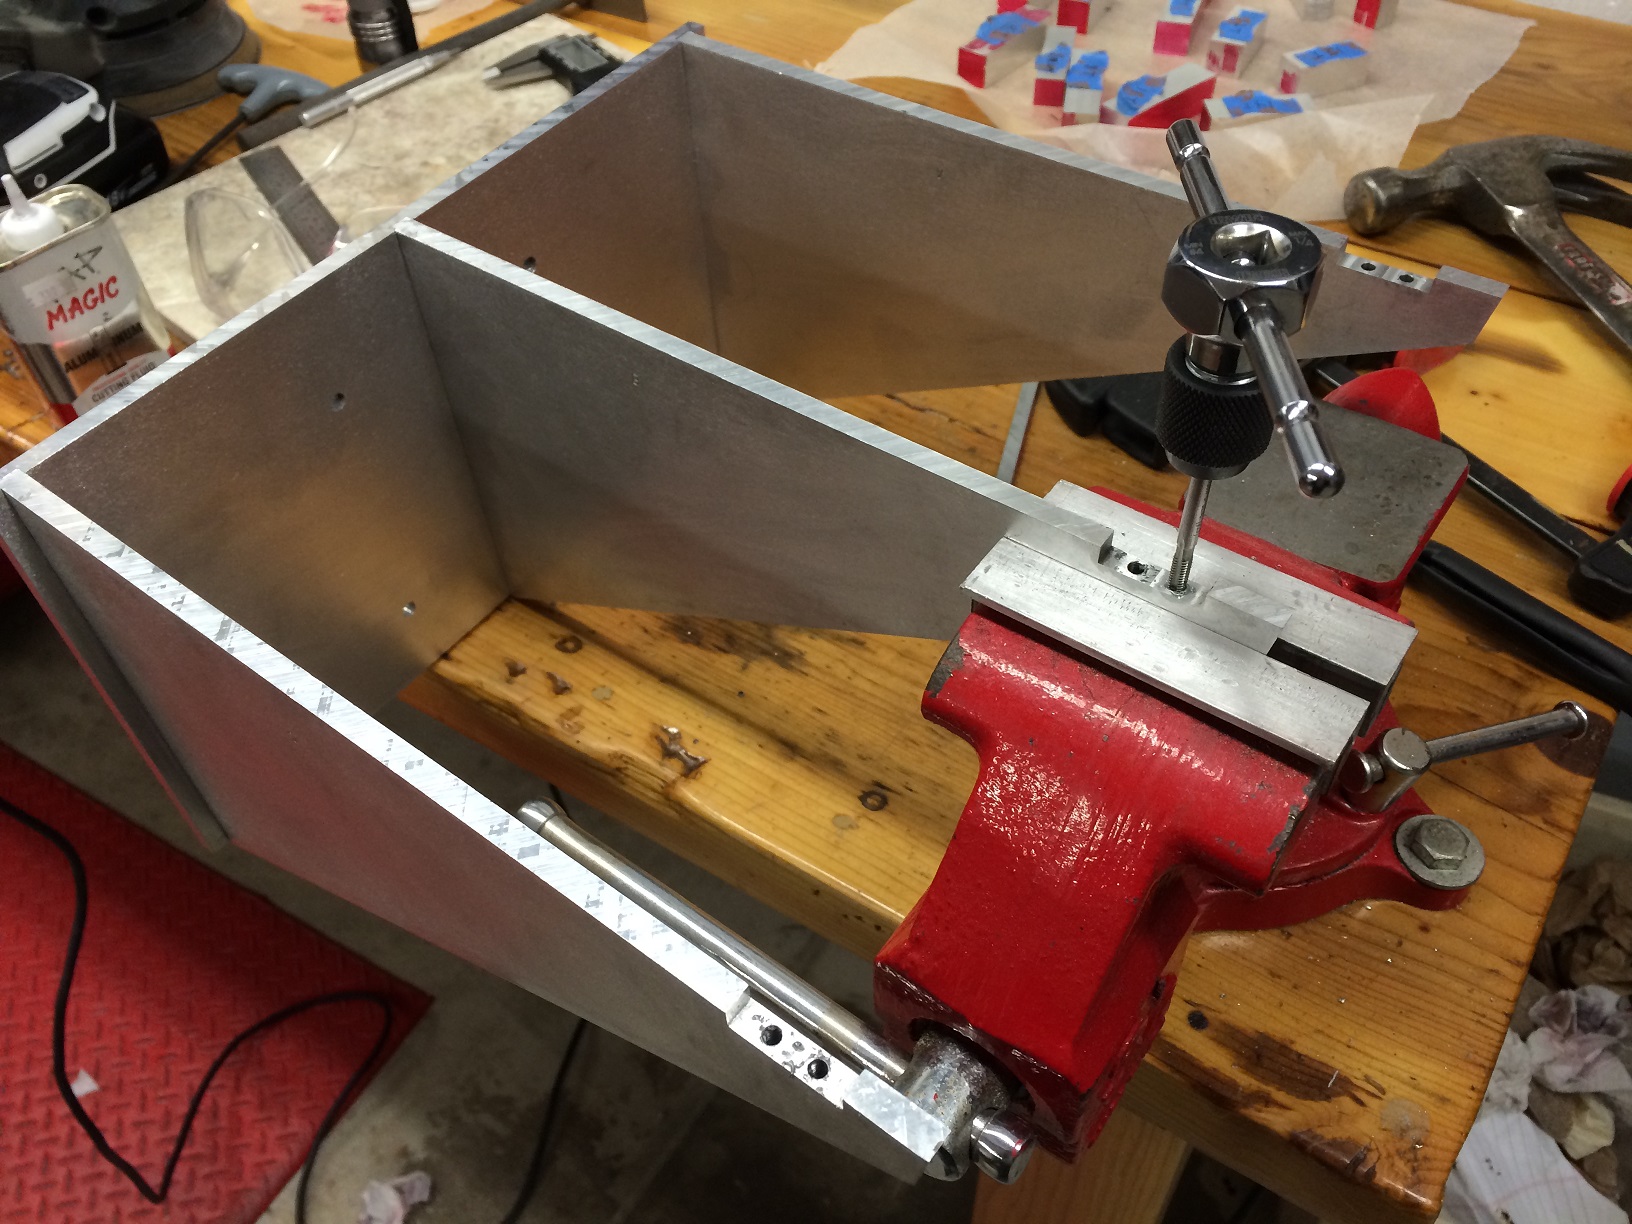
Lots of edge holes to drill and tap but it was the cleanest method of mounting everything together without having to use any ugly brackets. Had to always remember to use non-rusting fasteners since this project would be under water often.
The notches dado-like mounting made the ribs very strong even without the 10-32 machine screws. The four empty holes were to allow the plate to be mounted to my Sherline Mill for all the slotting and milling. It was no easy task coming up with a method to make the 8-inch slots on my mill. I had to cut half a slot’s length, then reverse the plate on my mill and cut the other half. Precision mounting was required to avoid any drift in the cutting and it all worked out well although it was quite the mental exercise.
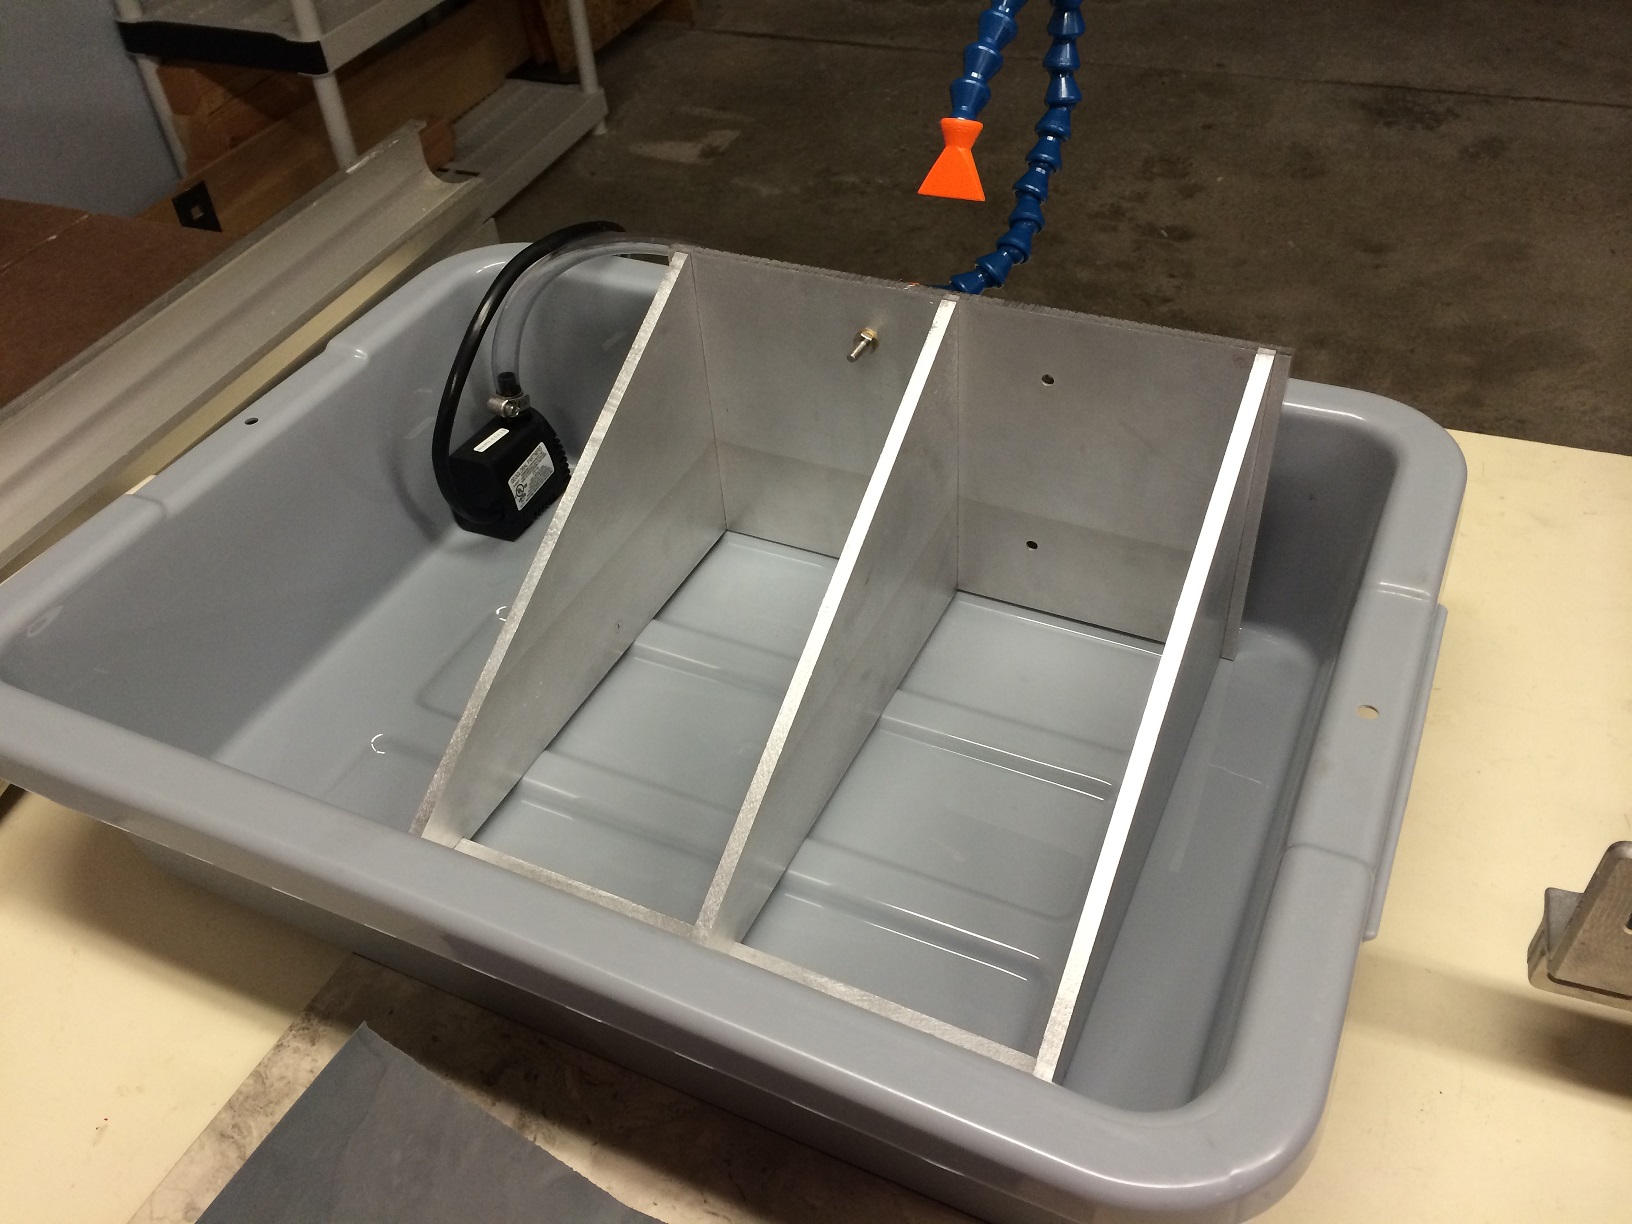
The aluminum framework is then placed into a plastic restaurant bus tub. I mounted a small garden water pump and routed it to some bendable Loc-Line to allow routing the water stream where it was needed. The pump is the type that can handle sediment and crud and seems to have no problems with the metal dust I generate when tested. For $20 I didn’t expect a lot but it performed well.
It works! Now all the metal dust is not only kept out of the air but is washed off the sandpaper as soon as it is created. It’s a noticeable difference during use and has cut down on scratching that happens as the sandpaper clogs. This happened a lot with the finer 500-2000 grit wet paper I’ve been using. Now I’m seeing much better results. This project falls under the category of “why didn’t I do this a long time ago?”
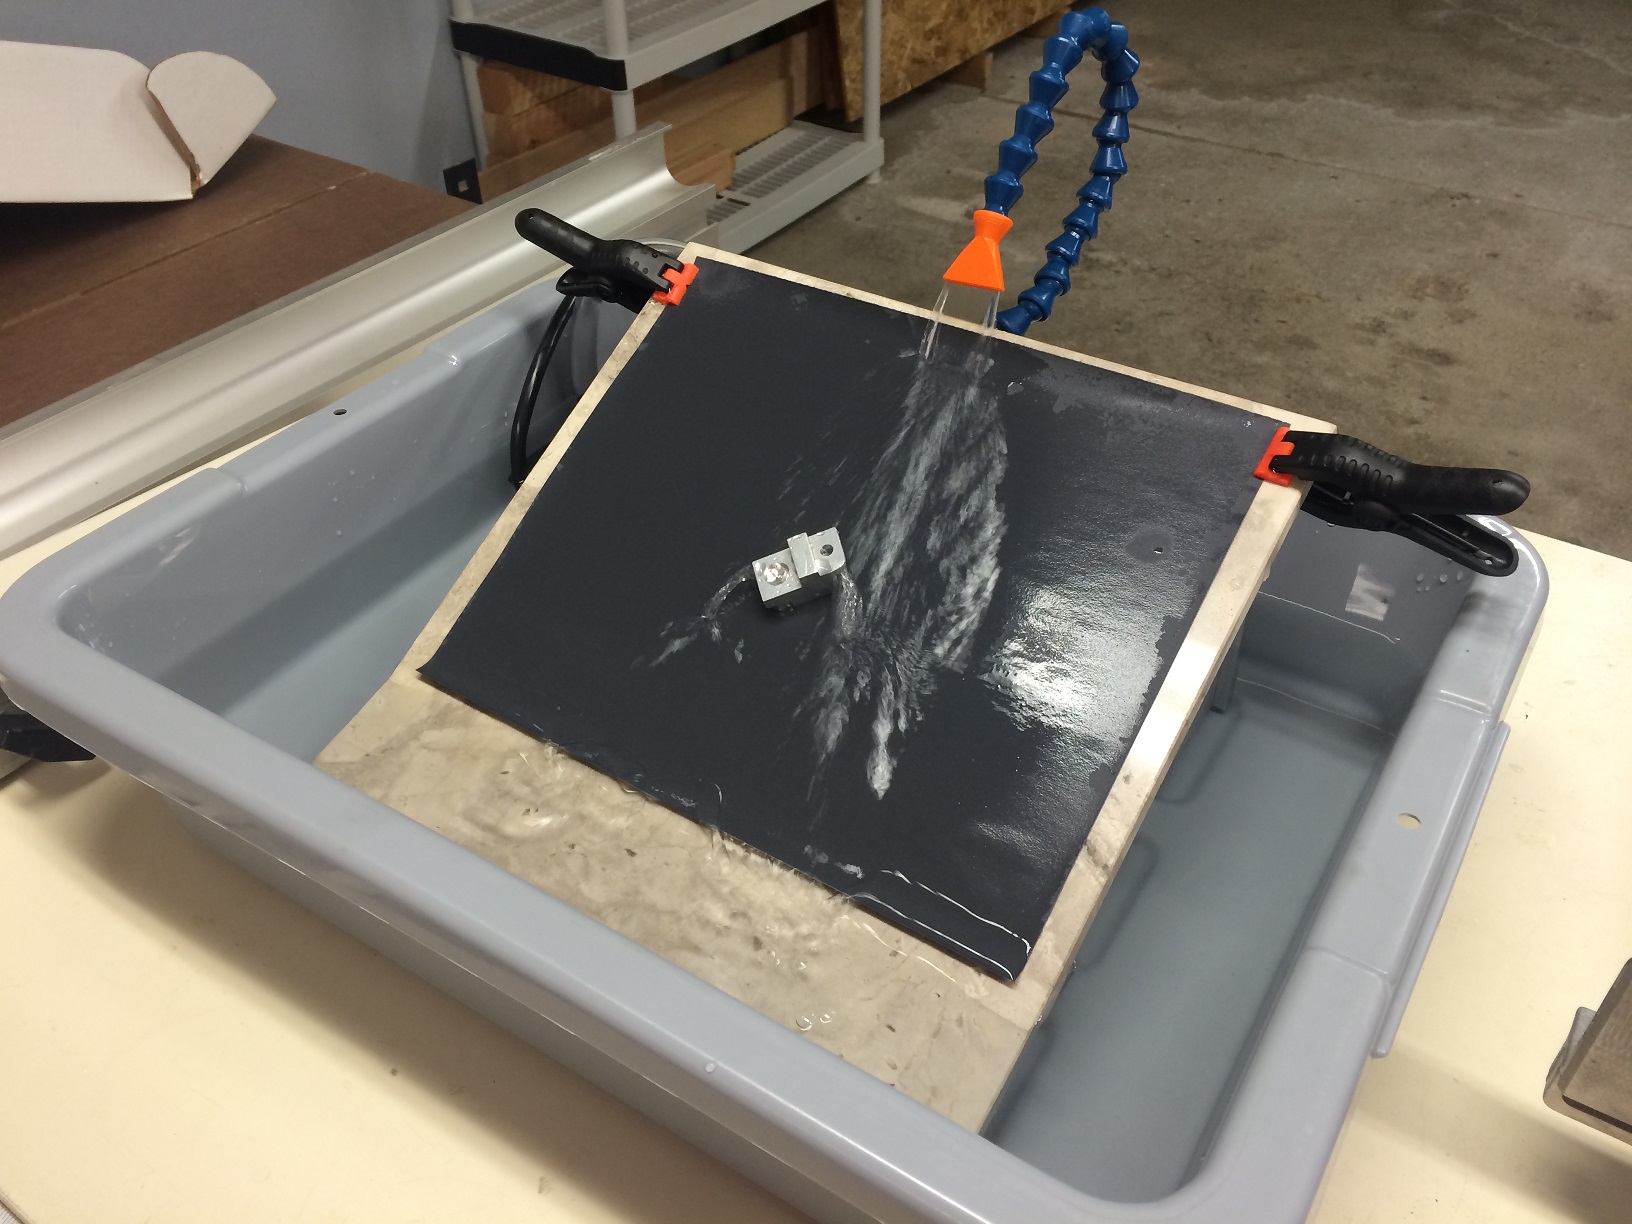
Because the water pump is pretty weak, about 1-2 gallons per minute, the Loc-Line “Fan nozzle” doesn’t spread the stream as much as I’d like. I might have to flatten it a bit with a little heat to get the stream to widen to the entire width of the paper or make my own custom nozzle. It works fine as it is but it bugs me a bit. I could leave it alone.
….Nah.